


Your cart is currently empty!
In Progress » Non-HGUC Hygogg ‘Mako’
2.13.2003 » progress
intro
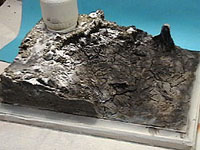
Here is my first progress shot for my Hygog. As you
can see, I haven’t gotten much done. Just a little sanding and puttying.
It’ll look much better in the coming weeks though. I hope!
2.16.2003 » inspiration & clay
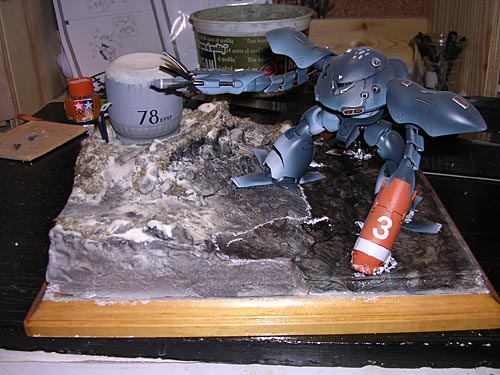
I managed to progress a bit on my Hygog and diorama.
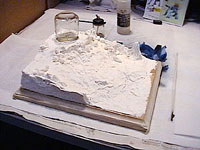
Diorama:
The base is a stained/finished wooden plaque that
I bought at Michael’s
The landscape is made from a base of styrofoam, then
covered in a baking soda/cornstarch clay. Here’s the recipe:
- 1 cup baking soda
- 1/2 cup corn starch
- 3/4 cup water
Mix baking soda and corn starch in a non-stick pan.
Stir in water over medium heat and stir continuously until mixture
becomes the consistency of mashed potatoes. About 3-5 minutes. Remove
immediately from heat an place into airtight container. After ten
minutes (or when cooled off a bit) knead dough until smooth. (Overcooking
the dough will make it crumbly.) Clay will dry overnight. Some shrinking
will occur and cracks will occur as well, so keep a little extra
clay to fill those in.
Next, I will need to prime the landscape and begin
painting/gardening 🙂
The Jar will be the location of my batteries and will
eventually become a giant fuel tank for a Federation refueling depot.
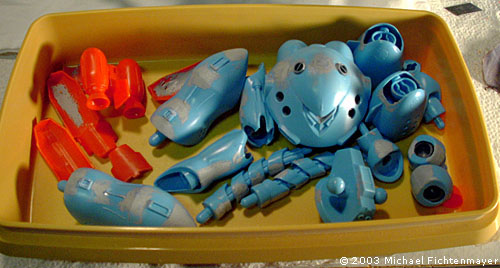
Hygog:
My goal is to make the painting of this aquatic mobile suit look
like a mako shark corvette. Here’s what I’ve done so far:
- Puttied, sanded, primed.
- Airbrushed a medium-light blue on all parts.
- Airbrushed Field-Blue on upper parts of parts.
- Airbrushed white underneath all of parts.

2.18.2003 » silverfish
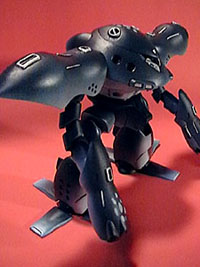
Major painting on the kit is complete. Here are some
pics. I still need to make my “lens” inserts for the vents
on the shoulders and forearms. They’ll be clear plastic. One side
painted silver, the other side clear orange. I also need to wire-up
the LED for the eye.


2.24.2003 » snow blower
Update time again. Sorry that it’s been a while, but
much is going on. Here are some updated shots of my diorama. Oh,
just to make it easier to explain, here’s a step-by-step:
Primed clay with BIN primer.
Painted ground with cheapo acrylics from Michael’s
Crafts. I used black, brown and a touch of dark blue.
Sprayed down a coat of flat, matt, clear acrylic.
Also cheap at Michael’s.
Elmer’s glued down “dead” turf I got at
an AWESOME local hobby shop. If you’re in Pittsburgh, check out
AB Charles.
Sprayed down another coat of clear fixative.
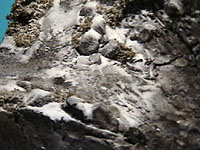
While matt fixative was still wet, I used a mesh strainer
and sifted baking soda onto the surface to simulate snowfall. I
wasn’t sure if it would look right, but as you can see in the pics…!
Blew off excess baking soda with airbrush and used
a paintbrush to “sweep” away other parts for “melt”
look.
Sprayed with 2 more coats of matt fixative.
Also pictured are the missile pods and metallic orange
arm inserts which I’ve gotten finished as well. This thing is really
starting to take shape. Whew! I still need to make the jar look
like a fuel tank, and finish the wiring for the LED.
I used an exacto knife and cut apart one of the missile
pods.


3.2.2003 » go with the flow
Another update for the Hygog diorama. This week, I
did some interesting things with the diorama. I finished the Hygog
kit, put the wires for the LED through the base, finished the fuel
tank, and poured the water in.
Water?!
Yes, water. I was watching While You Were Out on TLC.
It’s one of those home decorating shows. I saw them make some candles
that were clear with toy cars in them. I thought, Hey! This would
be cool for a Hygog diorama! So away I went to Michael’s and bought
the “Clear Gel Wax. (see pic below)
I like to experiment with different techniques and
have been wanting to find a cheap way to do water effects. This
seemed like a good way to do it. Another cool thing about using
wax instead of a clear resin casting material is that the wax can
be “peeled” off later if the look wasn’t what I was going
for. Since it’s a gel, it dried into a squishy solid mass. Think
Jello.
I blocked off the edges of where I would pour the
wax, heated it up, and poured it in. The results were kinda cool,
but not as perfect as I would had liked. I’m so glad that I had
a cookie sheet under my diorama because the wax broke free in a
spot and went everywhere. Well, at least into the cookie sheet.
Around the legs of the kit and the rocks, I pealed
the cooled gel-wax back to make it look splashy. This was an unexpected
event since I didn’t expect the wax to shrink a bit and leave itself
stranded up the legs. Later, I drybrushed some white Tamiya around
the pealed marks and the shore to make it look like waves. Since
the wax dried rounded, I painted some clear high-gloss acrylic on
the shore to make it look wet. (2nd pic)
Only one problem… One of the Hygogs feet warped
a little bit due to the 250 degree temperature of the wax.
Anyway, look at the pics to see the finished results:


3.3.2003 » go with the flow
Project on hold for now…
10.04.2003 » go with the flow
Thought I’d post some larger images of what it looks
like so far.


![Maude [Cyborg Action-Doll] (Files Only)](https://fichtenfoo.net/blog/wp-content/uploads/2023/01/Maude-Promos-300x300.jpg)


