Been a while since I posted a tutorial or tips and tricks here. I’d like to do more of it like I used to, especially with a decade’s more skill than I had when I used this site more. haha! My main motivation for my tutorials are pretty selfish though and this one is no exception. I design and build so much in a variety of subjects that I tend to forget how I did things. These tutorials help me as much as anyone else.
The last time I did doll make-up was 2 years ago and before that I hadn’t done anything similar since my Assault Proxie faces which were another 4 to 6 years ago, so I had to relearn it all over again with only a vague memory of what to do. Because I needed to do some face-ups for my Maude figure (available as a 3D printable kit soon… or now, depending on when you’re reading this) which is a 6in/15cm tall fully articulated 3D printable cyborg action-figure/doll. I designed her with interchangeable face-plates so needed to do a bunch of these in a variety of skin tones. This tutorial only covers the pale Caucasian tone as I’ve not tackled the black and medium flesh tones yet.
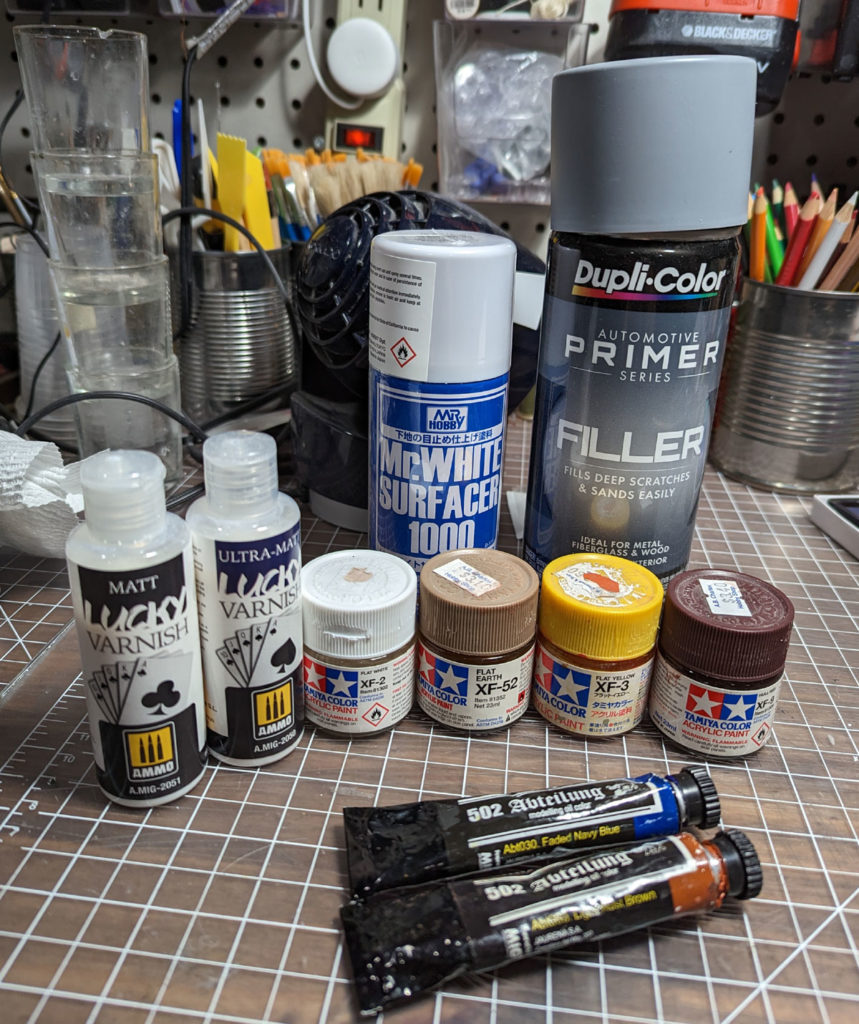
So with the intro out of the way, let’s get started with a simple face-up using a variety of products that most of my model-making friends probably have on hand. Mainly white glue, Tamiya gloss clear, water-color pencils, chalk pastels, and pigment powders. The brands probably don’t matter so much, but I’ll show specifically what I’m using and you can adjust as needed for your own supplies. I always print extra faces to practice on so I don’t worry about messing up.
Base Paint
The face plates were primed first with Duplicolor light gray Filler Primer, then a layer of Mr. Surfacer 1500 White, both from spray cans and done outside. I then airbrushed on a layer of pale flesh mixed using mostly Tamiya Acrylic Flat White, with a touch of Hull Red, Yellow, and Earth to get the color I wanted. Add just a touch at a time to build up the color into the white. I always make enough so I don’t have to make more later, or can repaint if I royally screw up. (Optionally you can airbrush some red “blush” on first over the white BEFORE adding the flesh color layer to get a subtle pre-blushing) Top-coat that with an airbrushed layer of Ammo by Mig Lucky Varnish Matte clear. Once cured, use a toothbrush and speckle on a VERY THIN wash of first blue oil paint thinned with odorless turpenoid, then a few layers of a burnt sienna wash. These will be almost imperceptible so build-up as needed to get a nice realistic mottled flesh color. Finish with an airbrushed layer of ULTRA-Matte Lucky Varnish (different from the Matte).
Use whatever products you like!This face-plate had the pre-blushing under the flesh layer.
Make-up / Face-up
Once that’s cured, we’re ready to move on to the “make-up” portion. Now if you’re a 48 year old CIS white male like me, this can be somewhat intimidating, but ignore that feeling and tell the toxic people (typically from my demographic) in your life to piss off because life’s too short to spend worrying about other people’s ingrained perceptions of what’s normal. But hey, I happen to like dolls (all toys are awesome! Yes, all.) and I love challenging myself do learn new things which this genre grants me in spades. You don’t learn and grow by doing the same old tired stagnant stuff over and over.
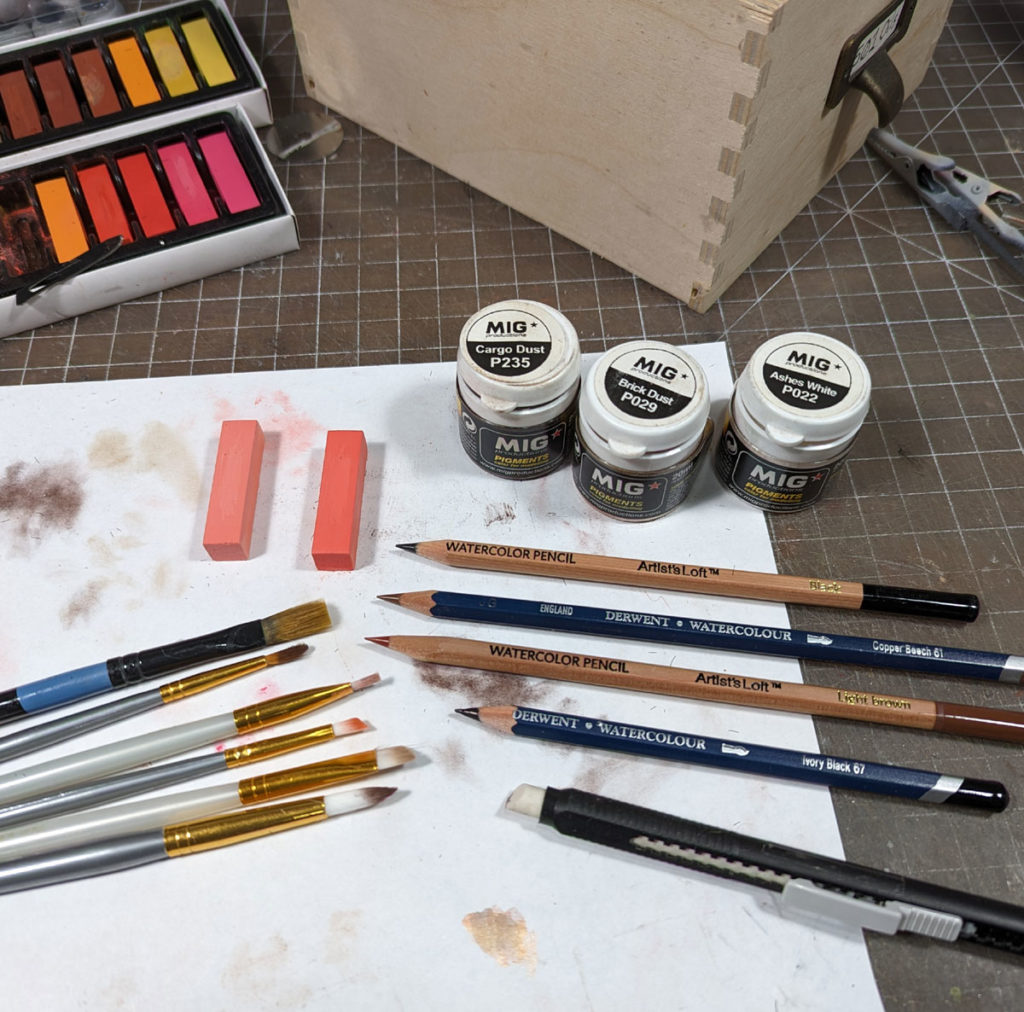
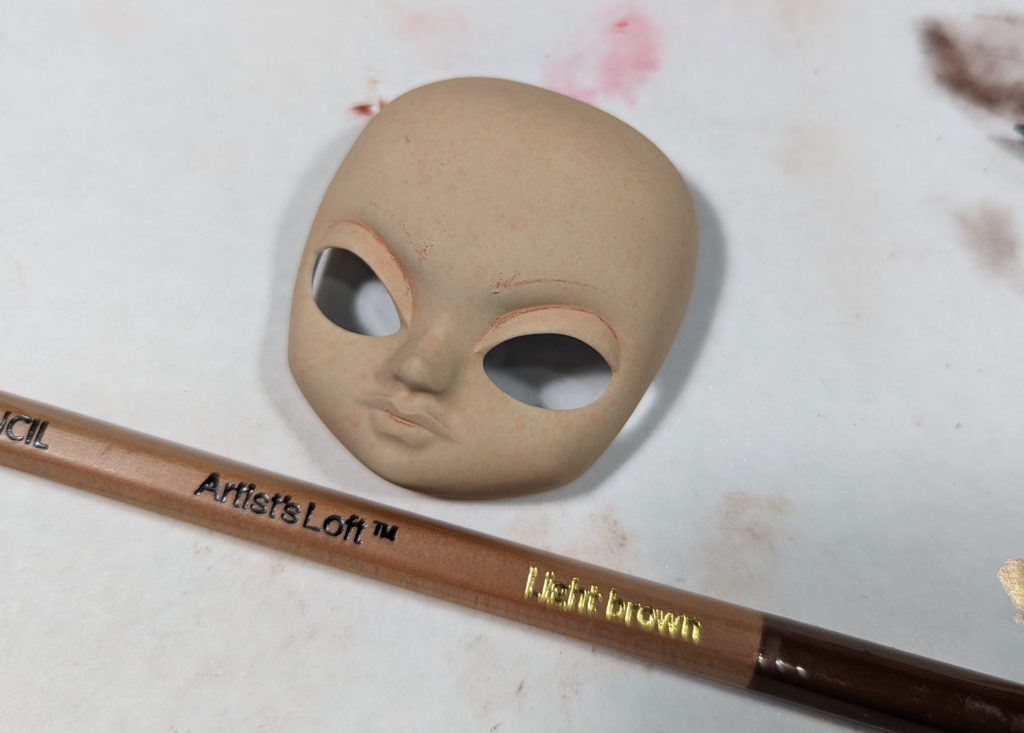
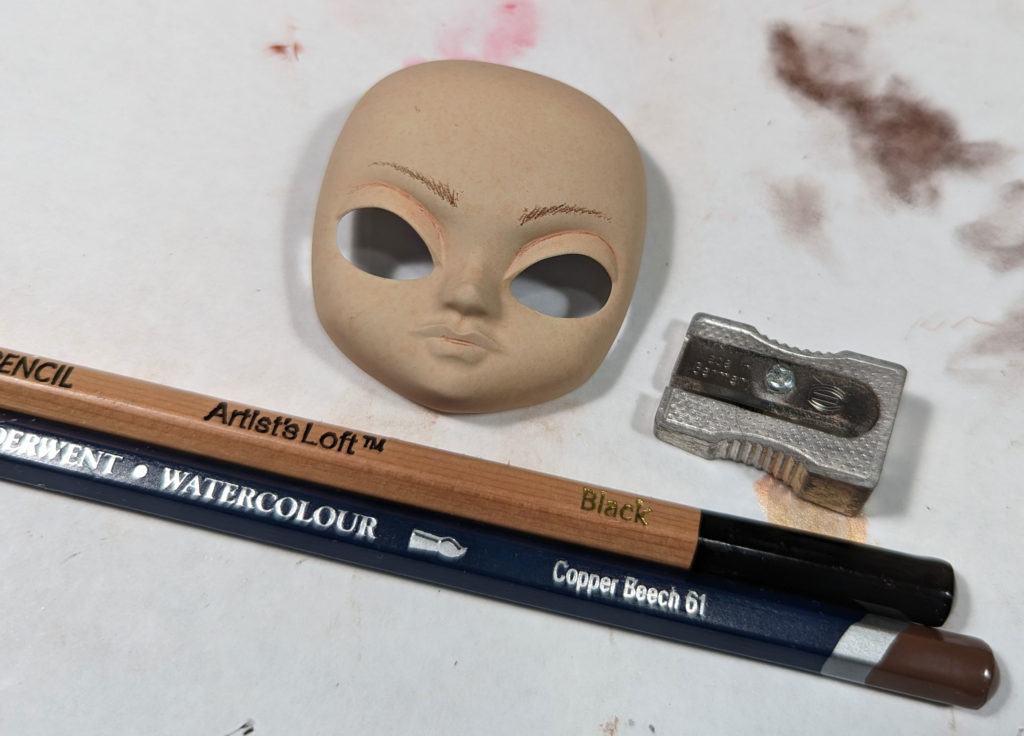
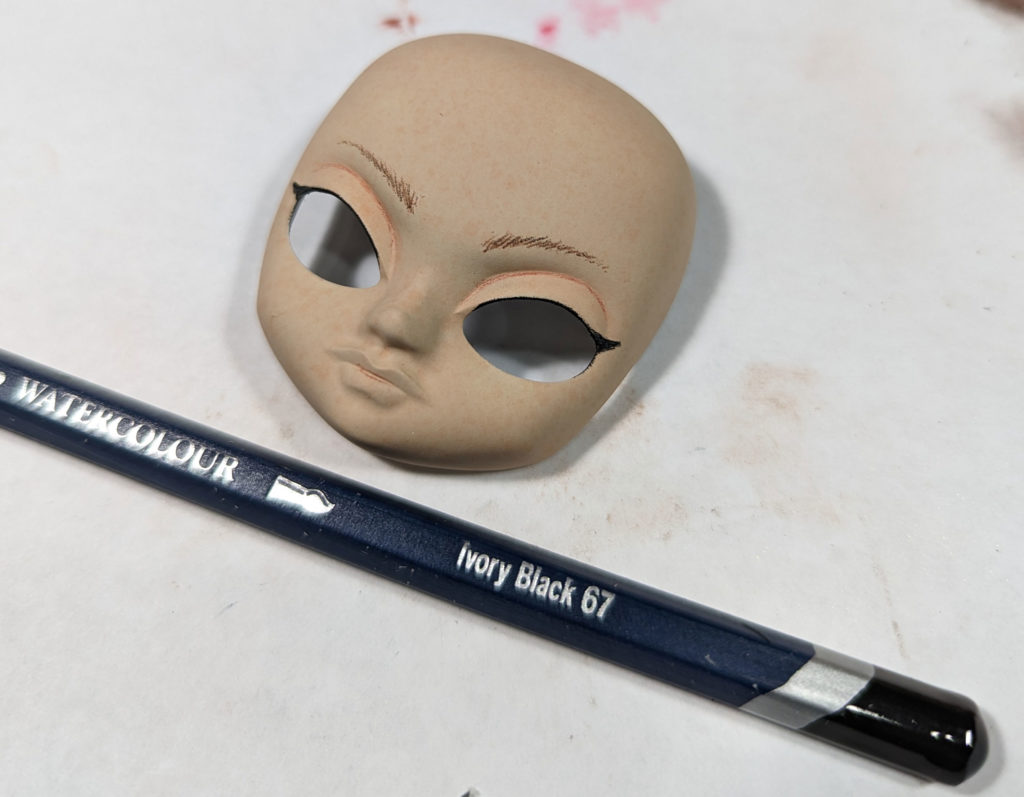
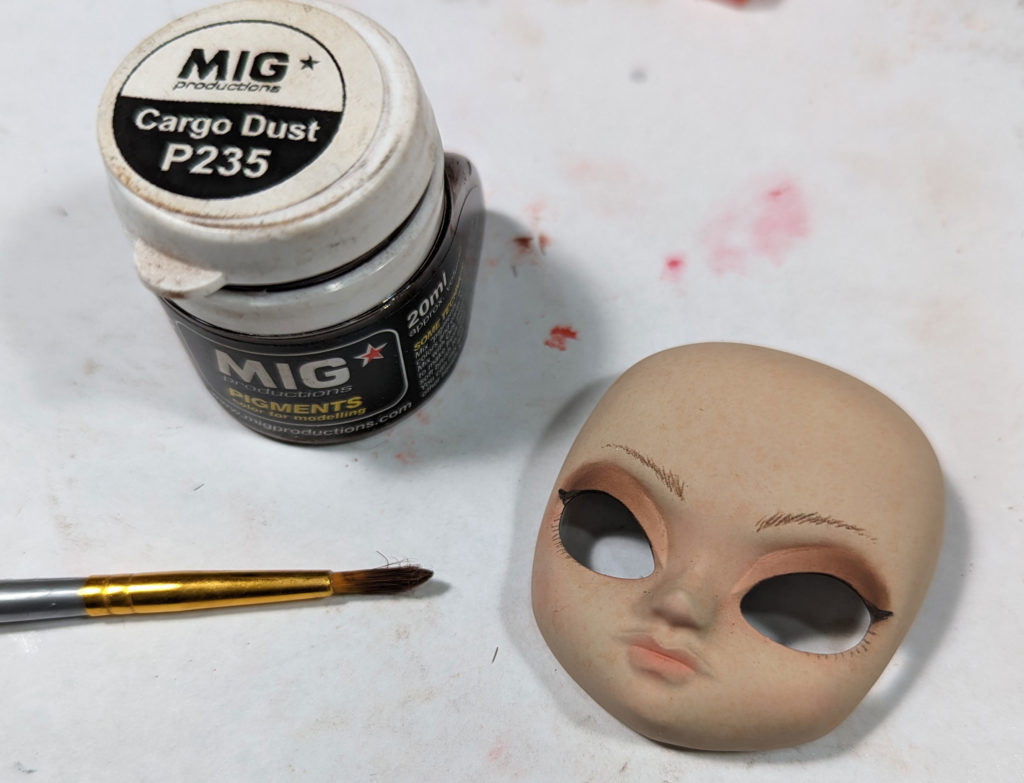
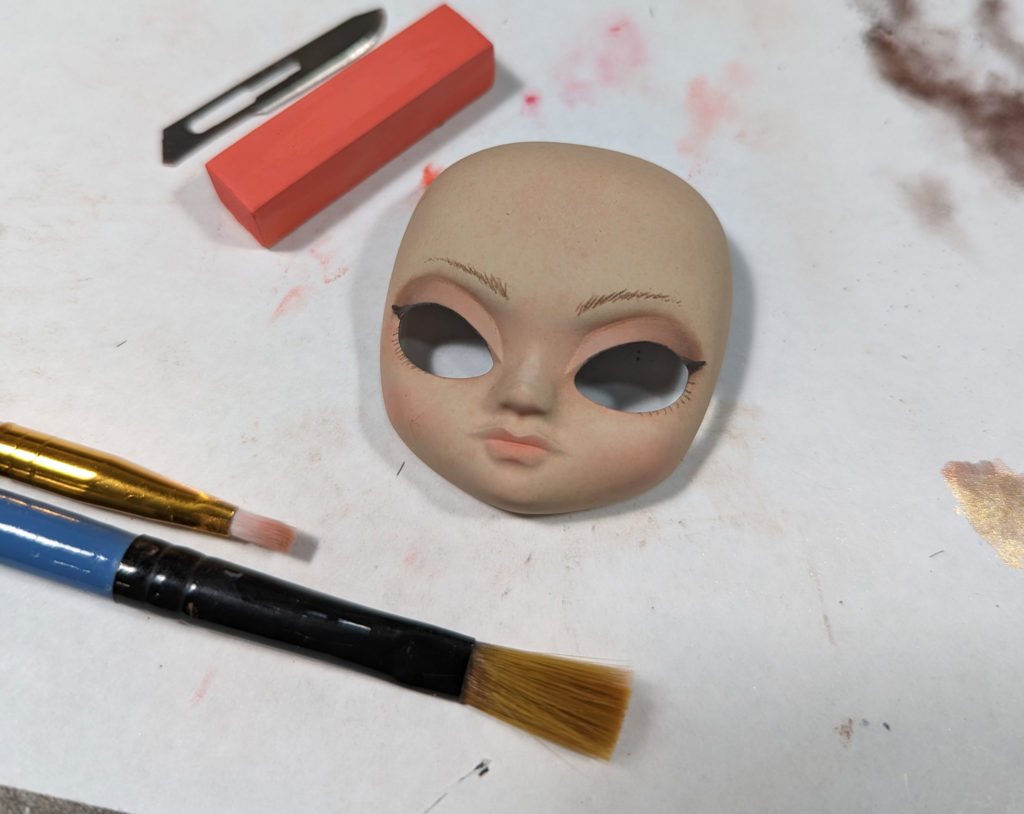
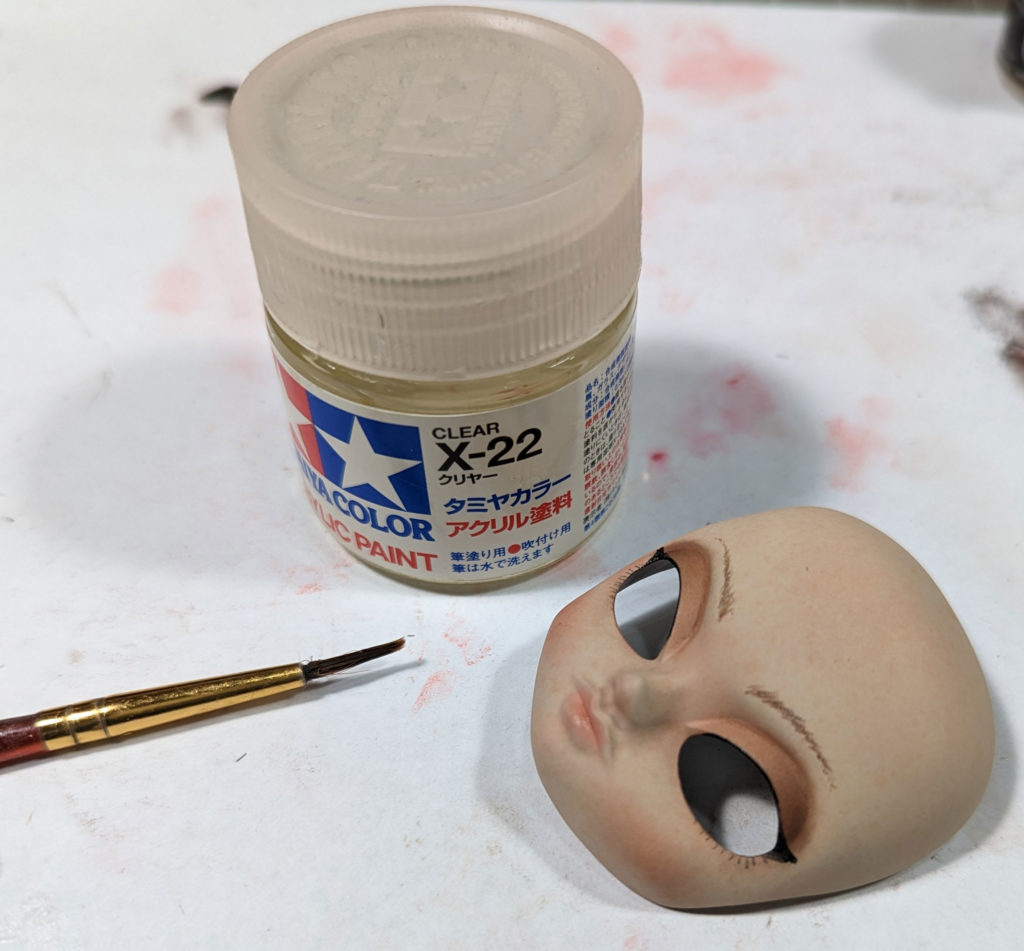
I used these products for this project. No idea what brand the pastels are but they were probably cheap. The pigments I’ve had on-hand for over a decade and I use whatever water-color pencils have the best color or density, hense the two different black ones. The Derwent is softer than the Artist’s Loft and makes eye-liner easier. The harder black is better for eyelashes and brows.Using this “light brown” (more of a copper) watercolor pencil, I start by lining the eyelid crevices to define the shape. I add a little inside the lips and lightly mark where the eyebrows will be. I then use a small damp brush and blend this a bit. This is why you use watercolor pencils. A soft eraser will clean up mistakes. Using very sharp pencils, it’s time to do the eyebrows. I do mine pretty light for this style of face. Start with short light hair-lines of the brown and build up as needed. Then I add a few lines of black to darken it. After I’ll take a soft dry brush and soften this a bit. This works well for small faces.Next is the initial eye-liner. The later layers will diminish this, but doing it now sets the base down making it easier later. I used the side of a soft black watercolor pencil to rub the liner onto the inside top lip of the eyes and taper that down the sides a bit. I use the tip to add a little fake lash pointiness at the ends. If you are not using fake lashes in addition to this, you may wish to emphasize this step more.Using the harder black pencil, I draw on some short, sharp lower lashes.Now we’re going to get into the pastels. Using this medium warm pink chalk pastel, shaved a bit with an old scalpel blade, I use a small flat brush apply the powder heavily to the upper eyelids, then lightly on the lower. I then use a little on the lips. You can use the eraser to clean up excess. Using the same small flat brush, I applied the lighter pink in-between the eyes as shading, under the nose, and a little on the chin and cheeks for initial blushing.I brushed a bit of this “brick dust” pigment onto the upper eyelids to begin the eyeshadow process. Pigments are more pure than pastel dust so use sparingly as they build up really heavily, really fast.This cargo-dust pigment is VERY heavy. I apply a little to my brush then wipe as much as I can off onto my paper before applying and it’s still dark/heavy. The color is great for this though. Start at the outsides of the upper lid and fade inward. This will be blended down a bit in the next step. Now I use my small flat brush and starting with the lower inside of the upper lid, apply some (ashes) white pigment. This brightens it and helps blend down the darker cargo dust pigment. I also apply a little to the bridge of the nose, above the lips, and upper cheekbones. (optional)Going back to the darker pink pastel now. Using the small flat brush, deepen the cheek, chin, and nose-tip blush further. A larger soft brush can be used to apply a little additional blush to the forehead. Once you’re done with this, go back to your soft black pencil and fix the eye-liner as needed.The make-up portion is now done, so LIGHTLY mist on a few layers of Lucky Varnish (matte) by Ammo. This will darken the pastels and pigments a little so do keep that in mind. I use the matte as opposed to the ultra-matte because it feels more like skin sheen. Using a small brush, apply a little clear gloss to the inside edges of the eyes. (can’t really see here in this pic) This will make it look more natural. I also drybrush a little of the gloss onto the lower lip. I like to do more natural lips but you can use oil-paints to do heavier lipstick colors. Oils are nice because you can clean-up the edges before it dries using a small brush and odorless turpenoid. Do that AFTER sealing the make-up though.
Adding Fake Lashes
Now you can add some fake lashes. I have NO idea where I got these… probably Etsy. It wasn’t expensive and there’s enough here to last me a lifetime. The edging is under 1mm and hides easily in this eye along with the eyeliner. Use SHARP pointy scissors for this step to trim the tiny hairs closely.
Just trim two equal lengths, long enough to fit across the upper eyelid edge.
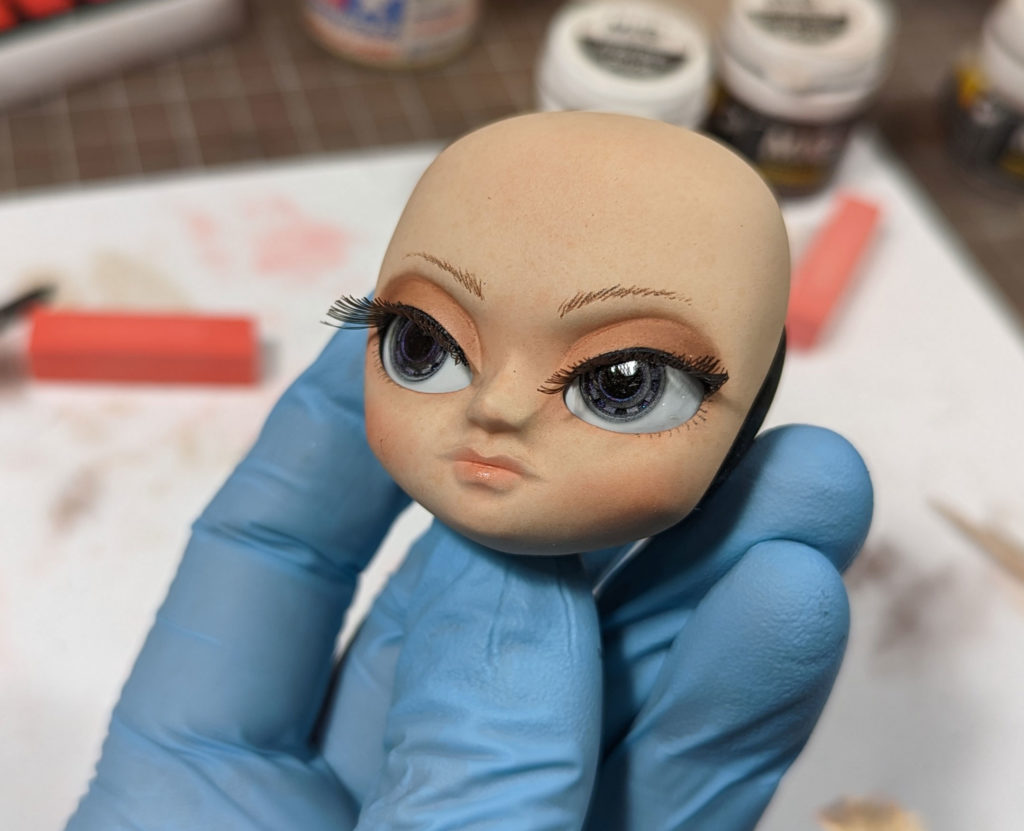
Using a toothpick and white glue, apply a thin bead of glue inside the upper lid and let it get slightly tacky. Otherwise the lash strip is gonna wiggle around. Maneuver it into position. This is tricky, but you can press a finger into the eye socket from behind to act as an eye and lip to set the edge against. I use a cotton swab with a bit of glue and swipe it along the inside back of the lash to add more glue and set it.Lastly use the sharp pointy scissors to trim the lashes to your desired length. The pointier the scissors the better for getting in close. Add your “glass” eyes and see how close to the uncanny valley you’ve gotten. If you need to make multiple faces using the same style, it helps to document your process to keep them all looking similar. Variations however are going to happen. We’re not machines after all!
Closing
I hope this helps someone else fumble their way through this process. Even if you’re simply painting resin figure faces, this should help a bit. It’s easier with the eye’s being separate, but if they’re molded in, do them first, gloss them well, then mask and keep them clean until the end. Most of all, just have fun! Even if you’re doing this for some sort of competitive nonsense, you need to enjoy it otherwise you’re not going to get your best work. At least that’s how I am.


![Maude [Cyborg Action-Doll] (Files Only)](https://fichtenfoo.net/blog/wp-content/uploads/2023/01/Maude-Promos-300x300.jpg)


