Your cart is currently empty!
In Progress » Desert Use Scopedog
11.16.08 » Source, Concepts & Initial Scratchbuilding
I’ve had this kit sitting on my shelf for over a year now and was putting it off for no particular reason. I love the design, but needed some inspiration to get to it. I found the inspiration on 2chan in the form of a desert open roof/headless scopedog in 1/72 scale I believe. Here’s the image I found:
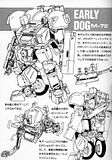
I decided to do something similar, but with a plethora of modifications and my own touches. I want to make this so that I could easily remove the rollcage and replace the head section. This will give me 2 kits to photograph and have fun photoshopping later. I also wanted to do the left arm similar to that of the “earlydog”. See above.
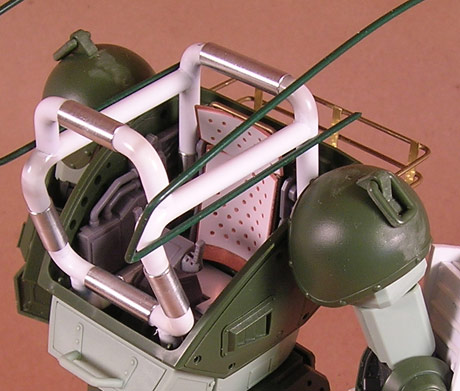
The rollcage was made from styrene rod. It’s jointed together either by glue or amulinum tubing. Later I’ll add some weld joints to the glued connections. The bar above it still needs it’s attachments done, but it will be for either a canopy or camo netting. I figure a canopy would be a nice thing to have in the desert sun.
The left arm shield was made from styrene sheets and strips. I “bolted” a piece of “steel” to the tip of the shield as a melee weapon.
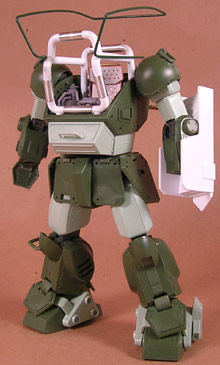
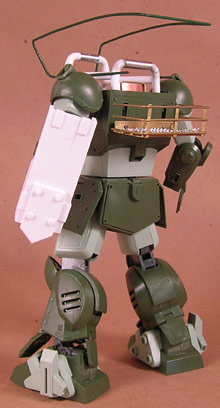
The seat was made from thin sheet styrene with holes drilled out based on a printout I made. This styrene was then glued to some copper sheet. I used copper since it’s easy to cut and bend. The basket on the back was made from brass rod and strips. I had purchased a package of misc metal sheet and the screen was part of that. I cut a piece and added it to the bottom of the basket to keep the little bits from falling though.

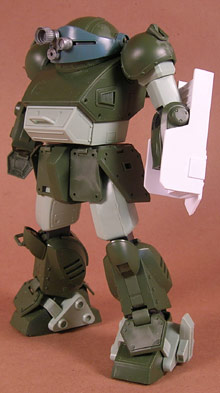
And here’s the ‘dog with the rollcage removed and roof/head replaced.
11.22.08 » More building and modifications
First off it came to my attention that what I’m doing and what my reference was based off of was an official design for the scopedog. Here’s the link.
I started on the stowage for this build and so far have made a bucket and a water tank. The tank will be strapped under my stowage rack. It was made by folding some very thin brass sheet around a styrene block. Then I added the side walls made from styrene and the handles made from brass strip and rod. Lastly I dented the hell out of it!
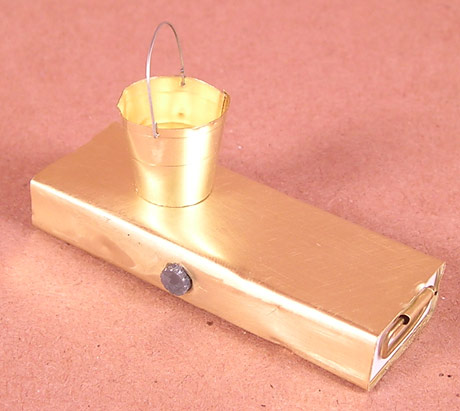
 For the bucket I figured that somewhere out there on the net there would be a template that I could scale up. I didn’t find one but I found some instructions which I used to create the bucket and the template below. This little template is for 1/20 scale but can be adapted for whatever. The styrene disc for the bottom is a 3/8″ circle of styrene. The handle was made from floral wire while the bucket itself was cut from very thin brass sheet with plain old scissors.
Instructions: http://www.missing-lynx.com/articles/other/makebuckets_ahall.html
Next up is the large RPG-styled Bazooka-Faust (Panzooka?). This was made from styrene and brass tubing as well as some misc gundam parts. The flared out back-end was the most difficult part. I heated the end over a candle until slightly soft, then pressed it onto the screw-end of a paintball co2 tank to widen the edge. This was done several times to get it right on the final piece and quite a few times screwing it up royally as well trying to figure it out. The end result is great though!

In the Scopedog instruction manual, Bandai shows some “detailed-up” pics of a scopedog. These looked great so I decided to apply some to mine. First was the welded joints. I thought about this for a bit and decided to try a modified solder iron tip to do the job. Below you can see the replacement tip and my old one which I modded. I used a dremmel cutting disc to make it have a chisseled point then a metal file to hone and sharpen the tip.
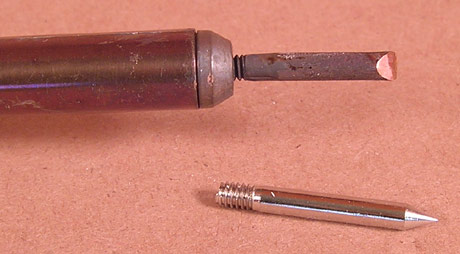
The trick is to get the tip just hot enough. Too cool and it just leaves a little scratch. Too hot and it sinks too deep into the plastic. I found myself unplugging and plugging the iron back in and out frequently to maintain my perfect temp. I held the iron still on my left hand and held the part to be modded in my right, tapping it along the weld-edge. You’ll get a few strings and whatnot, but after
I was done I lightly sanded all 3 edges (middle weld line, and the two opposite flat parts) to clean it up. A quick brush of tamiya extra thin cement will make the after-sanding effect more visible and smoother. This tip also worked well for torch-cut edges on the added armor panels.


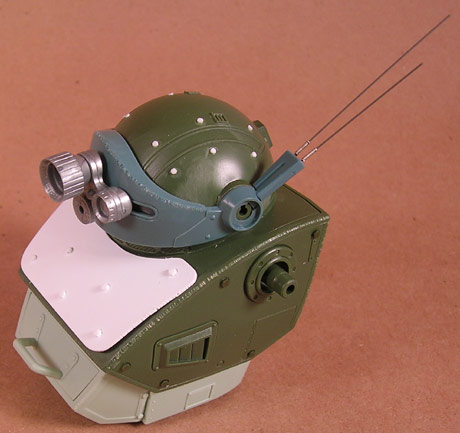
Lastly I used Aves Apoxie Sculpt to make the other weld beads for the D-Ring mounts and the roll-cage.


11.24.08 » Mesh Protection
This update is brought to you by mechaskunk.com. Model update parts that don’t stink! Or something… Rob sent me over some samples of dot-screening he’s considering adding to the store. For the dog I decided to use the larger holed version (he sent a finer screen as well). It’s brass sheet with equally spaced rows of holes all over and very nice for panel updates, screen and whatever else you can think of. In this instance I wanted to use it as small-arms protection for the pilot. I cut it along the dots with scissors, then
used a dremmel tool to make the perferated edges straight.

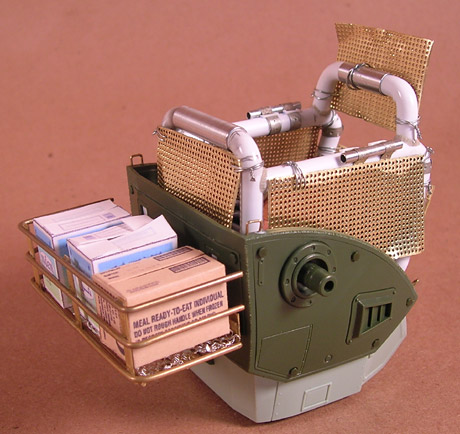
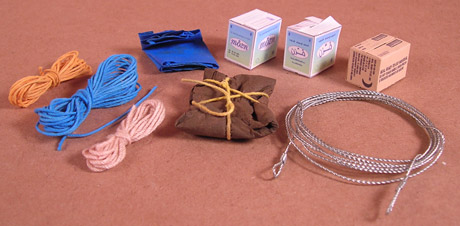
Also shown are my stowage options for this kit. I’ll be using 2 of the boxes seen, one MRE and one water box. I also have a bunch of stuff leftover from my Dunehopper. I made a lot of extra stowage for that and knew I’d eventually use it. Here’s a PDF to print your own boxes in 1/20 scale.
11.29.08 » Insurgency
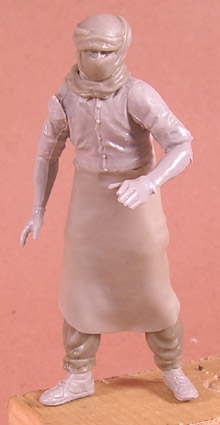
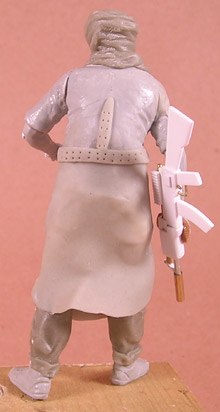
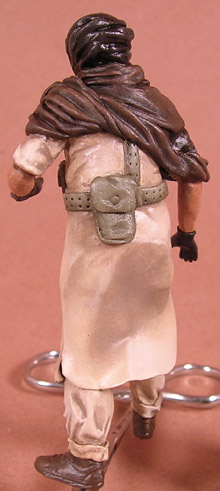
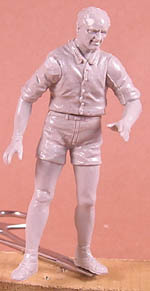 This build needs a figure to go along with it and the stock fige, while nice, are kinda boring in the sense that EVERYONE has them. So since this is a desert build I decided to modify a Tamiya race crew fig into an insurgent type figure. This has been done so far with dental tools and Aves Apoxie Sculpt.
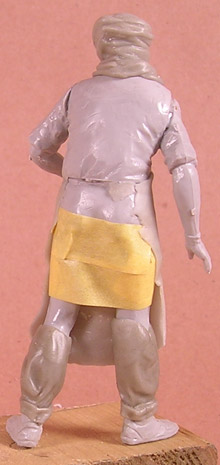
The tape was to keep the thinnly rolled pieces of sculpt from sagging into the leg gaps.
The AK-47-ish gun (just a simplified version I made to look like one) was made from styrene and metal rod/tube. I still need to make the strap for it.
Lots to do still on the figure including moer detail to the ammo belt, more cloth wrapped over his shoulders
(the reason for the unfinished belt/harness), pouches, and more detail/clean-up.

12.01.08 » Barriers
The figure is pretty much done. I just need to do a little clean-up and primer spot-checking. The pouches were made from Aves as usual and the snaps from pin-heads. I think it made for a nice conversion from those standard Tamiya figs into something more interesting.


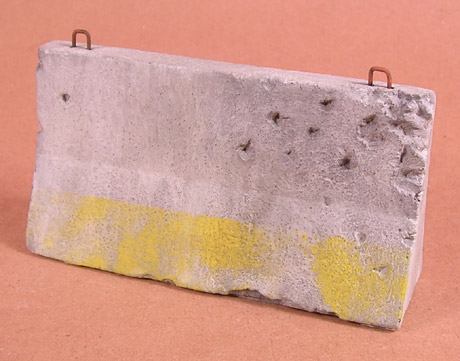
For part of the scenery I finally made a concrete barrier. I started making a master for some 1/35 scale Jersey Barriers a while back, but the project I need them for isn’t ready to be started yet. This finally gave me an excuse to make some and bigger to boot. They’re 4.75″ long, 2.75″ high and about 1.5″ at the base. I first made a quick master from some styrene sheet then attached it to the bottom
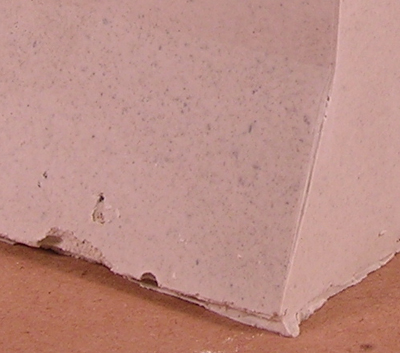
of a box and covered it with mold silicone. That was all yesterday. Then today I did 2 pours to try it out. The first was pure plaster of paris. (B) It took 1 cup dry plaster and 1/2 cup water to fill it. The second pour, (A) I did the same, but mixed in about 1/4 cup of sand. I want to see if this looks more like natural concrete when I chip and bust parts of it off. I really didn’t measure anything when doing these, but I was going for a taller barrier, about 4 feet tall. You can see the scale of it with the figure. I’ll just be using one
of these for the final scene. They came out nice, but very clean and angular… too perfect! Some roughing up with a wire brush will soften the edges and make them look more natural.

Close up of the sand-mix:
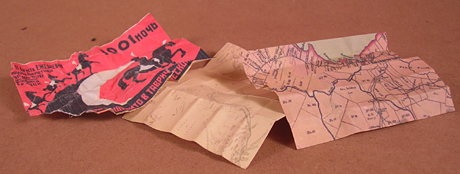
Next are some old maps and a Soviet era 1001 Arabian Knights (I think) poster I printed for the scene.
This shovel was made from thin brass sheet and styrene rod.

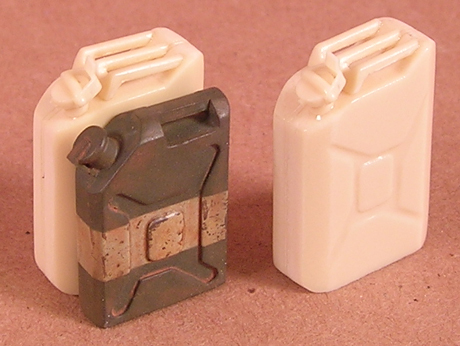
These are the very nice Jerry Cans from Maschinen Kreuger and High Desert Pilot. Very nicely done and larger than I expected as seen by placing one next to one of my cans I made for my Dune Hopper. Guess I was wrong size-wise!
12.10.08 » Painting Begins
This past week I had a very nasty cold which put me out of commission for everything. Modeling, being awakes, etc… I’m back at it though and started by priming all of the parts with Mr. Surfacer 1200 from the jar thinned with lacquer thinner and a few drops of Mr. Retarder.
Once cured I separated the parts by end color then painted all of the parts needing rust in two tones. First a light rusty brown-orange color. Then over that I lightly and randomly dusted the parts with the same color mixed with a little black. Here’s the results:

Those parts will later be clearcoated, salted, hairsprayed, then overpainted ion their top-colors. The rust will show through after removing the salt and some of the paint over the hairspray layer.
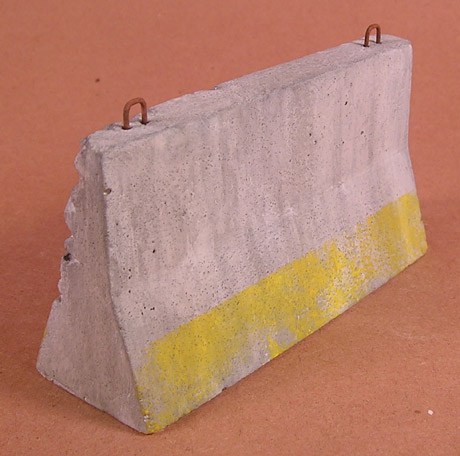
I also chipped up and painted my Jersey Barrier. I used the barrier that I had mixed sand into and the texture is very much what I wanted. At least it is after some light wire-brishing and sanding. The chipping was done with whatever metal tools I had handy. Going for a Gears of War look for this with bullet chips concentrated on one area where one might had been taking cover.
Once chipped I first sprayed the entire barrier with Tamiya Neutral Gray thinned with alcohol. Then I used thin coats of cheap acrylics (JoAnn Fabrics store brand actually… there was a sale. no joke.) white and gray and mixes inbetween focusing on downwar streaks. A piece of masking tape was applied no both sides and Cadmium Yellow was sponged on for the worn paint.
Once I was satisfied with the colors and paint textures I applied a thin wash of black oils mixed with oderless turpenoid which was easy to apply then wipe away for more weathering.
12.12.08 » Time For Another Blog
Article!
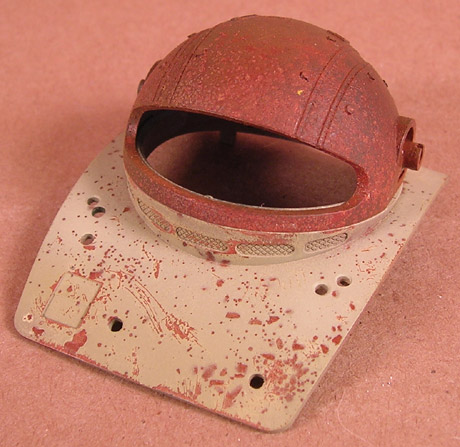
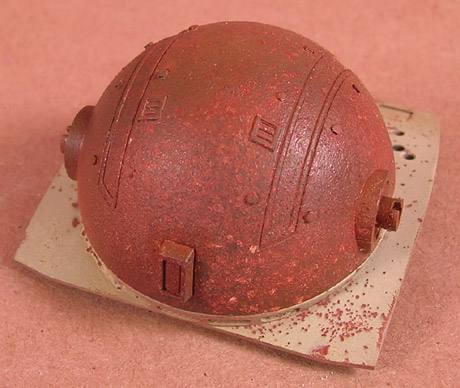
I was doing a test of the salt technique for rusty chips on part of the scopedog that won’t be in the final-final diorama: the top-hatch. I sprayed the rust-painted part with hairspray then added some kosher and table salt as each gives a different look and looks great combined. It looked good and gave me an idea for the parts which I wanted to be plain rust and no paint. I started with the scopedog head and the result was so good I decided to do a step-by-step:
1: Spray the part to be rusty with several shades of rust-colored paint mixes. I spray the part with a solid rust mix then randomly spray with darker tones. Finish it up with a light coat of Future Floor Acrylic to seal it.

2: Spray the part with a generous coat of hairspray then coar with kosher, then table salt. Don’t be stingy but make sure there’s gaps as well.

3: Now spray a few parts of the piece with some black-brown and follow up by spraying in other spots with some orange.
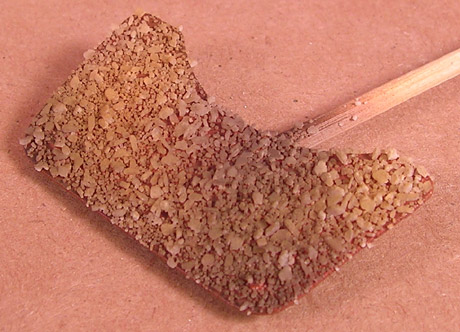
4: Dip the part in water and use a soft brush o remove all of the salt. The end result will leave a desireable rusty dextre both visual and tactile. (note: white specks are styrene beeneath and not salt… I was careless and salt IS an abrasive. Take care!
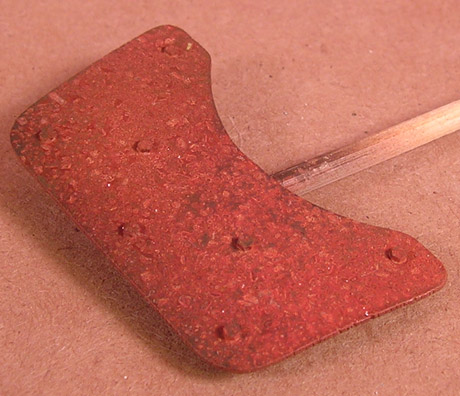
Here’s the armor panel added to the scopedon hatch along with my initial trial part, the head and hatch! Since I used hairspray beneath the Tamiya Buff color to adhere the rust, I was able to use the hairspray technique to remove even more paint chips.

12.12.08 » The Primer Look
Maschinen Krueger mentioned that it needed “primer” so I thought about it and did the following which worked out well:
1: Sprayed hairspray on rust-toned part and sprinkled on kosher and table salts. Then I gave it a light coating of “neutral gray”.

2: Oversprayed the above with Tamiya Buff then a lighter version of buff for a “modulation” look.

3: Removed salt and some paint with water. Notice the primer-gray rings that show through. I think I might be able to spray some hairspray/salt over the gray paint and before the buff, but am not sure how well that’d remove. It’ll leave some gray chips along with the rust though if it works.

12.13.08 » Degradation and Corrosion
I’m really letting loose with the corrosion and overly-worn/past it’s prime look with this build. Most builds just don’t look right or don’t feel right with this much wear, but for some reason, this seems to be fitting together with it.
To start things off, here’s the other shoulder. In the Votoms series, there’s a group of elite soldies known as the “Red Shoulders”. I’m making a Blue-Shoulder for kicks and the blue looks great with the buff base color. I wanted the blue to look as if it was painted over the buff paint, but didn’t adhere very well and quickly has weathered away. To do this I just added another coat of hairspray and
salt over a shoulder done like the one in my last update. Then I sprayed on the blue and removed the salt and a lot of paint in some water.


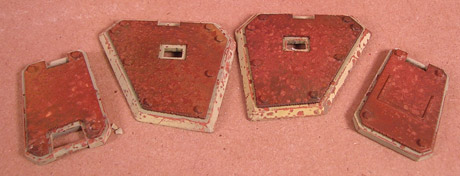
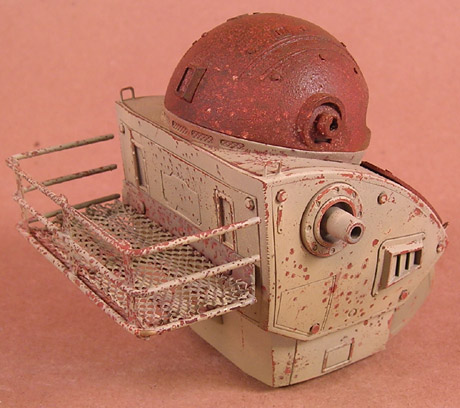
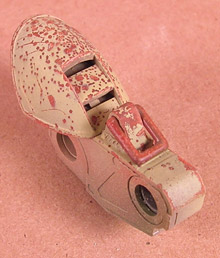
I added the rusted armor plates to the skits. Rust was done as shown above. You can see where I sprayed a little desert yellow on one of the side skits to break-up the monotonous buff.
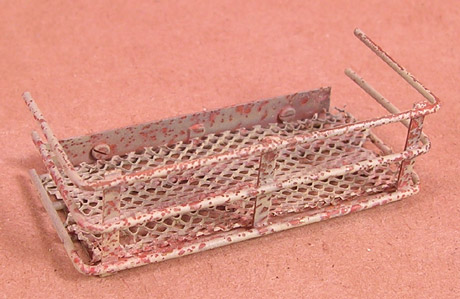
The stowage rack turned out really nice and corroded. Lots of nice little pins of rust popping through. Really looks like it’s been used and abused. Mostly though it’s beel left in the sun too long.
Lastly for this update is the main boddy and a knee. Again… sun bleached, poor maintenance and the look of a mecha that was found abandoned for quite a long time and quickly put back into service. I’m sure that all kinds of mechanical difficulties plague it’s operator.

LAter during the weathering process I’ll do some oil and pigment shading as well as filters to make panels and segments of the dome, body, etc… pop-out.
12.16.08 » Rust Three Ways
That’s right… rust done three different ways so far on this build. The first way is a new product I heard about and decided to give a change. This product is called Rustall. (visit their website here) Rustall comes as individual bottles or as a set of 4. Bottle 1 is the rust solution, #2 is “blackwash”, #3 is a matt coating, and #4 is dirt as seen in the cup below.

Using this stuff is pretty straightforward and simple and it yields some great results, however it’s not the end-all solution to everymodel and takes a little practice to start getting the look you desire. There’s instructions on a review on thei website, but here’s how I’ve been using it which makes it a little simpler I think.
First pour the dirt contents of Bottle #4 into a dish. Start out with bottle #3, the matt finish. Brush this on the part to be rusted. It goes on nice and thin and levels out beautifully. I really like this stuff! While the part is still tacky, coat it with the dirt in the dish. (the instructions say to do this dirt-dip while your paint is still wet, but my airbrushed paint dries too quick for that) Take a soft
brush and brush away the excess dirt.
You’ll not notice much of a change in the finish or color with the added dirt, but the dirt is important. It’s clay-based and makes for a nice texture and makes the rust solution distribute evenly. Once that’s all dry brush on an even coat of bottle #1, the rust solution. It goes on very thin and you won’t see much noticible rust on the first try. You add more layers to build-up rust. Without the dirt, the
rust solution tends to run like a wash and not “stick” where you want it.
You can add more and more layers of the rust solution, drying in-between but that will leave a fairly even and solid coating of rust. For a more realistic look I brush my second/third coats in random spots and then blend them in with water over the rest of the part. That way the rust builds up in some spots and not consistently over the whole piece. Looks more interesting and realistic this way.
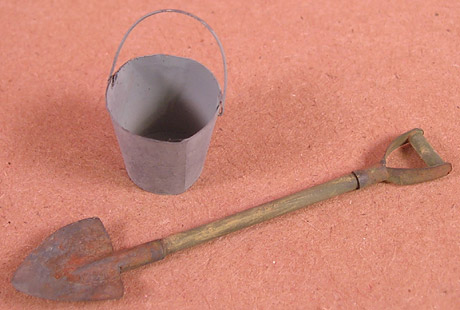
Here’s the rust solution added to a shovel. Note the “blade” of the shovel was painted in a neutral gray then sponged with lighter and darker grays thinned with water to give it a mottled, but not textured look. I applied it to the whole blade and handle, the for the 2nd
and 3rd apps only around the upper part of the shovel, blending it towards the point with water. The bucket was painted the same way, but no rust was applied yet. This shows the difference.
I’ve found that this looks better if applied over an uneven-colored
paint job and not a solid one.
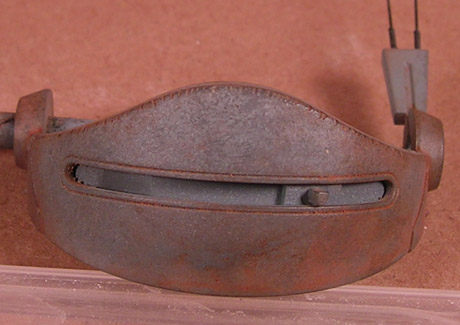
The same technique was done with the Scopedog Visor. The visor was painted in Neutral Gray and mottled with water-thinned darker and lighter grays to give it an uneven, natural appearance. Then some rust colored actylic thinned with water was sponged on in a few key spots. Not doing it all over increases the realism and visual appeal.
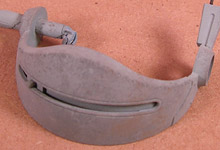

Finally I coated it in the matt-finish/dirt-dip then a coat of the rust solution. A few more coatings of the rust solution were applied where I had sponged on the rust acrylic. Finally the part was coated in satin FFA for sealing for later filters and washes. It yealds a very realistic looking fresh rust over steel look though.
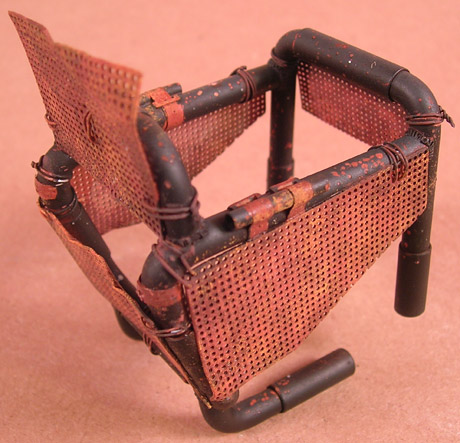
The next rust technique is pretty easy as well and yeilds some good results. I totally screwed up when removing the tape from the rust-base coat of this roll-cage and ended up pulling a lot of paint and primer off of the brass dot-plate. AAARRGGHH! I repainted and primed them by hand, but worried that the salt-rust method I showed a few updates ago (method #1 of 3 BTW) would rub the paint and primer off again.
So to do this more gently I tore off a chunk of sponge and dabbed on thinned acrylics in black-brown, rust, orange, and brown. This was really easy and the result is pretty cool. While it doesn’t look like the other 2 rust methods I’ve shown, I think all three look great and show the variety of rust that occurs. If all the rust looked the same that might not look as interesting.
All three of these methods can benefit from being combined. Using the large amount of rust-colored pigments from Mig Productions will also enhance these techniques as I’ll show later on when I get to that point. The next two pics of the external tank use several of these methods with good results.
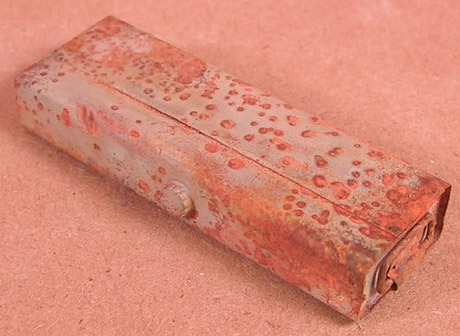
The first rust was shown when I applied the salt over the rust-base coat with hairspray then removed it after painting with water. In a few spots I added more rust with the sponge technique.
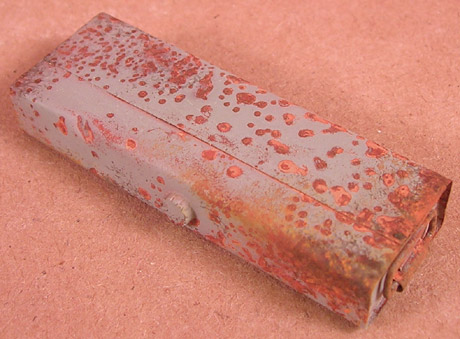
The next pic is the aftermath of the first having applied the Rustall system to it. It’s a subtle difference but enhances the look. Note that you’re looking at the bottom of this hanging tank. The top won’t be seen while strapped under the basket on the ‘dog’s back.
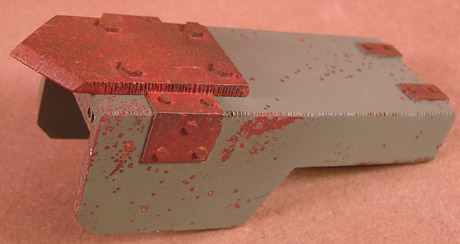
Next is the arm shield which shows the first method of rust I tried, the salt-method. (see a few updates ago for a Step-By-Step) I did this in a faded military green to make it look like an add-on to this refurbished ‘dog. Later I’ll rub a little graphite powder on the “blade” to make it look as if it’s been recently used and that the rust has been worn off.
And here’s part of the leg armor, also being rusted and chipped using the salt/hairspray method. With these buff-colored parts I sponged some very thin white-buff color in spots to simulate sun-fading of the paint. This part shows the most extreme example of this, others are more subtle. All of this though will be muted somewhat when filters, discoloration, wash, and pigments are applied later so don’t be too shocked about the starkness of it.

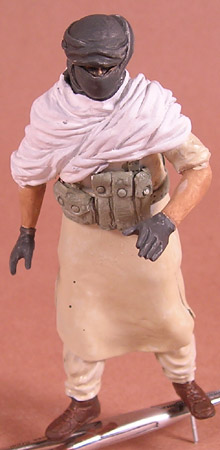
And lastly is the insurgent with his base-coats of paint. Looks like crap, yes, but that’s fine for this stage and lets me see what it’ll look like color-wise later. More opaque oil-paint will be applied over this base-coat rendering it invisible later. The basecoat is important though since the oils are applied thin. Primer-gray would show through a thin white oil-paint for example.
12.17.08 » Modulation
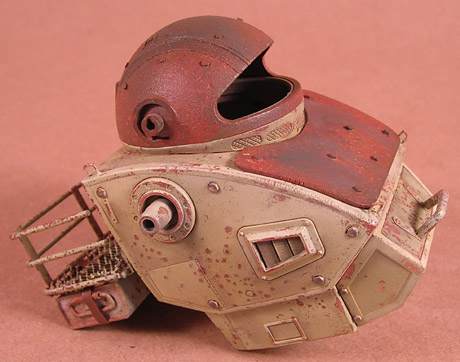
Adam Wilder over at Mig Productions (makers of Mig Pigments and other fantastic products) developed a technique called “Modulation” for armor subjects. It’s basically taking queues from figure painters in regard to light and shadow and applying that to armor. Light-to-dark gradations, highlighted/discolored panels, etc… I have been doing that with this build. When I sprayen my uff and other colors I mixed lighter versions and highlighted with the airbrush where light would hit. Now after my first application of Mig’s Sin Industries “Tan for Dark Yellow” filter I have been using their 502 Abteilung line of oils to highlight and shade areas of this build. This can really be seen well here on the body of the dog. Note the highlighted panels and how using darker and lighter mixes
of the buff color plays with the light and shadow emphasizing detail on this kit.
Once this dries I’ll apply another layer of the filter to blend all the colors together better. I’m loving the results though so far and they’ll look even better after washes and discoloration pop out the panel lines! (scroll up for the “before” shot in an earlier update)

12.21.08 » Filters and Discoloration
I mentioned earlier that I had applied a single coating of the Sin Industiries Filter to the scopedog. While the product itself is awesome, the thinner reacted bad with the Bandai plastic (as most thinners do actually, especially mineral spirits) and made a few parts brittle and cracked. This was really only where I had pre-snapped parts and there was pressure. The filter works great on other models plastics and resin, but Bandai plastic… sucks. So I blame Bandai more than the Sin Industries filter. The cracks I believe
can mostly be fixed and won’d show up on the final build. Instead I decided to use my usual Turpenoid + Oil Paints mix. I used the Mig Productions 502 Abteilung oil paints and made a yellow-orange filter to brughten-up and yellow the look more. Look at the photo above this sentence then the one below. Note that the highlights I did earlier are now more blended in and natural looking. THe filter ties all those colors together and enriches them.
After the filter I applied another satin coat of FFA then applied the discoloration. I used the 502 Abteilung line of oils as they’re much better than my cheapies from Michaels. I used dark and light rust, blue, yellow, and dark mud. These were dabbed on the blended into the surface. The result is fantastic and really makes the surface look used, worn and more natural. Later I used more light and dark rust and added additional rusty streaks.
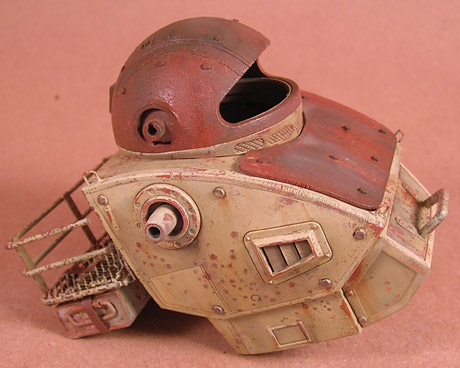
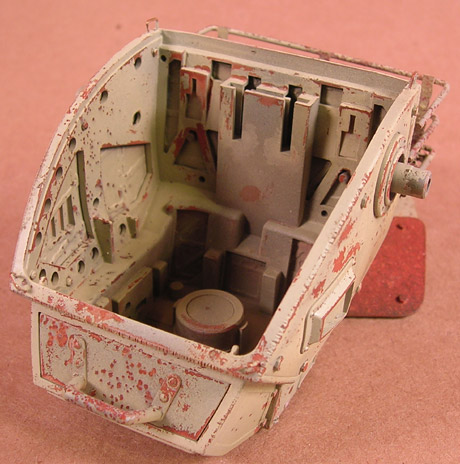
The following I learned a few builds ago by accident. I applied some graphite to a gun, but later did the discoloration technique with the oils and turpenoid. That blended in the graphite and made the surface look like worn metal. I did the same thing on the internals here. I painted everything in Tamiya Dark Gray then lightened panels and such with oils. After a satin coat I buffed on the graphite with my fingers, applied dabs of blue and rust oils, then blended it all in with turpenoid. The result is really great!

Lastly is the gun progress. This was painted as above substituting German Gray for Dark Gray. The wood was painte dby hand then coated in gloss FFA and later dulled with a satin coat and discoloration. I think the gun needs to be darker so I’ll fix that later.

12.26.08 » Pin-Wash, Flat Coat, and Rust Pigments
Since my last update I’ve applied pin-washes of 502 Abteilung ‘Dark Mud’ oil paint which is a nice dark grayish brown. Perfect for this build. Afterwards everything recieved a flat coat of Future Floor Acrylic + Flat Base.
Once the flat coat cured I began blending various rust-toned Mig Pigments into the rusted panels to tone down the color-texture a bit more and increase the realism. The texture from the salt shows through a bit and makes it look very nice and random. The rust pigments were Light Rust, Standard Rust, Rail Rust and Old Rust. I also used Grimy Black and their new Graveyard Dirt pigment for shading. The Graveyard Dirt is a dark redish brown color which is perfect for shading rust. This was applied alone the channels on the head. I blended these in with clear turpenoid and a flat brush. Once that dried I applied some of the Mig Fixer for the first time.
This stuff works great and makes the pigments stay put. This will be useful for my next layer of sandy colored pigments.
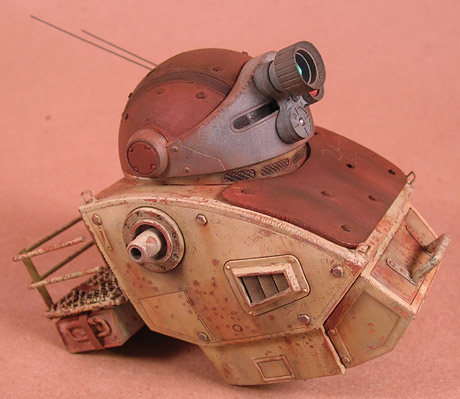
On the body I appled small amounts of rust-pigments to some of the larger chipped areas and grimy black around the arm joints and vents. These were blended in with clean turpenoid as well. What turned out great is that the rust was blended all over ad applied thicker in some spots to increase the rusty and streaked rust look.
Below you can see that I added the great and shiny sticker lenses to the head. A small steel bearing was used for the tiniest eye. These will be dulled down with a little matt medium and dust. You can also see the difference in the Rustall rusted visor v/s the salt-technique and pigment rusted panels. Makes for a great contrast or realistic rust effects.
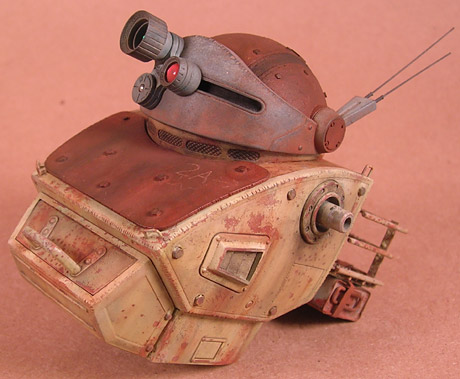
12.30.08 » Dust and Build-up
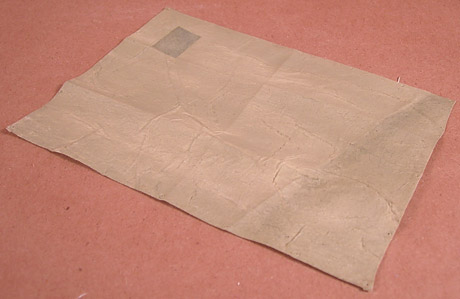
First-up today are the tarps. These are made using the method described in an article at ArmoramA which describes how to use tissues brushed with water-thinned silicone sealant to make fantastic scale tarps. First below is the large canopy tarp I made for the open-cockpit ‘dog. I took a small scrap rectangle and made a “repair patch” in the one corner.
Next I decided to try to use these to make a duffle bag. I was surprised at how easy this went together and is even laced and actually works. It’s filled with small and-rocks to give it weight and bulk. The strap is made from a strip of the same material.

Once I had everything ready I began the final dusting and building of this beast. Below you can see some shots I took. The camo netting was made from cheesecloth painted with cheapie acrylics. Note the different colored tarp pieces in the stowage basket to give it some variety.
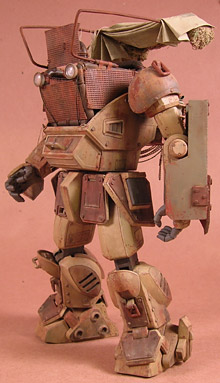

The ropes are twine soaked in water and glue and tinted with pigment powders. While wet they’re put into position, held down if necessary, until dry.
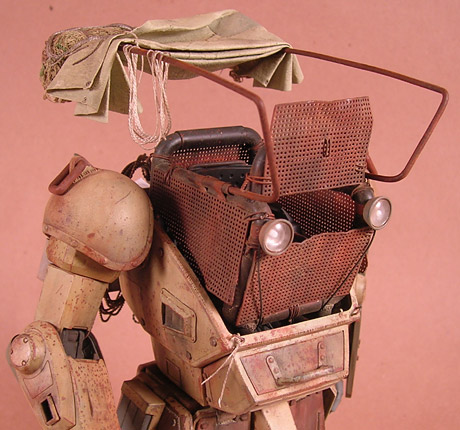
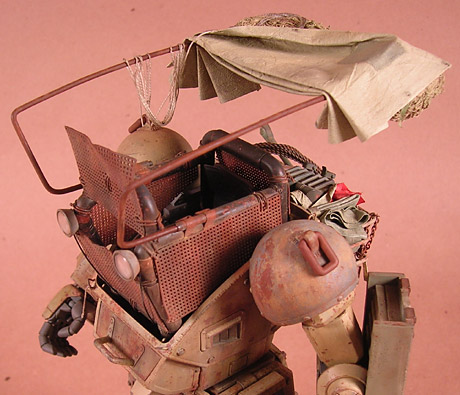
I even made some cargo straps from the leftover bits of painted tarp.
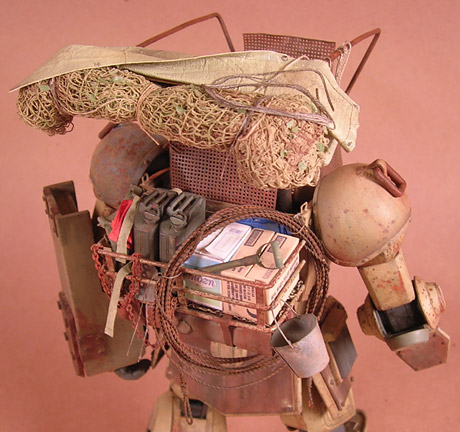

The insurgent is coming along nicely, but slowly. I usually need to wait 24-48 hours between sections painted in oils to allow them to dry enough. Tonight I should be able to finish him up with the irises and additional shading/highlights then once completely dry I can flat-coat and weather him. Yes, weather. Nothing like some dusty shoes and discolored robes to add realism to a figure of this scale.




![Maude [Cyborg Action-Doll] (Files Only)](https://fichtenfoo.net/blog/wp-content/uploads/2023/01/Maude-Promos-300x300.jpg)


