


Your cart is currently empty!
In Progress » The Dragonfly

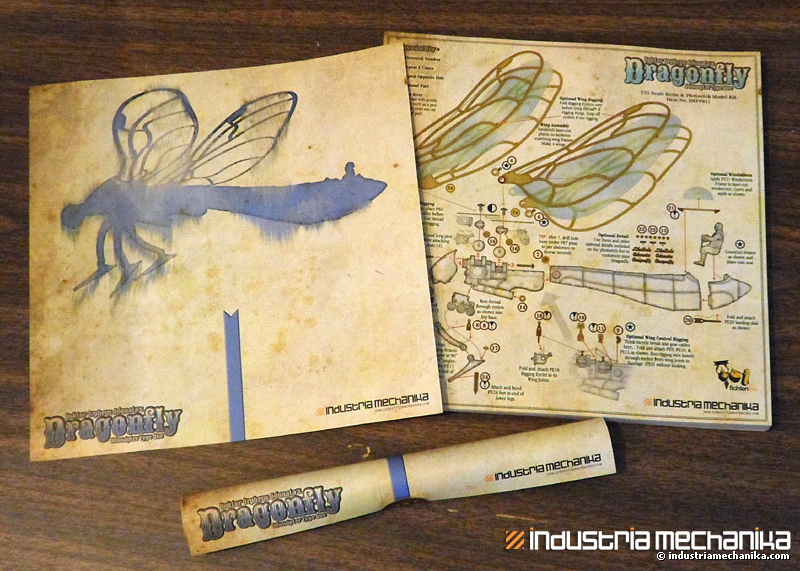
Apparently I posted nothing about this here on my own site, but the follow-up to my Hornethopter kit, the Dragonfly is done and in-stock at Industria Mechanika. Much like the Hornet, I designed the entire Dragonfly craft, but this time I had my friend and iMech collaborator Christophe Desse create the abdomen/fuselage based on my plans to make the design/shape better. We’re also using the same Aviator pilot as the Hornet because he’s cool, the perfect pilot, and didn’t cost more to print a new one. 😉 Plus we’ll have more pilots in the future that can be swapped out.

My original sketch plans. ^

Pre-production master pattern. ^
I started my paint-up after cleaning up all the resin and photoetch. The resin is so well-cast that clean-up took maybe an hour. The etch takes longer, but that’s because it’s a lot more pieces and the larger parts require slowing down as to not risk damaging them. I still kinked a couple wing parts while polishing, but it was easy to fix. Whew!

Dragonflies and Damselflies come in just about any color you can imagine, even magenta! A Google image search on either/both will give you more ideas than you can paint in a lifetime. But you’ll find one you like and it’ll stick in your head. For me it’s one my daughter and I often try to, and occasionally succeed in catching at a local nature conservancy, the Common Blue Skimmer. It’s just my inspiration though and when done, it will only loosely resemble the actual coloring.

To start off, I primed all of the resin and to-be-painted PE parts first with Duplicolor Self-Etching primer (olive-green) then with Duplicolor Sandable Primer (black). The rest of the photoetch I blackened using the Uschi Van Der Rosten (also sold through AK-Interactive) brass burnishing liquid. This quickly blackens/tarnishes the brass parts to the point that they don’t require any further painting on my part. In fact the challenge is now to paint some of the resin parts to look like this.

I sprayed the matching black-primed resin parts first with thinned Mr. Metal Color Brass, then mottled on a 70:30 Mr. Metal Color Copper:Iron mix and an over-thinned coat of Mr. Metal Color Iron. I then buffed all of these parts with a soft toothbrush. Over that I mottled on a very thin layer of Tamiya German Grey then rebrushed everything with some dried brass paint in my toothbrush to bring some of the metal onto the grey.Then I applied a satin coat of Future and let the cure.

At this point it was too coppery, but that’s fine as all I needed at this point was some washes of 502 Abteilung Shadow Brown and blue oil paints thinned with odorless turpenoid. This way I still get some of the coppery look that is seen in the natural burnished brass, but it’s not overwhelming. After the oils dried overnight, I gave these parts another satin coat of Future, then airbrushed on some AK-Interactive blue filter for panzer grey. Now the parts look exactly like their real burnished brass counterparts.

Painted the colored body next. The top panels are the faux burnished brass paint-work, same as the “internals” with a white underbelly. The light blue is actually two-tone with a light blue on top fading to a pale purple towards the white and rear underside. It’s subtle, but adds visual interest. This paint job has a kind of 1950’s-esque/Steampunk combo feel to it.

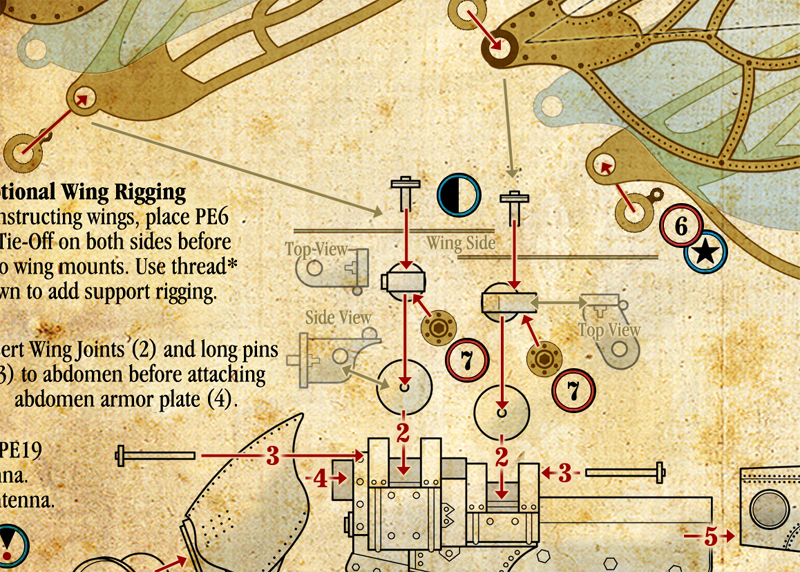
I realized that I never posted how to do the wing film easily when I did my Hornethopter… or at least how I did it. It’s not a quick process and takes patience. I designed the wing plastic to be about .5mm smaller than the wing itself so that it didn’t stick out of the edges. Choose a PE wing and have the smooth side facing you (bend up the rigging eyelets first!) Use a tiny amount of super glue at point A and B on the diagram to tack the film into place initially. Too much SG and it’ll have the film. I also found it looks great, crystal clear really, if you polish the film with some Tamiya Finish Polishing Compound, but that’s me. Now flip the piece back over and using a very thin brush, run Future Floor Acrylic (FFA) along the frames of the wing PE. This seeps underneath and acts as a clear cement when dry. The wing PE will probably be a little curled since the parts are so long (mine was anyway) so you may need to use some small paint jars to hold the PE down flush while the FFA dries. Repeat on opposite side and on other wings.

The pilot was painted with a base-coat of Tamiya Acrylics, then with oil paint. Dry-time was sped up by putting the figure under a light-bulb to heat-dry it.
To make the photoetch insert behind the glass eye pop, you REALLY want to use some clear resin in-between. Clear future or other clear paint will dry and shrink leaving silvering in the gaps between the PE detail. The clear resin does not shrink so makes one solid clear connection between the detail and the glass lens making the detail be visible from a wider angle. Test this with a drop of water between the lens and PE to see what I mean. The eye PE was painted with Mr Super Metal Color “Super Fine Silver” then with Tamiya clear orange with some pear powders mixed in.
Otherwise it’s fairly straight-forward to put it together.

Weathering was done with a basic discoloration on the blue parts and the pilot’s clothes. Then some washes were added. Finally I used the AK-Interactive Engine Oil diluted slightly with some odorless turpenoid and applied that on most of the joints and engine parts.
All progress images:


![Maude [Cyborg Action-Doll] (Files Only)](https://fichtenfoo.net/blog/wp-content/uploads/2023/01/Maude-Promos-300x300.jpg)


