Your cart is currently empty!
In Progress » Adrian Smith’s Frankenstein by Industria Mechanika » Dirty
First off, not too many Frankies left so click here to order Adrian Smith’s Frankenstein!
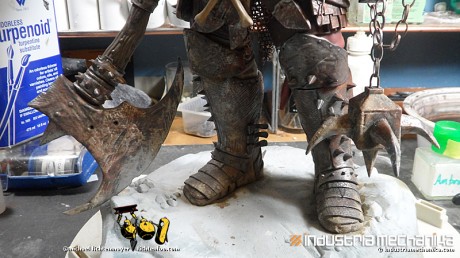
Lots to go through as I posted a shot of the feet on Facebook today and got a lot of SBS requests. Metal, rust, dust, then finally the mud.
Metal: I posted this before, but once again so it’s all in one place… For the metal I first hand-painted the parts with water-thinned Tamiya Flat Black. Then I drybrushed Mr. Metal Color Iron. When dry I buffed it with a toothbrush. Then I drybrushed on a layer of Mr. Metal Color Aluminum (little goes a long way) and buffed that in with a soft toothbrush as well.
Rust: The rust can be tricky and I tried something new here. I made a thin slurry of water and Microscale Industries “Micro Flat”. Now usually I don’t use this product as if brushed or airbrushed on, this particular bottle is more of a satin at best and at worst a semi-gloss… but it’s here and it worked for this. I took a small piece of auto sponge and dampened it with the thinned flat mixture. Then I dabbed that into some AK-Interactive Medium Rust Pigment powder and dabbed it on randomly and thinnly. Thicker in spots for effect, but thin for an overall rust. You want the metal to show through. As soon as it starts to look dry, take a stuff brush and or toothbrush and blend it in a little.
Now once you’ve done all of your rust like this it looks okay, but it’s all the same color. Next take some lighter rust pigments from AK or Mig Productions and apply them sparingly to the existing rust dry. When you’ve got the desired effect, use some thinner to set it into the initial rust layer.
Finally you need to apply a wish. I used AK-Interactive’s “Dark Wash” and first applied it with a thin brush in lines, corners, etc to make those areas pop/recede. Then after that dried I applied a “filter”… a very thin wash of 502 Abteilung (oil paint) Shadow Brown which darkens and mottles some of the rust.
Dirt/Dust: The dust is fairly easy. Using your airbrush, first spray very thin layers, almost invisible at first, and focused more on the feet of AK-Interactive “Dark Mud” and “Light Dust” liquid effects. When done, take a deerfoot brush, dampeded with odorless turpenoid and stipple/push the dust and dirt around. This will cause it to look less airbrushed and more naturally blended and set into recesses/mottled on. (This also works great for applying their streaking products and blending with downward strokes for streaks)
Mud: In a small container, mix dry plaster, pigment powder (70/30) then moisten with the AK-Interactive liquid effects. I used Light Dust and Fresh Mud. Stir this with an old crap brush then stipple this “mud” where needed around the feet and such… wherever you think mud would go. Then for randomness and additional dampness you can use more washes and liquid effects to darken the dried mud making it look damp.
That’s pretty much it for that! Hope that helps!
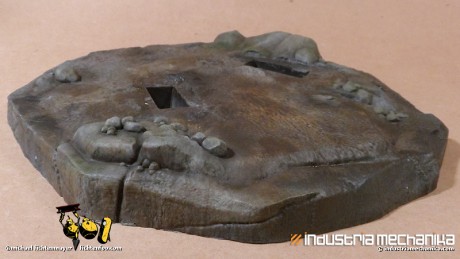
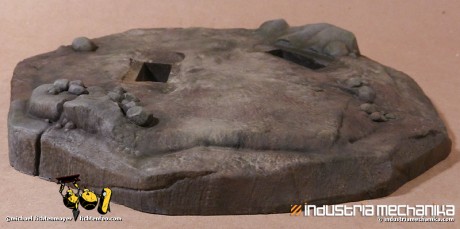
Now onto the base work’s first few steps. After priming the chunk of base with black primer, I used the following sponge techniques (I already wrote this so click here) on the rocks.The difference is after I added some washes and Slime Green effects.
After that was dry I used the same mud mixtures above and applied that to the rest of the base. I first applied a dark mud, then a light mixture stippling it with a stiff brush. Next I airbrushed on some AK-Interactive Dark Wash, then Slime Green. Finally I took it to my table and stippled the surface with a deerfoot brush and odorless turpenoid to blend it together nicely.
Next up is some leaf litter.


![Maude [Cyborg Action-Doll] (Files Only)](https://fichtenfoo.net/blog/wp-content/uploads/2023/01/Maude-Promos-300x300.jpg)


