Your cart is currently empty!
In Progress » Vorflugkontrolle
11.17.04 » The Story…
“Twenty minutes until commencement of operation!
Twenty minutes until commencement of operation!” boomed the
voice over the carrier’s intercom. The flight deck personnel hurried
around the bay, performing their pre-flight checks and assisting
the pilots with boarding their craft.
In moments, several squadrons of Fliege and Kauz armors
would be on their way to take out an unsuspecting Mercenary supply
convoy. Meanwhile, propellant tanks needed to be filled, weapons
needed to be charged, and pilots needed to be suited up. The latter
was no small task as everything needed to be checked to ensure the
pilot would be protected against the rigors of solo space-flight.
11.30.04 » Panzer Kampf Anzug Space
Type: Fliege
Since I’m still gathering parts for my Pak
Krote project, I decided to move on to the next kit. This is
the Fliege from Maschinen Krieger. I wanted to do something with
the larger scale figures so I’m making a small dio consisting of
2 figures and the Fliege.
The setting will be inside of a ship in zero-g. The
background will be a section of the ships hull with pipes, monitors
and equipment inspired by this,
but not destroyed as such. The inside will be detailed similar to
these images from a submarine…
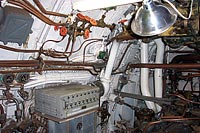

The Fliege will have the red tags that say “Remove
Before Flight” only in German as well. The figures will both
be “floating”.
By the way, “vorflugkontrolle” means “pre-flight
check” in German. Thanks to Tuffskull for the translations!
I’m giving the Fliege a blue and gray “camo”
for space use. Sure, black or dark gray would be better space camo,
but not nearly as interesting visually. Here’s the scheme with the
decals I designed for it.

I’ll be modifying the interior of the Fliege to look
more detailed since it will be posed with an open cockpit.
The first figure will be the pilot that came with
the fliege, but with a different head since I’m not big on the mustached
fellow that comes with the kit. The second figure is a flight crew
member which will be a modified Tamiya 1/20 pit crew figure.
11.30.2004 » In-Prog Extravaganza!
I’ve been slacking on creating this in-progress page,
but I’ve been taking a lot of pics and doing a lot of work to this
kit so there’s a lot to see.
11.30.2004 » Recasting the Prowler Head
Since I don’t want to use the mustached head of the
fliege pilot, I’m going to use the goofy, but more detailed one
that comes with the Prowler. I like the hat better as well.
WhiteBase posted a technique for casting with “Miliput”
so I decided this would be a great way to use the Prowler head without
“wasting” a good looking head that I could use again later.
Plus with multiple heads, I can practice and pick the best looking
one.

Basically what you do is take a glop of miliput and
coat it lightly with talcum powder. You then coat the head as well.
You push the face into the miliput (MP) and wait till the MP hardens.
After its cured, you redust the back of the head, the hard MP and
a new glop of MP and press over the top to make the other half of
the mold. When the second glop is cured, remove the piece from the
center.
Make sure you don’t have any undercuts or else you
won’t be able to remove your part later.
I drilled a few holes after my first casting attempt
failed (a). You can see the hole in the nose and back of the head
in the mold. The second attempt worked out much better (b). You
can see the “flash” on the nose and around the head compared
to the original (c). I’ll clean up all that later.
Once you have the molds made, you can put that extra
wad of miliput to use instead of making a “rock” out of
the extra. It’s not as clean as resin casting, but works great for
ball joints and other small extra parts you use a lot of.
11.30.2004 » Pilot Parts
Here’s a shot of the pilot body. I’ll be cutting and
modifying it later to have a different pose. You can see where the
pilot body comes in 2 halves in case you want to put it into the
Fliege cockpit. Since I’m not putting the pilot into the cockpit
and leaving the hatch open I’ll be detailing the insides which is
just an undetailed hollow space really.

The helmet is great if you’re planning on placing
it onto the figure which unfortunately I am not. The helmet will
be held by one of the figures.
The outside seams sanded down nicely, but there’s
a bad seam inside of the helmet which needs dealt with. Unfortunately,
my fingers are way to big to get into there with sandpaper.
My solution is “flocking”. After the helmet
is painted, I’ll be adding flocking which gives it a fluffy fabric
texture. It’s used a lot in auto modeling. First though, I used
thinned putty to smooth out the inside as best I can. Here’s some
pics.

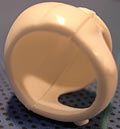
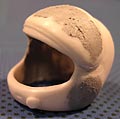
Next I’ll be adding “padding” to the inside
of the helmet with miliput. More pics about this after I do it.
11.30.2004 » Feets and Legs
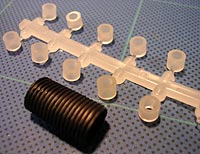
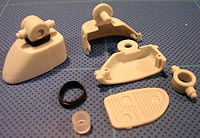
The feet and legs are a bit of a change from what
I’m used to with MG kits. They use less polycaps and the joints
are covered with a ribbed rubber tubing for detail. Here’s a shot
of the p-caps and tube.
The feet are in 2 halves with a piece for the sole
detail. These don’t fit together that great and require a lot of
putty and patience.
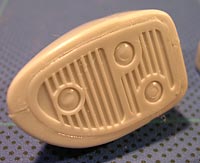
I’ve been really diggin’ Tamiyas extra thin cement
on this kit for the seams. Basically you put the two parts together
then run the water-thin cement down the seam. It melts the plastic
as well as the normal cement IMO. Both have there uses however.
The black circles are a reminder of where I need to putty to fill
sink holes.

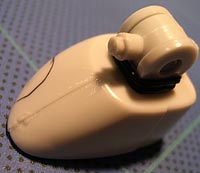
The hip joints are the weirdest of all. They consist
of a plastic ball which is held by 2 cups in the thigh halves. At
first I thought the balls would be seen so I cleaned them up and
puttied them. Later I realized that they’ll be covered by the ribbed
tubing as well.


After reading the kit
specific tips for the Fliege on Kruegers Kriger, I found that
the thighs would have to be widened a bit to prevent a gap. Plus
this keeps the balls from being too tight. (I sanded down the “cups”
to help this a bit which ended up being a mistake since after all
was done, the balls are now too loose. Ahh well… white glue will
fix that.) So I glued the thighs together with a shim of really
thin styrene. When the glue dried, I sliced down the excess with
my blade. I also removed the details along the seams and added them
back in later.

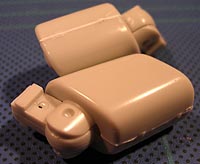
Here’s a shot of the puttied and sanded down leg.
Looks good, but we’ll see how it looks after it’s primed. Notice
the “T” connector?The calves were supposed to fit over
that. Well, I like to keep as much of the kit separate as possible,
so I cut the “boxes” that hold the “T” so that
the T could slide in and be glued after painting. The calves have
since been glued and sanded.
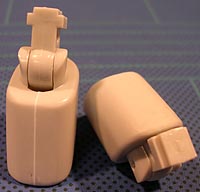

Here’s the finished Thigh pic with the details.

11.30.2004 » Body and Cockpit
The cockpit was really made to have the pilot bust
in it so as a result it’s very underdetailed. Which is fine since
with the bust, you wouldn’t see anything anyway. However, I am having
an open cockpit without a figure, so I needed to add some details.
You can see the lack of detail and the bust support pegs in these
pics.


I had to sand down the bottom inside of the hatch
to allow it to open and close properly. In the first pic, you can
see how far it’d go before getting stuck.
In the second image you can see some of my added details
to the cockpit. These were in my “big bag-O-resin” that
I picked up at the Morgantown show for $5. Basically they’re the
sleeves for control levers in aircraft, but they looked like hose
connectors to me so I added them inside with some “hose”
made from wire. There will be more hoses coming out from the holes
in the connectors later. You can also see where I cut off the connector
pegs from the figure/arms. Since this will be fixed posed, I didn’t
need the peg holes anyway. They’ll be covered with the modified
shoulder padding intended for the figure bust. For those that don’t
know, the pilots arms would go through those holes and into the
Fliege’s arms.


The hatch had a pretty good sized sink hole on the
front. I applied Tamiya putty with a q-tip and sanded it smooth.
Still needs a little pin-hole fixed, but looks good.


So in the cockpit, the pilots legs would go into the
legs of the Fliege. The cockpit however is just a hole at the bottom.
I wanted to make the leg holes, or at least an approximation of
the leg holes, so I pulled melted styrene sheet over 2 exacto handles
to make the leg holes area.


Inside the cockpit I used a bent piece of styrene
to first cover the leg joint connectors. Then I glued in the leg
“cups”. After the glue dried, I used miliput and “blended”
the leg hole cups into the rest of the cockpit and covered a few
seams as well. Aside from the head/backrest, this will all be covered
with flocking to make the inside look insulated and to cover any
imperfections.
Now this isn’t the perfect design set-up for this
type of cockpit as the pilot would be very uncomfortable, but I
had to leave room for the leg support rods. It’s still better than
what was there though.
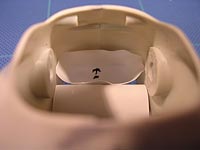

In the above pics, you can see where I drilled out
the seatbelt holes in the seat. I’ll be making seatbelts from thin
styrene, just like I did with my Cloud 09’s straps. Below is an
image of my 2 seat belt buckles so far. They still need some shaping.
I still need to make the other end of the buckles for the front
of the Fliege’s cockpit as well.

12.02.2004 » Body, Arms and Booster
Guards
Here’s more shots of the body as of yesterday. The
sensors have been glued onto the front and the panel lines on the
hatches have been rescribed and molds redrilled.
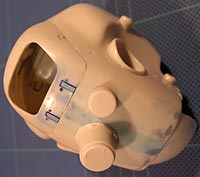

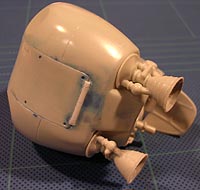
Here’s a shot of the arms. The hand is from a 1/60
scale Patlabor kit. The black rubber tubes weren’t working that
great so instead of using them, I sculpted new ribbed covers made
from miliput over the joints. The arms no longer bend, but this
will be a fixed posed kit anyway.

I wanted to make some booster armors based off of
what I saw on someone’s Kauz kit. I wanted rounded armor pieces.
I first tried bending them with my bare fingers in hot water and
over a candle. Both yielded sore fingers. So after some thought,
I wrapped the armor piece over some PVC pipe and taped it so that
it would hold it’s shape. I then rolled the PVC over a candle for
a bit. After removing the tape and armor, the shape held and had
a perfect roundness to it.
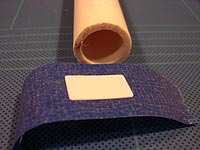

Afterwards, I glued some bent styrene strips and rivets
to it for detail and to connect it to the mech.


Here’s some shots of it sticky-tacked to the hull.


12.08.2004 » Crewman
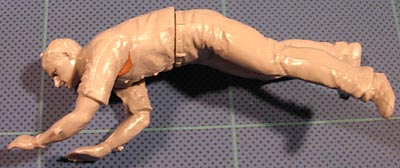
My Tamiya 1/20 Pit Crew set arrived the other day
and I got started on the crewman for my dio. Luckily there was one
figure in pants as the rest were wearing shorts. I used his legs,
another figures torso, and arms from two other figures to make this
guy in the zero-G pose I wanted. I used sticky-tack to test poses
out with the various limbs till I found one that I liked. I used
my exacto to scrape off all of the flash and needle files to get
into the recesses.
Once the flash was cleaned up a bit, I glued the figure
together. The last 3 images show where I’ll need to putty and reshape
to blend the misc limbs to this body. The blue lines are where I
was testing out my new seams for the shirt.


12.08.2004 » Pilot
The pilot is taking quite a bit of work to repose.
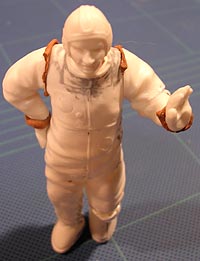
I need him to be in a floating position as well. His pose can remain
somewhat stiff though as he is in a bulky space suit. To repose
him, I wanted to bend one of his legs and reposition an arm so that
the hand can rest on the Fliege. That hand will be where he is connected
to be in the floating pose. Same for the crewman.
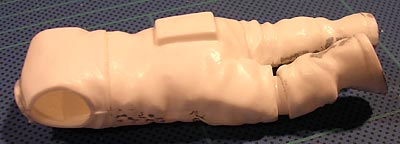
The first images show the leg mods so far. First I
hacked off the leg at the knee. Then I cut a taper in the lower
leg so that I can bend it.. (image 2) I added a bit of styrene tube
into the leg cavity to extend the leg a bit since I had to remove
some for bend. Next I’ll use some Miliput to fill in and shape the
knee.
For the arms, both were in the “hands on hips”
position. O cut the left arm in half and rotated it so that the
lower arm was pointing outward. This way, I can add the hand in
an up position so that he looks like he’s resting his hand on the
Fliege while floating.




12.08.2004 » Hull
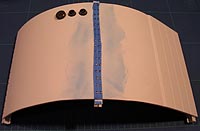
I got to start the backdrop of the hull as well. This
was made from .06 inch styrene heat-bent over a very hot
pasta pot. I-beams were added to support the thinner sheet of styrene
that will be the inner hull and will stick out for visual interest.
A panel line was scribed in the outside and sidewalk scribed styrene
sheet was added to simulate ceramic heat resistant tiles.
For the rivets, I took a tip from the StarShip Modeler
forums and used straight pins that were cut short. These were put
into pin-viced holes and CA glued.
The hull is attached to the wooden base using brass
rod and tubing.




12.17.2004 » Figure Mods & TV
Since my last update, I carved up the excess on the
crewman and used miliput to fill in gaps and reshape a bit. The
images below are of the dried and unsanded miliput. I’ve since sanded
them down and reshaped them a but with files and sandpaper. I have
also applied a coat of tamiya putty and will take more pics when
that is dried and sanded.


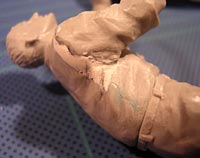
Here’s the pilots leg. You can see where I added the
miliput around the styrene tube to bulk it up. Next is more shaping
and putty.


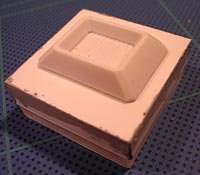
For inside of the hull, I’m adding a TV monitor. I’ll
be lighting this up with some LEDs. It’s made from styrene and a
clear plastic sprue “box” that was protecting a patlabor
lens. The screen will be frosted acetate with a printed transparency
over it for the monitor interface.

12.17.2004 » Pilot Ready to Prime /
Hull
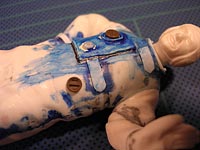
The pilot is just about ready for priming. I have
a few little dots of putty left to sand, then I can prime and see
if there.s anything major that needs fixed. You can see in the photos
the details I changed/added to the pilot suit. Originally on the
chest there was some shallow details. Not sure what it was exactly.
I used some miliput and extra parts from an M-8 and made it into
some ventilation equipment and a air hose connector. Mode detailes
were added where they were shallow on the waist and the back. Treads
were added to the bottoms of the boots.




I also started detailing the inside of the hull. I
made a cabinet from scraps of styrene, and a rise on the floor which
will contain lighting. The cabinet will hold batteries. I’m still
working on the doors.
The detail on the wall is clapboard siding shaped
styrene on the lower portion and to change the texture a bit, IDE
cable on the top. Pipes, tubes, and misc greebles from my $5 bag-O-resin
will be added. The floor is 1/48 scale diamond plate embossed styrene.
The 1/20 was WAY too big. The 1/48 looks far more realistic.


12.22.2004 » More Hull Detail
Here’s some pics of the added hull detail so far.
I’m using various sizes of brass and aluminum tubing for pipes and
wires for… well wires. I’m adding some misc. stuff as well such
as bed rolls, computer equipment, the tv, and eventually I’ll be
scratching some gagues and valve knobs for the pipes. The cabinet
doors were cut from thick styrene (.06″) and the edges were
beveled using a power sander.


01.02.05 » Nice Bike…
Where Do You Put The Batteries?
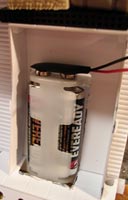
So like I said before, this piece will have some lighting.
The batteries will be hidden inside of the cabinet. Here’s a few
shots.

01.02.05 » Priming and Painting!
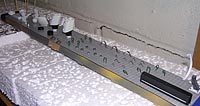
Woo Hoo! Finally after all the construction, I’ve
started painting! So first off, an obligatory shot of the skewer
forest and duct-tape small parts holder.

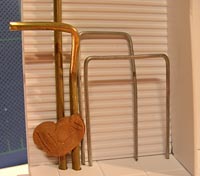
So first I primed all the parts with a dark gray Duplicolor
primer. Nice stuff! After that dried, I gave all of the pipe parts
a coat of a brown-orange copperish color. I have a bottle of Tamiya
copper, but it’s VERY sparkly and wouldn’t look right on this piece.
With the copper colored (non-metallic) paint, I can use some copper
rub-n-buff over it for the drybrushed shine where needed for a more
realistic and in-scale look.
The other pic is of the main Fliege body. I first
painted the insides and sensor a dark gray. Next, I masked off the
door and sensor and sprayed flat white where I needed it for the
door and other sensor. Next I’ll mask and paint it all a light gray
color, then add the blue camo on the main body.


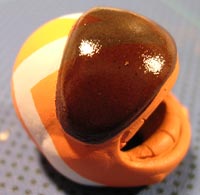
Finally for this update, I started painting the helmet.
After priming with duplicolor, then spraying the helmet with flat
white, I masked off the stripes with Tamiya tape. I then sprayed
the whole helmet a yellow orange color. When dry, I removed the
stripe masking and masked off the visor.
To make the visor look tinted without painting it
just solid gloss black, sprayed it with a mixture of 1:1 Future
and Tamiya Gloss Black. I slowly built up several layers of this.
It allowed the striped to show through and makes the visor look
like an added clear part instead of just a raised area of the helmet.
Adding the stripes makes the effect more noticible.
There are 2 pics of the helmet tinting. One without
and the second with a flash. I had a hard time photographing the
visor so you can see the stripes like you can with the naked eye.
Next I need to hand paint the rim of the visor and the added padding
a dark gray. Then I’ll coat the whole helmet with Future to make
it gloss and apply flocking to the padding. I’ll also be brushing
on many layers of Future to the visor to smooth out the slight lumpiness
I got with the gloss black mixture.


01.03.05 » Copper!
My idea for better looking copper worked out great!
I went to the craft store today to purchase some copper Rub-n-Buff.
They didn’t have it. However they had a color called “Autumn
Gold” which was basically copper colored. I purchased it.
My brass tubes were already primed and painted with
a flat brown-orange color. (BTW, the raised areas on the pipes are
just Tamiya tape) First I tried drybrushing it, but it didn’t look
quite right. Next I tried putting it on a q-tip and buffing it on.
PERFECT! In the first pic, you can see the difference between the
plain flat brown orange pipe and the copper buffed. The second pic
is drybrushed. Later I’ll post shade it with a “soot”
color around the connectors.


I also painted the light gray of the armor and the
blue-gray camo for the body today. First I masked off the white
that I painted yesterday. Then I painted all the armor the light
gray. Next I used my airbrush and made a faded “spotted”
camo pattern on the top-front of the suit. Then I faded a blue-gray
around the window area. Finally I removed the masking tape and you
can see the results below. The suit looks bluer in person than in
these pics. Even my blue cutting mat looks dulled for whatever reason.


01.04.05 » Eighty Four
I did some searching on navy ships last night for
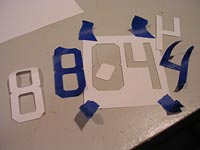
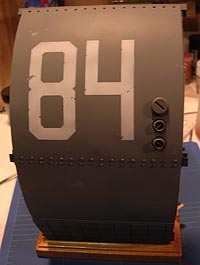
number reference. A lot of what I saw had numbers similar to what
I did below. Stenciled block lettering. Instead of a huge decal,
I decided to mask this and spray it on. First I designed, then printed
the numbers out in the size I needed them. I taped this over several
strips of tape which were latered on my cutting mat. I cut the paper
and tape at once and ended up with a great stencil. I applied it
to the hull, added additional masking and paper for overspray, and
sprayed on the numbers. I didn’t spray them on very thick. I wanted
some of the gray beneath to show through as a slight weathered/stenciled
effect. Why 84? Don’t know… it was a good year with great music.
The inner walls were painted a thin white over a dark
gray primer. A lot of my hull painting is being done thin to allow
the primer to show a bit so that it looks old, worn and dirty. More
grime will be added later.
For the diamond plate, cabinet, light step, and thingy
on the wall, I used a blue-green-gray color similar to my heating
ducts in my basement and of old metal cabinets. I gave the floor
a coat of futuer, then masked off some squares to warn people of
the d-rings sticking up. I lightly sprayed the squares with yellow,
then I took a toothbrush and gave them a good scrubbing. This removed
some of the paint to make it look somewhat worn. More yellow was
taken off by slightly rubbing the yellow with the side of a bamboo
skewer.



01.08.05 » Chip off the old paint…
So I’ve been really into this project the past week,
plus I am finishing up some freelance, so that means a lack of updates.
No worries though since I’ve still been taking pics.
First up is the clear covers for the gauges. These
were made but heating up small squares of clear vacuform plastic
and pulling them down over the end of a cheap rounded exacto-handle.
I sliced off the rounded tips and will glue them over the gauges
when I’m close to being done.


Next up, I started decaling and weathering the kit.
First up I put 2 coats of Future Floor Acrylic down on the kit.
After that cured, I decaled it. Decaling went quick since it’s not
a very large kit. The decals as usual are my own designs.
Normally I’d seal the kit with another coat of Future,
but some of the thin panel lines are really starting to fill up.
So before I coat it again for a panel line wash, I started the paint
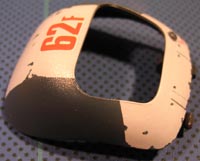
chips. I’ve never done chipped paint since I mostly work with 1/100
scale stuff which paint chips would be out of scale on.
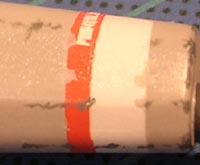
I read an article on chipped paint effects (here)
which really helped. First I painted on the chips over the white
stripes with the color underneath to make the white look like it
was flaking in spots. Over some of those chips and on the rest of
the kit I used a medium gray to simulate paint chipped off the primer
coat. Them on a few of thos chips, I used some rub and buff to make
it look like the primer had chipped to the bare metal.
Since this is a combat robot, I chipped on any surface
that may come into contact with any surface such as walls, terrain,
other mechs, etc… After I put my next coat of future on to do
the panel lines, I’ll start weathering the kit with smoke, dust
and rust. Since it’s a space-suit, I won’t be doing too much in
the way of weathering since there’s not much mud and earth in space.
The dust will be from lunar/asteroid missions and general storage.



01.12.05 » Flat Coat and Greebles
Before flat-coating the parts, I washed the panel
lines with artist’s watercolor. The watercolors worked great. I
used a mixture of Burnt Sienne, Black and White and diluted it with
water. I applied the wash with a small brush only where needed.
In reallity, I applied it as I would with a pen… carefully. What
I like about the watercolor its that it cleans off with water instead
of a solvent that could damage the undercoats.
I applied the flat coat of Future (70% Future Floor
Acrylic / 30% Tamiya Flat Base) and the parts look great.
Also pictured is the “remove before flight”
plugs for the rocket nozzels. They were made from headlight covers
and d-rings from an M-8 Greyhound kit. The lens in the gun sight
is just a straight pin dipped in Tamiya Clear Red. It’s the most
beautiful lens I’ve ever done. Nice and shiny!


Here are the insides of the hatch and cockpit with
the flocking applied. I still need to add some more greebles to
the cockpit and a little more “wear” to the leather seats
and arm sockets. I was a little worried about the flocking looking
good and not out of scale, but the end result is great. Better than
what you can see in the pics.


Here’s the kit without the arms added yet. I had some
small black o-rings that fit perfectly in the arm holes. I have
already cut the pegs off the arms and glued them into the holes
with epoxy. Pics of that later.

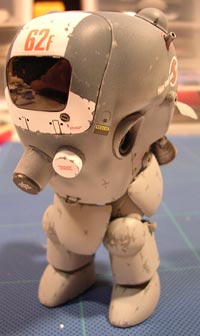
This is the insulation material (for doors and windows)
that I got at Wal-Mart for the gap between the inner and outer ship
hull. I’ve already applied it and it looks fantastic. Pics later.


The first pic is of the “clamp lamp” I made
to attach to the large pipe. The clamp was made from green floral
wire whice was bent into shape and painted. The “rubber grips”
is just cheap thick acryllic paint. The second pic is of the lenses
before I applied them to the gauges. I sprayed them with a touch
of transparent yellow to make them look old.


Lastly for this update is a shot of the base in-progress.
Note the clamp lamp.

01.12.05 » Holy Crap! Large In-prog
Pics!
Here’s the latest…

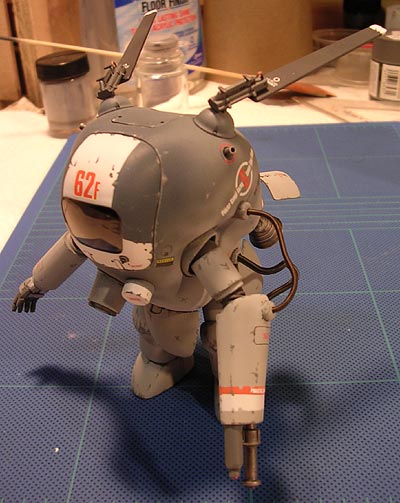


Here’s the outside hull paint chips… still gotta
weather it. And here’s the inside with the LED’s lighting it in
the dark. Obviously, this was never meant to be a fully lit piece
like the Zaku dio. Neat effect though.

01.13.05 » Hull Weathering
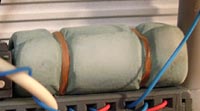
First off, I shaded my bedrolls using oil paints.
I had painted them with Tamiya light blue (which is more of a blue-green)
first, then applied 2 gloss coats and 1 flat coat of Future. The
flat coat gave the surface some tooth.
I brushed on my oils in spots where I wanted lights
and darks, then let them sit a few minutes. Next I took a stiff
small brush and blended the light and dark spots into the base color.
I’m very happy with the results, but the pics aren’t doing it justice.

Okay… I really like MIG pigments. This was my first
time using them and I must say, they work so much better than pastels.
They stay on the kit as opposed to just blowing off and blend really
nicely.

Here’s a shot of the “insulation” between
the hull layers. The second pic is of the clamp lamp with some dirty
hand/finger smudges from adjusting the light.
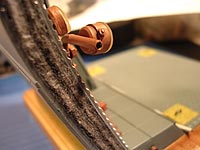

Next in a close-up of the floor d-rings. I rusted
them a bit. I figure the inside of the ship may be humid from all
the perspiration and people on board. Plus I wanted the ship to
have an old worn look to it. I used MIG light dust to dirty the
floor and MIG smoke and a tortillion to make the dirty scrapes on
the floor. The second pic is of the cabinet doors with more rust,
dirt, and finger prints.


Here’s a full shot of the inside. All I have left
to do is add the pictures, postits, fliers, etc to the doors/wall.
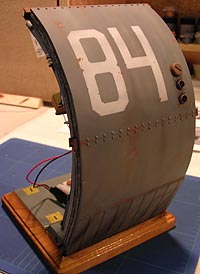
The outside hull was first streaked with black smoke on the tiles
simulate reentry burn. Light dust was then streaked vertically to
give a dusty old look from countless planet landings. Around the
paint chips, rust and light rust was applied using a small brush
and water. I then tok a tortillion and blended them out a bit and
streaked them down. I then rusted the i-beams using the same colors.



01.14.05 » Personal Touches
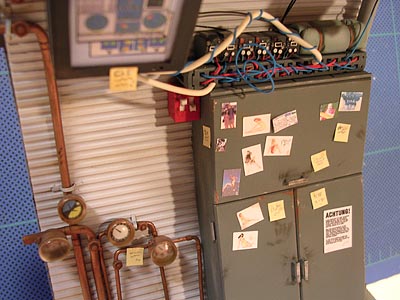
The inside is almost done. I added pics and post-its
to the cabinet doors. Now I just need to “yellow” some
of them a bit with some tea to make them look old. I think they
add another level of realism to the piece. I used white glue to
paste them up, but might add little slices of tape to make them
look “attached”. I might make a sign to but above the
gauges to fill that space. It looks too empty.

01.15.05 » Hi-Res
Images of Fliege and Base
That’s right! The Fliege and Base
are done for now. After I finish the figures,
I’ll put everything together and take the final
images with the lights on.
01.23.05 » Figure
Painting
Okay, it’s been a bit since my last
update, but I’ve been rather busy. First off,
I’d like to thank Craig Whitaker (aka MONGO_MEL
at www.armorama.com)
who I met at my local IPMS meetings for giving
my lots of advice on figure painting. He even
sent me a link to a great article he wrote on
the subject. Click
here. Craig does fantastic work so check out
the article. I deviated from the article a bit
for the Fliege figures at first, but followed
it to the letter for the heads.
First I base-coated the figures
with Tamiya acrylics, 2 coats of Future floor
acrylic and 1 coat of flattened Future. The flesh
tone was painted first, then masked off for the
clothing colors. The hair, hat, gloves and shoes
were hand-painted with the Tamiya.


After all of that cured for a day,
I began using my oil paints to do the shading.
First off I laid down a darker color which I custom
mixed to go with the olive drab, into the folds
and recesses. Then with a flat blender brush,
I blended the darker colors into the base coat.


Next I added titanium white on parts
where the light would hit. I used the same blender
brush to blend that color in. I had to redo the
crewmans pants because I smudged them all up while
panting the head.


I haven’t taken pics of the heads
yet because they’re drying and I don’t want to
risk smudging them, but when they’re dry, I’ll
write up about them and take some pics. Oils take
a while to dry and I don’t have a great place
to use heat to dry them faster, so I’m playing
a little waiting game.


![Maude [Cyborg Action-Doll] (Files Only)](https://fichtenfoo.net/blog/wp-content/uploads/2023/01/Maude-Promos-300x300.jpg)


