


Your cart is currently empty!
In Progress » Shadow of the Minotaur » Stone Texture
I decided to jump the gun a bit and start texturing the stones. I was told that it’s best to wait until you are completely roughed to start the final detailing, but I had nothing better to do and was anxious. I started with the following tools…

I began by using the dental tools to create pits and various surface changes on the rocks. Then I used the toothbrush and stiff round brush to stipple a texture onto the stones. Here’s the result: (Click the pics for larger versions.)

It looked pretty good, but the surface was just massive amounts of pinholes with smooth areas in between. I decided to see if there was an alternative to the Sculpey Dilutant (softener) and found that both alcohol and turpenoid work great. I also found this great tutorial on sculpting creatures with Sculpey which gave me better ideas to “complete” the texture. It turns out that I was on the right path, but just needed to take it a bit further. So back to the toolbox…

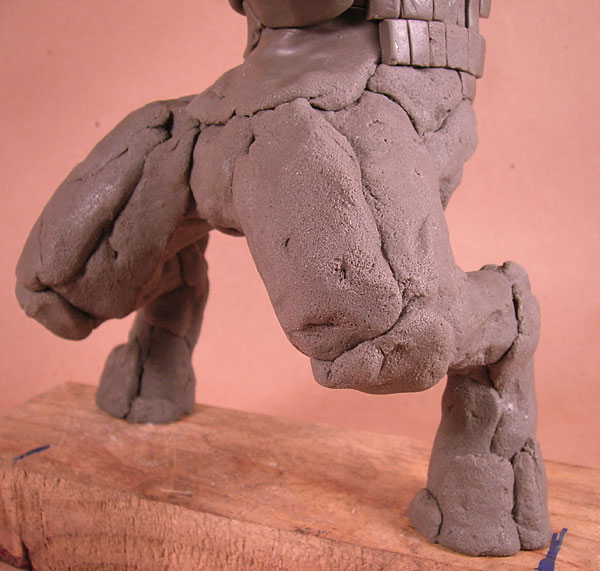
I decided to use turpenoid which dries slower than alcohol. I used soft brushes to work the pitted surfaces. Basically I brushed the dilutant all around which softened the clay and left me with a better, more mottled texture with far fewer pinholes. The leftover holes are great as natural rock has small pits and such. While still moist I used pieces of cheap sponge to stipple the surface which resulted in what looks like a rough stone appearance. A small but of sponce held in some hemostats works great for getting into tight areas like under the legs. Here’s the result. Click the pics for larger versions.

You can’t see too much difference between the images, but the final results are great. Now I just need to create a different texture for the cut stone bricks. I’m thinking back of a paintbrush to simulate chissel marks then a slight softer texture applied over that. Click the pics for larger versions.


![Maude [Cyborg Action-Doll] (Files Only)](https://fichtenfoo.net/blog/wp-content/uploads/2023/01/Maude-Promos-300x300.jpg)


