Your cart is currently empty!
In Progress » Remora Pair » Basework

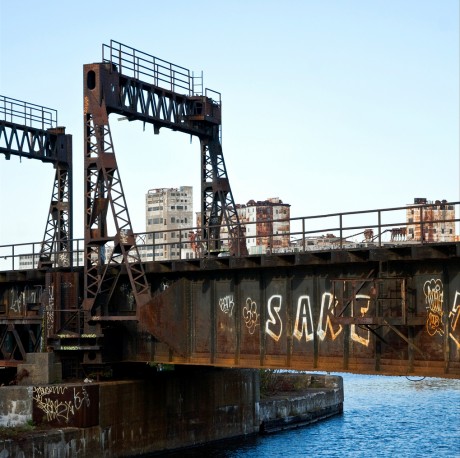
(photo found on Flickr in Industrial Decay Network group)
I decided to do a section of bridge over some water for the base of my Remora. The Remora will be floating above the bridge, moored to a tower similar to what’s shown in the image. The mooring point will be what holds the Remora up simulating hovering. I’ll go into it more in future updates, but for now I’m testing how I’d like to paint the concrete bridge pylons based on the reference
The pylons were made from a mixture of DAP plaster and “grit”. The grit is a mixture of concrete sand (the stuff with the fine pebbles included) white, brown and black fine ballast from Woodland Scenics and medium buff ballast. I used about 1 cup plaster, 1/2 cup grit and 1/2 cup of water and poured that into my form which I made from styrene. It takes a few days for the plaster to fully cure and stop feeling wet to the touch, but sets up and can be removed from the mold in about an hour.
My first largest pylon broke in half todaywhile I was drilling a hole so I poured 2 more just in case. I’ll have to wait a few days to deal with them now. The small pylon was scrubbed to remove the smooth finish (as seen in the untouched round leftover pour). I used a scotchbrite pad and toothbrush. Various tools were used to do the chipping and cracks.
I tried several methods for the paint, but what I found worked best was Gouache which is like a dense watercolor paint. I used thin washes of it to tine the raw plaster. The grit shows through and adds to the scale concrete texture. The lime(salt?) seepage stains were done using thicker washes at first initially, then followed up with a putty knife and full-thickness white gouache. You can see the thick streaks on the left and the thinner initial background stains on the right.
Once my larger pylons dry, I’ll scrub them and start painting them to match.


![Maude [Cyborg Action-Doll] (Files Only)](https://fichtenfoo.net/blog/wp-content/uploads/2023/01/Maude-Promos-300x300.jpg)


