


Your cart is currently empty!
In Progress » Lighthouse Standoff
01.24.08 » Source, Concepts &
Initial Scratchbuilding
I’ve been wanting to make a lighthouse for quite
a while now. One of my original ideas for my Griffon dio was
to place it flying near one. After receiving the UC Hardgraph
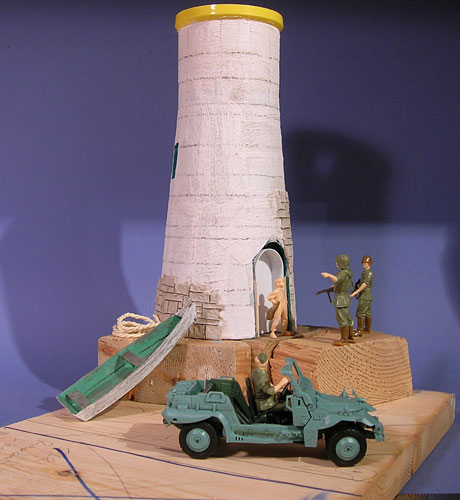
Cyclops Set, the idea came back to me. This diorama will feature
a young boy standing off against a team of Zeon soldiers sent
to secure the family lighthouse as a strategic lookout.
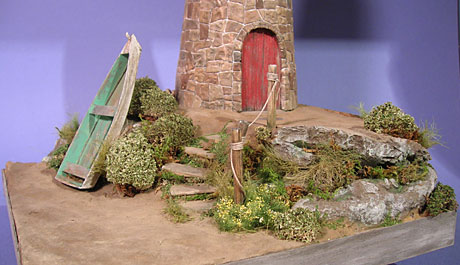
This diorama, like my Fireball
one, will take advantage of the vertical space in my display
cases. The base will be small, but the setting will reach
near the vertical limits of my display. I’m estimating this
to be roughly 13-14 inches tall when done. The base is made
from some scrap lumber and will have the lighthouse, rocks,
foliage, derelict rowboat, nautical junk, and other materials
added on top of it.
01.24.08 » The Lighthouse and
Scenery
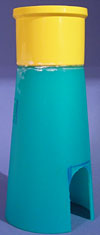
The lighthouse is being scratchbuilt using an
old drinking cup and spraypaint lid as a base. These were
epoxied together and coated with a layer of stucco texture
get to give the surface tooth for the next step being the
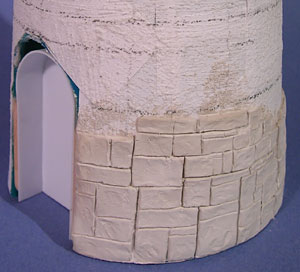
large stone facade. The stones are slowly being added in sections
with Amaco Marblex air-drying clay. Thin slabs are being applied
to the outside then the brick pattern sculpted in. The bricks
don’t need to be too detailed as I’ll later apply the mortar
and a layer of in-scale-stucco to the outside.
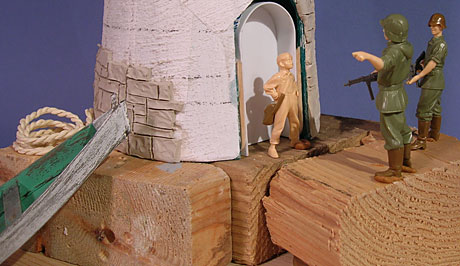
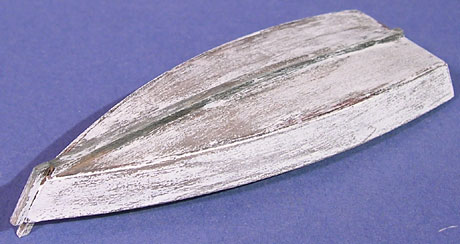
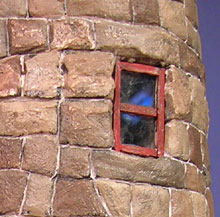
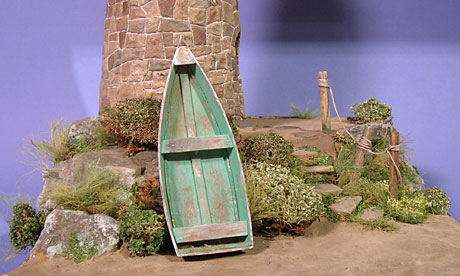
 The
The
arched door and boat are made from thin basswood. I used some
techniques I learned from Chuck
Doan’s website to paint and detail it to this point. I
still need to make some black iron hinges and handle to the
door and oar supports to the boat. The boat is based on plans
for a
single-sheet plywood rowboat here. I scaled them down
for this dio.
After cutting the wood and gluing it into shape,
I applied a few washes of black india ink thinned with water.
This gives the wood objects an old weathered look.
When that is dry you ready the color of acrylic
paint you want to apply to the objects. I used liquitex and
apple barrel acrylics here. Apply a wash of thinner (I used
mineral spirits) to the wood surface. Just apply to a section
at a time. When that begins to dry, brush on a thin coat or
two of your acrylic paint.
When that dries in a minute or two, apply sticky
tape to the painted surface and pull it off. This lifts the
paint from the wood giving you a great chipped paint on wood
look. Afterwards you can weather it further such as the water
damage added to the bottom of the door.


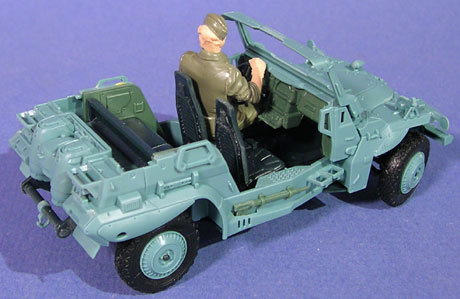
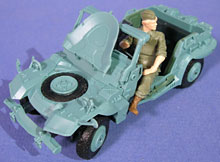
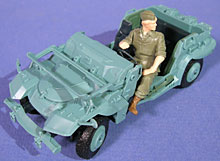
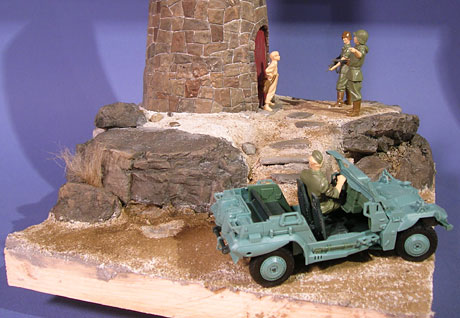
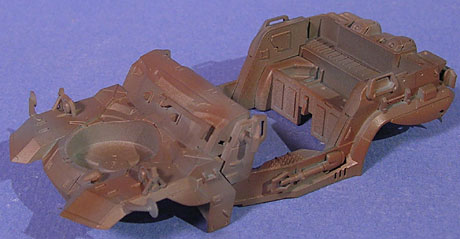
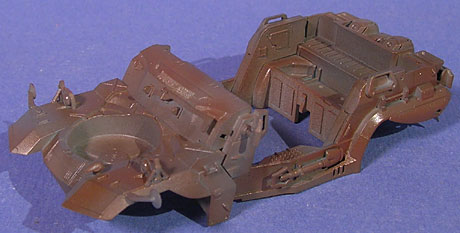
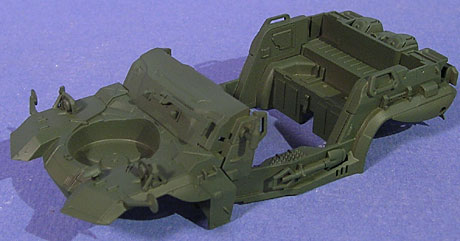
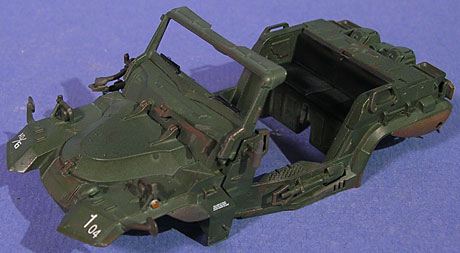
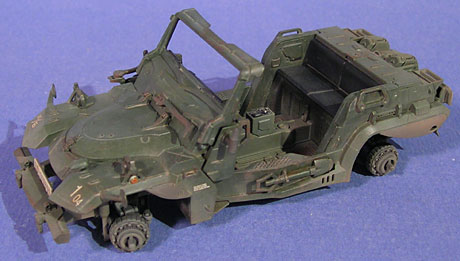
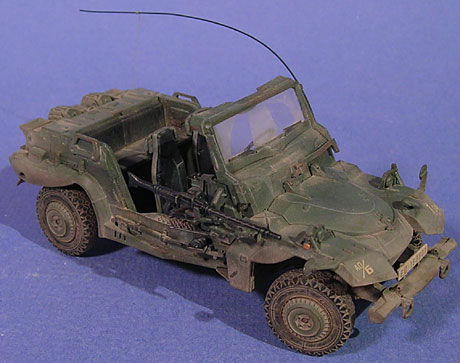
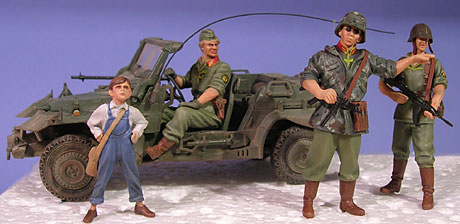
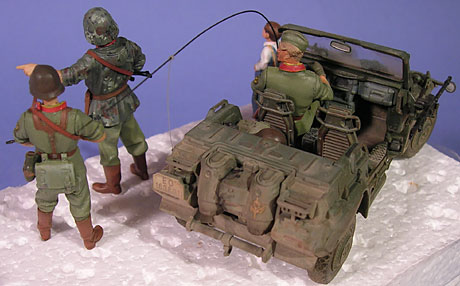
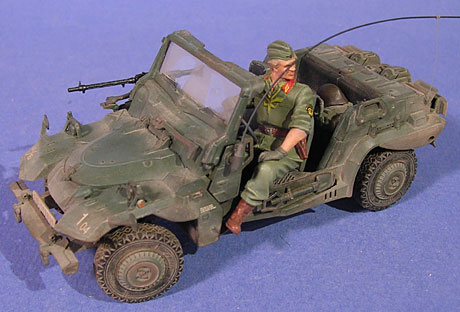
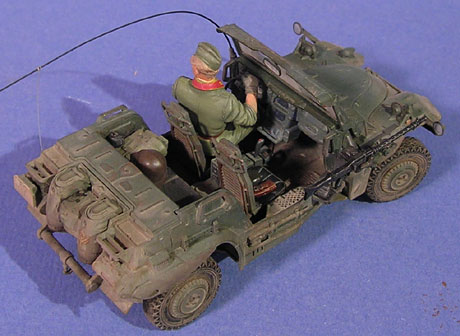
01.24.08 » PVN.3/2 Zeon Technical
The Cyclops set jeep is small, but has a lot
of detail. The wheels are a vinyl material which have no flash,
but will need the sprue marks sanded down. The front wheels
are “steerable” which is a nice touch and the underside
is nicely detailed. A hatch in the back conceals the tarp
roof and the front hood hatch contains a spare tire. The engine
is located in the rear of this vehicle. The driver and other
figures, like the jeep, are molded in color and are nicely
detailed. The faces are a little soft in the detail area,
but if you wanted you could replace the heads with aftermarket
ones.
The jeep is a quick and easy build however.
What you see above took all of 3 hours to cut, sand, and put
together.

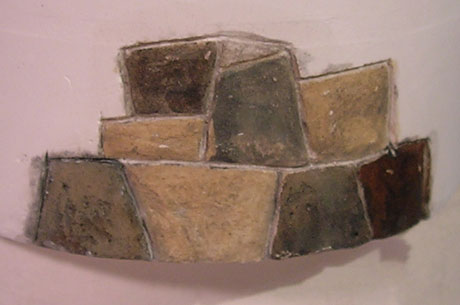
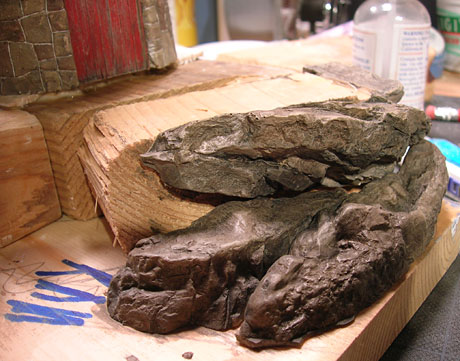
01.24.08 » New Stones
I was messing around with a large piece of plaster
I poured the other day… carving some stones into it. The
stones look so good that I’m pitching what I have so far on
the lighthouse and starting over with an all-plaster version.
To do this I’ve poured plaster into the same shape cup I was
using on the first. Then later I’ll carve the stones into
it with dental tools, then tap with a wire brush. It’s easy
to carve, looks MUCH better/more real and has inspired me
to do a natural stone lighthouse instead.
To paint the stones I thin some india ink and
various Apple Barrel acrylics. First I brush on a thin layer
of the paint, then a thin layer of the ink. Less-thinned ink
makes darker stones. More thinned paint and ink makes for
lighter ones. For the mortar between I just rescribe into
the bare plaster to reveal the natural white, then paint the
bare plaster with a thin india ink/paint mix to tint it. Follow
it all up with a coat of prepared matt medium and viola!
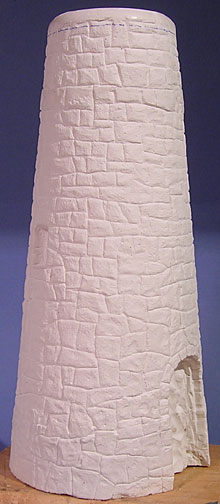
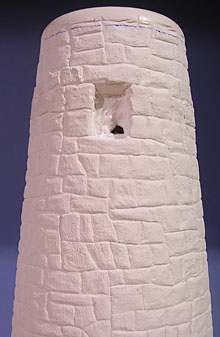
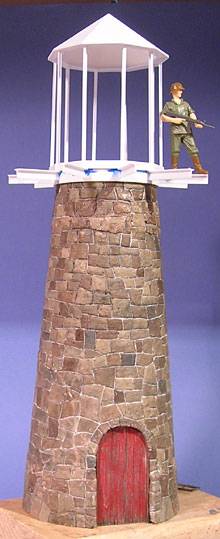
01.29.08 » Blistering Heights
After 4 days of carving then roughing up with
a wire and nylon brush, the lighthouse tower is complete.
And I havea few blisters from all that carving to prove it!
Here’s pics. Next up is the upper deck and light components.

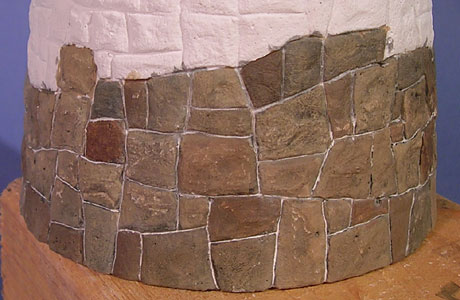
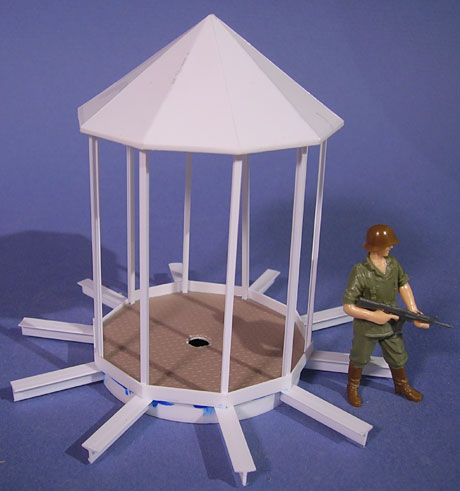
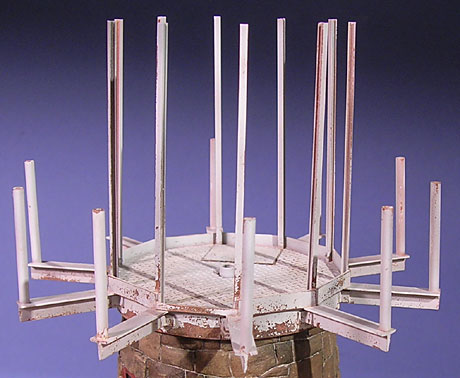
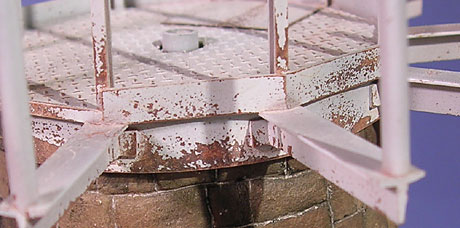
01.30.08 » Top of the Tower
Today I finished painting the stones and started
work on the top part of the lighthouse. After looking at several
lighthouse photos I decided to go with a decagonal (10-sided)
shaped top. The thin I-beams will hold clear plastic for the
window panes. The T-beams around the outer perimeter are the
supports for the balcony floor which will be wooden planks
like a deck. You can also see that I have one of the 2 windows
installed on the tower.

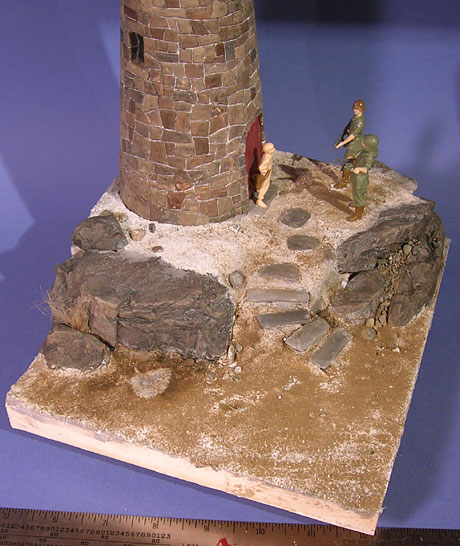
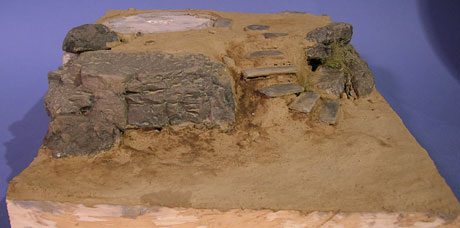
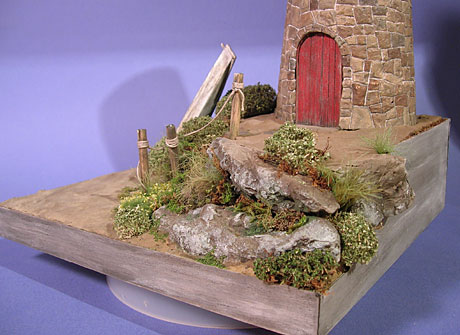
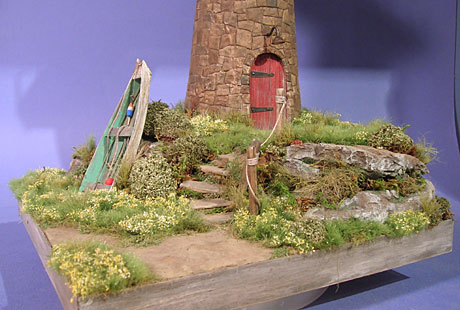
02.02.08 » Land Ho!
Happy Groundhog Day! How appropriate then that
this update deals with the groundwork for this diorama. As
seen above, the base is pieces of scrap lumber glued and stacked
to make a sturdy platform. Added to this was rocks made from
plaster. These were made using the Woodland Scenics rock molds
purchased at my LHS. They look great and paint up beautifully.
Once the rocks and such were glued in place, I covered the
base in celluclay to blend in the ground to the rocks and
make several sloped areas such as the slope for the stone
steps. These too were made from plaster.
Over the celluclay I sifted a mixture of dirt,
sand, plaster and small rocks. There were pressed into the
celluclay and brushed off of the rocks. Larger pebbles were
added afterwards and pressed in. I then steamed the plaster
coating using my iron to add moisture via a very fine mist
rather than spraying it with a spray bottle which usually
makes drippy messes, pits, and craters for me. Once this dries,
I’ll paint it up and apply some washes and folliage.


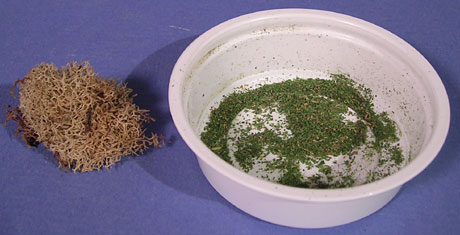
02.07.08 » And now some green…
Once all of the plaster/dirt/celluclay had dried
it was time to add the dirt coloring and some greenery. First
I gave all of the plaster/dirt a coat of Prepared Matte Medium
to lock and seal it. Then once dry, I painted the base in
a mixture of real dirt I sifted and water. Basically, paint
with mud. Once again I gave that a coat of Matte Medium thinned
with water aka Prepared Matte Medium. When dry I dusted it
all with various pigment powders such as Russian Earth, Dry
Mud and Beach Sand.
I spent a day or two experimenting with creating
moss. The moss
and lichen tutorial can be seen here. My moss
mixture was applied thinly in spots that are shady and would
recieve some water. I also applied some lichen to the rocks
for added texture/color.

Wooden dows were cut, weathered, mossed and
inserted as supports for a rope railing. The rope is beige
crochet string which was perfect for this. The plants are
a mixture of acrylic-colored and teased out hemp rope, real
sheet moss, real lichen, woodland scenics fine-leaf foliage
and silflor spring grass and flowering meadows. And that’s
just for what’s seen there so far. I plan on raiding the spice
cabinet for some other folliage and litter.

Lastly, here’s the top of the lighthouse so
far. The light cylinder is clear PVC, large styrene tubing
and brass sheet. It sits on the small servo which will spin
the whole thing to reflect the light 360 degrees.

02.07.08 » BRING ME A SHRUBERY!
Nnnnnee! Nee. I needed some small bushes to
fill out some of the dio and bring it to life. Again I turned
to research and found that applying spices (parsley especially
works nice) or dried crushed up green tree leaves to brown
lichen brushed with white glue works especially well. Using
different mixtures of spices or crushed leaves to produce
different colors on different bushes makes for a more random/more
organic look. Unter the bushes I shoved crushed brown leaves
and brown bits of dried moss for the dead stuff from prior
seasons.
The ground leaves also work well for recreating
small creeping plants. My rear driveway ends up with small-leafy
plants that spread out over the asphault, in sidewalk cracks,
and everywhere else that’s bare. Just apply some thinned white
glue where you want these planst then sprinkle the leaves
on it and blow away excess. Kinda like adding glitter to a
kids project.
I also added the veneer to the outside of the
base to finish that off. I used a 1/32″ birch plywwood
from Michaels. I stained it with thinned black ink then applyed
some white drybrushing. When barely dry I then sanded it down
to get a nice old greyed wood look. I think I’ll add rusty
nails to the corners for the final touch. This makes it match
the rest of the nautical/rustic scene nicely.

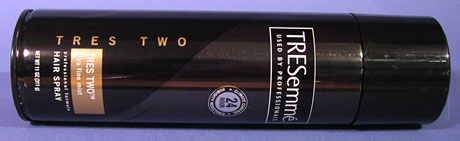
02.13.08 » Rust Chipped Paint
Since I want this lighthouse to look somewhat
dilapidated I decided to have the paint for the top peeling
and chipping due to rust and harsh weather conditions. To
achieve this look I first primed then painted the parts with
a Tamiya Acrylic drark gray then random coats of Nato Brown
and a rust mixture through my airbrush. Then I gave it a coat
of FFA and let it sit for a day to cure. The next day I sprayed
it with several coats of Hairspray and painted the white.
A few hours later I used water and wet brushes to loosen the
water-soluable hairspray under the paint and create the chipped
effect.
02.14.08 » Jeep Painting Part
1
I’ll be doing this as a step-by-step tutorial
in my blog later, but here’s what I’ve got on the jeep so
far:
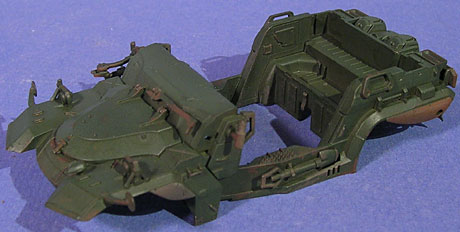
1: Primed jeep via airbrush with Mr Surfacer
1000 thinned with lacquer thinner and a few drops of Mr. Retarder
Mild.

2: Sprayed jeep with gray then random swaths
of Nato brown and a rust mixture. All Tamiya Acrylics. Later
this will show through as random rust and primer coats under
paint chips.
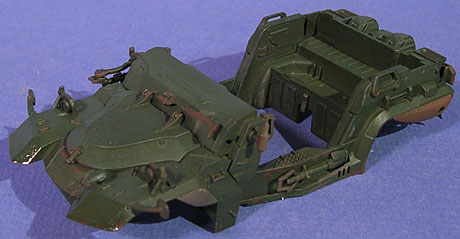
3: Clear-coated and sealed jeep with Future
Floor Acrylic (FFA) thinned 50% with Tamiya Thinner.
4: 24 hours later 3 thin coats of hairspray
(hair lacquer) were applied.
5: Jeep was sprayed with Olive green then parts
were highlighted with JGSDF Olive Green which is a little
lighter.
6: A few hours later, using clean water, various
brushes were used to wet the model and loosen the water-soluable
hairspray undercoat. This makes the topcoat of greens unstable
temporarily so that they can realistically be chipped away
with the wet brushes. Other implements (toothpicks, styrene
card shards) can be used on the unstable surfaces to create
line-scratches. Larger areas of paint can be removed as well
as I did on the fenders. Remove as littler or as much as you
want.
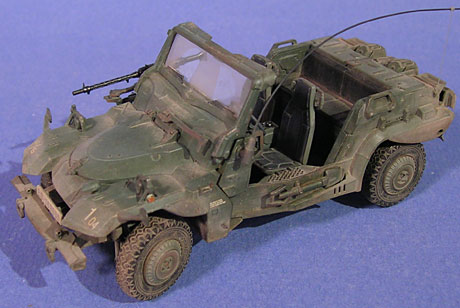
02.16.08 » Jeep Painting Part
2
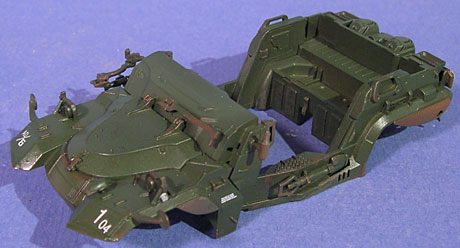
8: Now that the chipping is done, it’s time
for decals. Normally I would coat the whole kit in gloss Future
Floor Acrylic. This time however I just brushed a few thin
coats where the decals would end up. Note the gloss on the
front fenders.
9: Decals were applied and tools, dashboard,
seat cushions, and other hand-paint-necessary bits have been
painted. Mirrors and lights were painted with silver. Later
clear Tamiya was applied where necessary based on the light
color.

10: Now a satin coat of FFA was applied. This
seals the topcoat from firther chipping attempts, accidental
or not and seals the surface for the solvent-based weathering
apps.
11: Next up, three applications of filters have
been applied to all the jeep parts. Filters are kind of like
a wash, but not really… they’re hard to explain, but add
a lot to the depth of a model. For this filter I mixed up
a pale blue-green oil-paint mix with some turpenoid. This
alters the color slightly and blends colors together between
the various colored parts. It also “seasons” or
tooths the surface slightly for the next step, discoloration.
Note also as I go, more and more of the jeep gets put together.
This is based on what needed painted when and with minimal
masking.

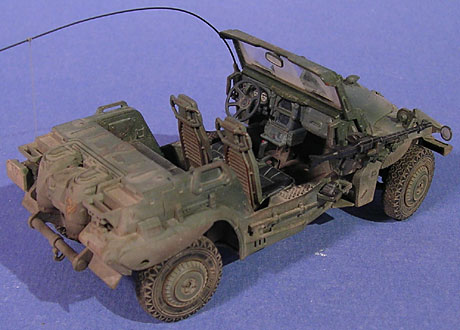
02.19.08 » Jeep Painting Part
3
12: Once the filters have dried/cured for 24
hours, it’s time for the discoloration. This technique involves
applying small dabs of various oil colors then blending them
in with a thinner dampened brush. This gives the surface more
variation in color and a more realistic and deep appearance.

13: After the discoloration has dried, about
24 hours, a wash is applied. This wash is a mix of oil paint
to a dirt-color then thinned with turpenoid. This thin wash
is applied to the whole vehicle and all external parts such
as wheels, seats, etc… While it’s drying you might notice
pools or water (thinner)-lines. These can be blended out with
a stuff soft brush before the wash fully cures. Another 24
hours.

14: Next up is pre-dusting with the airbrush.
For this I’ve mixed Tamiya Flat Earth with Flattened FFA to
make a semi-transparent dirt-mix. This is sprayed in very
light mistings where larger amounts of dust would collect.
Side skirts, underside, and the rear pannel. More specific
dusting effects will be added next with pgment powders.
02.19.08 » Jeep Painting Part
4
I didn’t expect to finish this today, but here
it is!
15: The windshield was masked off where the
window wipers would hit. Then the windshield was lightly sprayed
with my Tamiya Flat Earth + Flat FFA mix.
16: The tires were painted in flat black then
had a satin finish applied. Pigments were dusted onto the
wheels and then rubbed off with rubber gloves. This removes
all the pigment except for what’s around raised edges and
in the treads. A little bit of pigments were then brushed
around the road-hitting edge of the tire since it’s been running
on a dirt road and would pick that dirt up.

17: The machine gun was painted in flat black
and given a flattened FFA coat. Powdered graphite was rubbed
over the weapon to give it its gunmetal sheen. After it was
attached to the jeep it had just a little disty pigment applied
since the weapon would generally be removed and kept very
clean and maintained.
18: Pigment powders were applied dry with various
brushes. Thinner was applied to these dry pigments to affix
them to the surface better. The end result is still fragile
and should not be handled much, especially not with bare hands
as that could leave fingerprints in the finish. The underside
and rear panel recieved a lot of pigment, while the rest just
got dust added in specific places. A little powdered graphite
was rubbed onto the floor grates and sides where the crews
feet would rub/polish the surface.
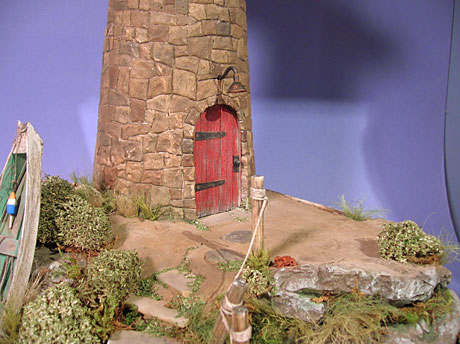
02.21.08 » Lighthouse Details
and Figures
While doing everything else, I’ve been painting
the figures. These take a while since I’m using oils so it
ends up being a process of paint one color or paint some highlights,
then set under a heater vent till tomorrow. All I have left
now is shoes/boots, a little more eye detail, straps/equipment,
and uniform details. There’s decals for some of it that I
can apply then add oils on top of to blend. The red neck detail
and the insignia are decals. There’s also some yellow parts
on the soldiers uniforms that need painted as well.

Lighthouse-wise I added the painted/weathered
door details (minus the bolts for the foor hinge parts), some
chain (since BK liked that in a ref pic) fishing net, and
my buoys. The buoys were made from styrene rods and spheres.
I still need to lay the rest of the grass and flowers.
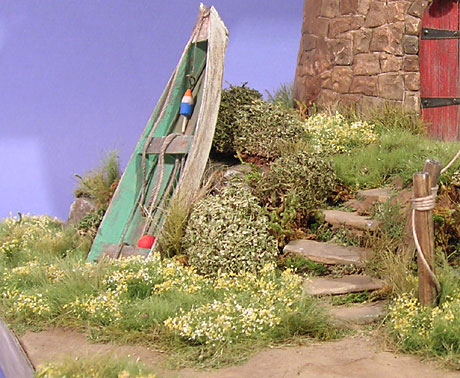
The fishnet is made from some nylon mesh material
used for wrapping party/shower-favors… can’t recall the
name. (edit: called tulle!) I wasn’t going to use it, but
everything else was way too thick. I wanted something I could
drape, but this wasn’t it. Instead I had to make it into a
roll with some painted beads used as floaters.

The top of the lighthouse is complete except
for the wiring. Waiting on an LED order to finish that part.

02.23.08 » Grass and Bird Poop
At this point the figures are about finished…
just a little drying left before their flat coat and discolorations.
While waiting on them I’ve planted all of my Silflor grass.
This diorama uses 3 different types of Silflor and bunches
of my own home-made tall grass. The Silflor used is “SF72221
Dandelions & White Clovers”, “SF71021 Spring
Short 2mm Lawn”, and “SF72021 Spring High Pasture
8mm Lawn” from the Flowering Meadows and Spring Assortment
sampler packs. These were mixed-and-matched to get a natural
random clumping between the heights and flower density.
In randoms spots I added some of my tall grass.
This was made from short 2″ pieces of hemp-rope which
were dipped/soaked in various water-thinned green acrylics.
After these bits were dry I took a wire brush to them to thin
them out and seperate the clumps. Then they were snipped with
scissors at various angles to randomize the lengths of grass
in the clumps. After that the bottom-side was cut flat across,
dipped into glue and placed on the scene. When the glue is
dry you can ruffle up the grass clumps to get them looking
bushy and blended into the scenery. Using these different
colored clumps within the Silflor makes it more random and
natural.

There’s still a few pieces of grass that are
drying, but while the glue dries, sprinkle the grass with
real sifted dirt. Lightly brush this in so that it settles
on top of and hides the white glue used to hold the grass
down. Later you can press the dirt in more. I found that sprinkling
the grass with crushed leaves/spices makes for some nice random
litter/small plants thrown in.

In this pic you can see some heavy rope resting
in the grass. Glue the rope down first, then plant grass around
it. This gives the rops the look of weight on the grass. Also
in this pic, the grass hasn’t been dirted or teased out yet
so between the flowers and plain grass there’s a definite
line. When the glue dries, this will be teased/blended. The
small hole in the wood is to insert a nail or something to
press the on/off switch for the lights/motor.

And what seagull-ridden natural scene would
be complete without bird poop? I made a small nest using the
same hemp rope cut into small bits. Small plastic Britta balls
were painted and used as eggs and white oil paint with dabs
of gray/black were used for bird poop. You know you’re into
the small details when scale poop is added. You’ll notice
it throughout the scene… that “crap” is a pet-peeve
of mine as I always have to clean that “shit” off
of my kids toys/swingset all summer. Grr.

02.24.08 » Last but not least…
So this will be the final update for this in-prog
thread. At the moment the entire piece is completed except
for the wiring of the motor and LED. Unfortunately I didn’t
oder any LEDs until this past week so I have a few days until
they arrive before I can finish it. In the meantime, here’s
some final images of the figures which are done. Gun-straps
were made from lead foil and boots have since been dusted
lightly with pigments..
I used some Lifecolor Tensochrom “oil”,
“fuel” and “kerosene” to add some fuel
stains to the engine caps.
And here’s a final teaser before wiring and
final pics.


![Maude [Cyborg Action-Doll] (Files Only)](https://fichtenfoo.net/blog/wp-content/uploads/2023/01/Maude-Promos-300x300.jpg)


