


Your cart is currently empty!
Completed » Santa Armored Fighting Suit

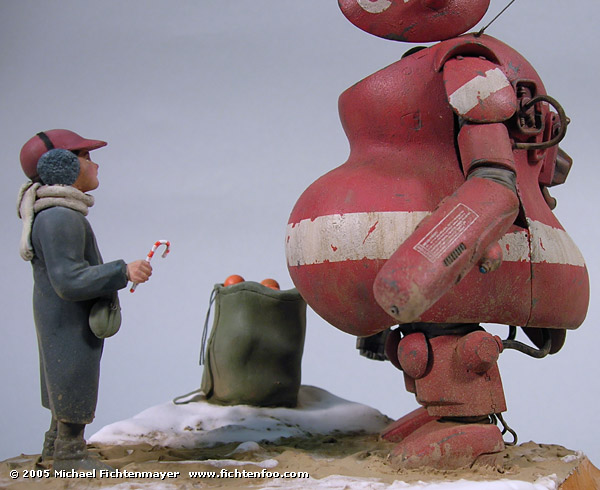
Story »
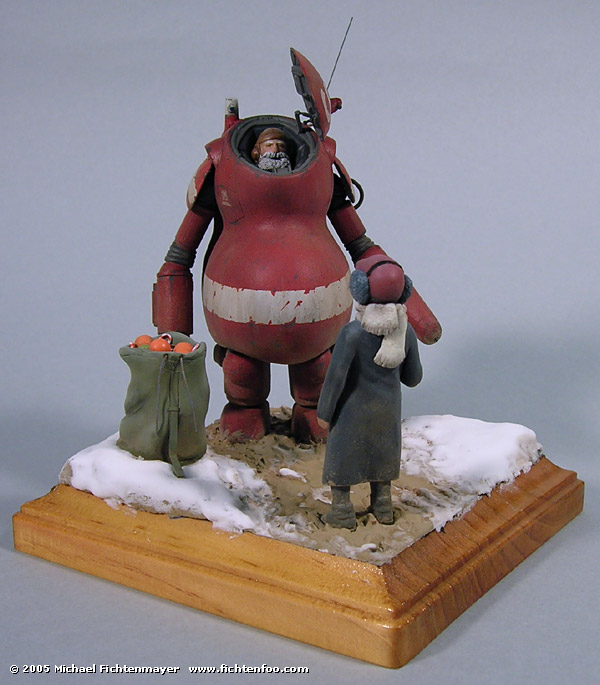
Just like the Marines of today and their “Toys for Tots” program, the Mercenaries of Earth’s distant future too have their holiday
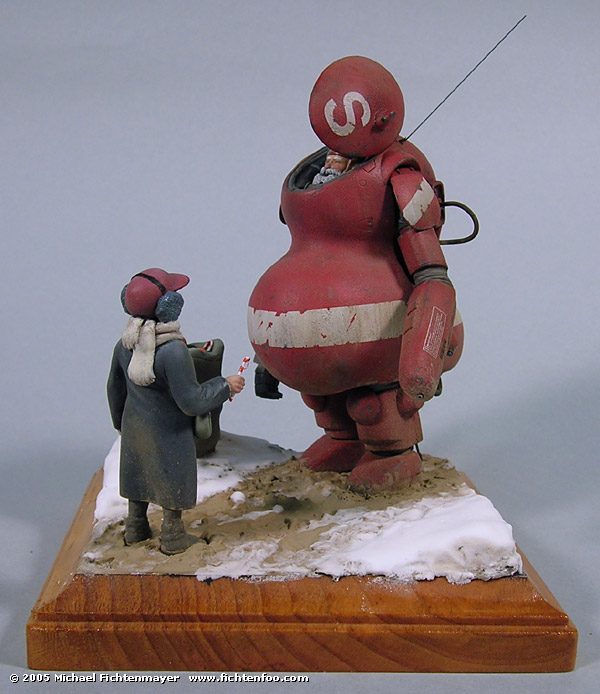
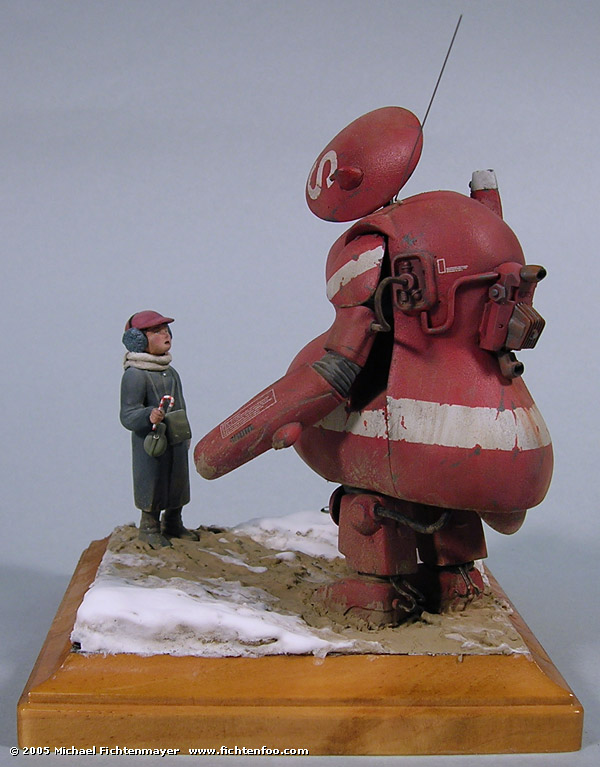
gift-giving traditions. With his red “suit” and large belly, Santa still visits Earths children on Christmas. The times nessecitate him to be a little more armored, but the spirit of giving and the look of joy on the childrens faces makes the dangerous trek across the war-torn landscape a worth-while cause.
About The Build »
This is my fat-type conversion for Nitto’s 1/20 scale Super Armored Fighting Suit kit. From the start I planned on making jolly old Saint Nick the focus of my build. Who else would need such a large variant of the SAFS? I started with the base hull for the body and using plastic Easter eggs and lots of Bondo, Magic Sculpt, Apoxy Sculpt, and sanding I molded the large belly and bum for this piece.
After some requests for casts of it I decided to make this a conversion kit. Since all the other Fat-type SAFS pieces I’ve seen used the Raptor gun arm, I built mine and had it cast to go along with the body. This particular build is using one of the first pulls from the mold.
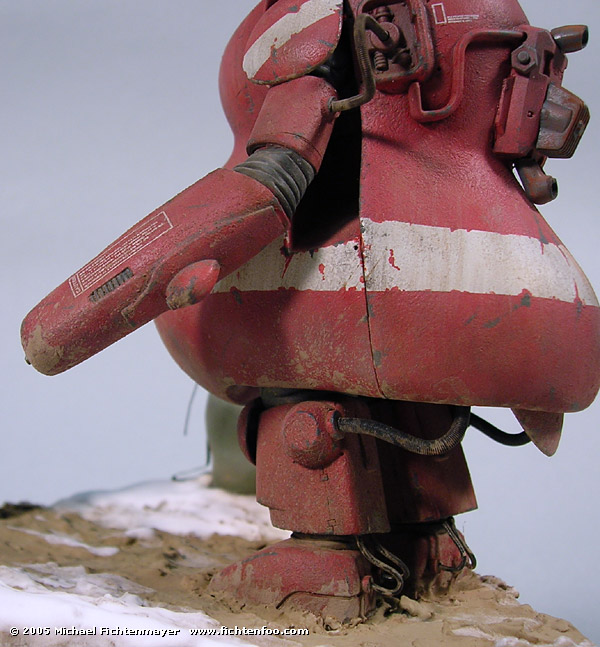
The ‘bulk’ of this suit was just following the normal SAFS instructions and just replacing the torso and gun arm with the 2 new parts. I molded new joint covers from Apoxy Sculpt for the elbows, knees, and ankles. I think these are my best joint covers yet.
After priming, I painted the kit in white, then masked off the stripes and painted the kit a bright brick red. Then I added various clear-coats and weathering. So I don’t have to retype what I did for this SAFS since it was mostly the same as my last, please click
here for my Bloodwind in-progs.
Once main weathering difference was the addition of mud splashes on the SAFS and boy. Since it is winter the melting snow would
cause for muddy paths. I used a combination of Light Dust and Europe Dust MIG Pigment powders for the mud color. I mixed it with a little water and brushed it on for the caked mud and spattered it onto the sides and lower arms with a stiff brush to simulate mud spatters from walking.
I modified the SAFS Pilot head and the Eddy Amsel figure for this build. For the pilot head, I just added a beard and mustache using Magic Sculpt. For the poy, I holled out under his coat and made the scarf and ear muffs from Magic Sculpt and lead foil. They were then painted with oils and acrylics.
About The Base »
For the base I wanted to depict a muddy and heavily traveled path. I used a combination of Celluclay and Joint compound for the groundwork. When it started to set-up I used the legs of some 1/20 figs and made lots of overlapping foot prints in the mud to make the road look very used.
I painted the ground as close a color as I could mix to the Pigment Powder. Then when that was dry I painted the pigment powders mixed with mineral spirits onto the road to complete the color matching of the mud on the suit and boy to that of the base.
For the snow I mixed together a slurry of baking soda, water and white glus and merely spooned it onto the sides where there’d
be less foot traffic. Immediately after I used a brush to clean up the edges. Then I watered down the mixture and added drops of shush into the road cravases. I got a few compliments on the realistic looking snow at a recent show I took this piece to. Thanks to maxwinamp for the snow tips!


![Maude [Cyborg Action-Doll] (Files Only)](https://fichtenfoo.net/blog/wp-content/uploads/2023/01/Maude-Promos-300x300.jpg)


