Your cart is currently empty!
In-Progress » The Centurion 1/4 Scale Bust » Paint and Texture
First-up, I finished up the hollowing of the busts and made a video tutorial showing the ease and what some have described as my apparent insanity while taking a large drill to the kit… on purpose. Whatever works though!
httpv://www.youtube.com/watch?v=3gkYrOFh1r0
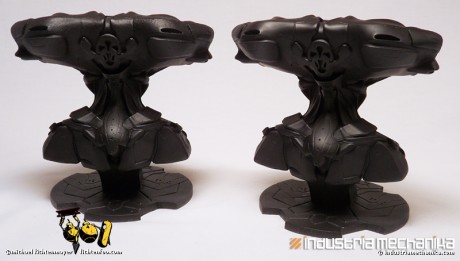
Once the drilling and clean-up was done on both pieces, I primed with a Duplicolor Filler-Primer to check for errors then on one of the pieces used Mr. Surfacer 1000 to create a rough texture on some of the armor. These parts I want to look insect-like and organically grown. To create the texture, simply stipple on the Mr. Surfacer (the kind in the jar) until it becomes tacky and makes peaks. Do small areas at a time. Then when dry, lightly fine-sand down any excessive peaks and you’re good to go for another coat of primer. I used Duplicolor auto-primer on these. The black “sandable primer”.
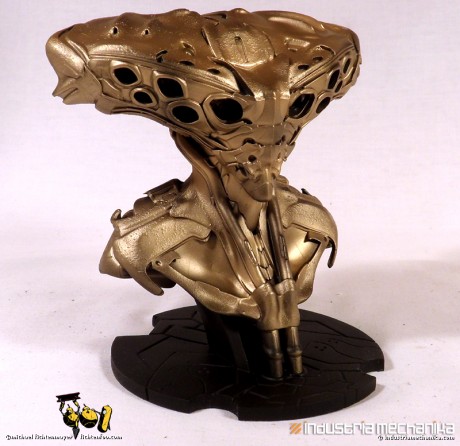
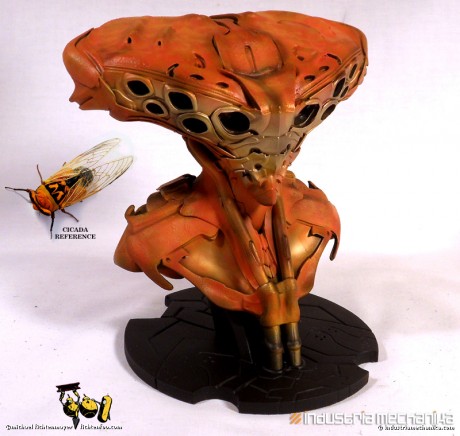
Now onto painting the “insect” one. I’m using an orange/black cicada as loose reference for the color scheme. I started off with a base-coat of Mr. Super Metal Color Titanium mixed with Mr. Metal Color brass. At this point I started thinking “with some red it could be an alien Iron Man”. My hope was that some of the metal will show through in the next mottling steps.
Next I mottled on different transparent oranges, reds and yellows using Golden Airbrush Acrylics and very thin Tamiya Acrylics.
And lastly for this update I over-thinned some Tamiya Khaki Drab and mottled that onto the surface. To mottle, reduce your air pressure and practice getting really fine lines with your airbrush. Then do overlapping figure eights (88888) and random squiggles on the surface. Next I’ll be using black to define the edges and faded “spots” more like the reference.
The face-plate I plan to do like the original box art in a matte black/dark charcoal color so that it has the look of a mix of technological and organic components.


![Maude [Cyborg Action-Doll] (Files Only)](https://fichtenfoo.net/blog/wp-content/uploads/2023/01/Maude-Promos-300x300.jpg)


