


Your cart is currently empty!
Creating Moss and Lichen
As I gain experience in this hobby I find myself trying more and more to recreate nature in various scales. This involves plenty of research on modeling materials and real life examples/images. For my current project I’d like to place some moss and lichen on some rocks. Just a small amount, but it’s become a big learning process. As usual I went in search of examples and such done by other modelers to see the good and bad and learn from it. I didn’t find a whole lot aside from people using the ground up foam or real moss… neither of which looked like what I wanted, but the real moss looked to make some nice additional greenery.
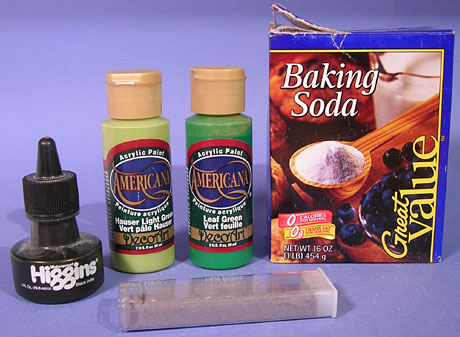
For this article, I’ll avoid my trial and error processes and focus on the technique I stumbled upon while mixing various concoctions. You’ll need the following supplies for this method:
- Model car interior flocking (gray)
- Baking Soda
- Cheap-O acrylics
- Black India Ink
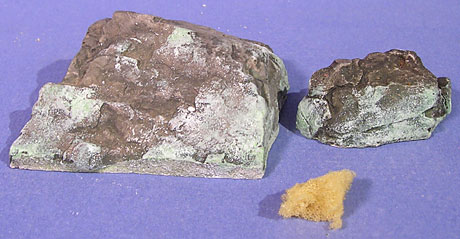
I started off my making some rocks using the Woodland Scenics rock molds and plaster of paris. These rocks were gived a few washes with diluted black india ink and a wash of russian earth MIG pigment for a little color.
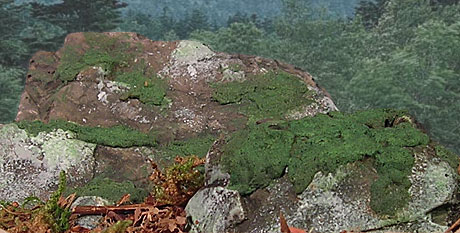
Next it was time to add the lichen. Lichen often appear as pale white/blue/green plants on the surface of rocks. They look a little like mold in some of the images. To recreate this I applied random layers of white, gray and pale sage green acrylic with a small piece of sponge.
Now it’s time to make the moss. You start by mixing equal parts of baking soda and flocking. Then you add just enough green acrylic paint to make a thin paste about the consistency of white glue. Add a little ink to this for a deeper/less saturated color.
This mixture can be applied two ways. First I took the same soft brush I mixed it with and dabbed in on thinly in spots. This gives you a light covering. I then took a toothpick and applied small glops of the moss mix on the tops of the rocks and over the thin areas. This gives you the thicker heavier moss look. The mix will look a little solid, but this is where the magic of the baking soda happens. Originally I added the baking soda and no flocking. The BS was just for bulk. That happened while drying however is small gas bubbles forming adding texture. With the addition of the flocking the texture went from bubbly to fluffy in a scale moss kind of way.
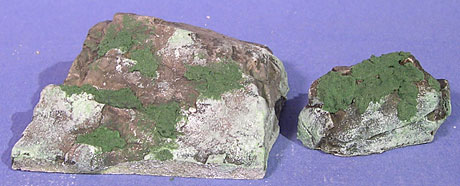
Let this mixture dry completely as acrylics of this variety can lighten or darken while drying. When dry you can add thin acrylic washes of brown (for the not-so healthy spots and roots. Then once the wash dries, you can drybrush the moss a little using a color that’s only slightly lighter than the dried moss mix to bring out the texture and tease out the flocking fluff. Here’s the final results.

This is the basics of my method, but I’ll be playing with different colors and different add-ins later for different projects.

![Maude [Cyborg Action-Doll] (Files Only)](https://fichtenfoo.net/blog/wp-content/uploads/2023/01/Maude-Promos-300x300.jpg)


