Your cart is currently empty!
Using Real Dirt for Mud and Groundwork
This article will explain some techniques I found and figured out on my own for using real dirt for the creation of mud and groundwork on display bases. Nothing looks more like real dirt than… well, real dirt. We can process this dirt and the result is a cheap and plentiful source of material for groundwork and mud.
Finding Dirt
Different parts of the world and even the area in which you live contain different colors and varieties of dirt. In the Pittsburgh
Area we’ve got your basic light brown dirt, but also yellow clays and even more I suppose. This will work great for modeling certain parts of the world, but not all. In the jungle you might have redder and darker dirt, in the desert, more yellow or orange and so on. Find a dirt that matches best what you want to model.
No go out and dig up some dirt. You don’t want to take the topsoil however as that contains insects, molds, fungi, etc… dig a foot or so down and you’ll still get some but probably less. I’m no scientist though so use your best judgement. For my dirt, I dug a hole
in my back yard under the grass about 8″ deep and took a cup or so of dirt from there. I filled the hole back in and placed the grassy
lump back on top. That was a month ago and the grass is growing fine.
Processing Dirt
You now have a clump of solid or broken up dirt and some might be wet. Not a problem. Line an old cookie sheet with foil and spread your dirt out on it. I dried mine in the oven. I placed the sheet in the oven, turned it on 300 degrees Farenheit and let it heat up. Once the oven heated up, I turned it off and just left it for an hour to dry. After that it was perfect. Results and times may vary however depending on the clayness/wetness of your dirt.
Now take your dried dirt and using the back of a screwdriver handle and an old bowl, grind it up. Remove any larger stones that get
in the way. I did this step with a few spoonfuls of dirt at a time. Transfer the crushed dirt through a wire strainer to remove the smaller stones. Keep these stones for use later. Now you should have a coarse pile of sifted dirt.

Place this into a cup and put a pantyhose leg over the cup top tightly. This will act as a finer strainer. Go outside and shake the dirt through the strainer into another bowl or cup. This is a dusty process. What’s in the bowl is probably as fine as you’ll get. Here’s
the final siftings of the dirt I got from my back yard after getting one of those pantyhose socks from a shoe store. (so you don’t germ up the shoes trying them on) As you can see there is 5 different sizes of siftings I got.
A: Larger stones and such
B: Smaller stones
C: Smaller stones, some caked with dirt to make
them appear larger
D: Very fine stones and coarse dirt particles
E: Powdered dirt, the finest of the siftings
A and B were removed through a simple dollar store wire strainer. D and E were the result of removing C by scraping them over some panty hose stretched over a cup. E was removed from D by shaking what fell into the cup over a larger tub (and outside since it was a dusty process). D was left in the cup and E was shaken through the pantyhose material.
I’ll have uses for all of these stones in various mixtures of my groundwork spread mix. A and B can be pressed into the spread when
wet and dusted with E later to match better. E is very much like a pigment powder now. A and B were rinsed in the strainer, hence the cleaner look. If I were to rinse C it would be a muddy mess. B was 4x that volume before rinsing since much of B was large hard clumps of dirt that rinsed away.
Here’s the pic of the siftings:

Making Mud
Now that you’ve sifted the dirt, you can use the finest siftings (E) make some mud to add to your vehicle, robot, base or spread
out as bare ground. The mix I’ve been using for dry ground/mud is below…
Recipe for Mud:
3 Parts Liquitex Matt Acrylic Gel Medium (use Gloss Gel for wet mud)
2 Part Fine Dirt Siftings
1 Part Dry Plaster of Paris
1 Part Water/White Glue mix
Mix this together and apply it where you want mud. It takes a while to dry fully, but looks great. As usual, test before applying.
Applying it to a Base
Applying it to a base has some issues. This mix wants to crackle if spread thin on a smppth surface. To counter this I make a mixture
of Plaster, water, glue, and C and D siftings (see above image) and lay that down first to make the ground rough and toothy. Don’t worry, the next mud layer will go on smoother. Once the toothy mud is dry, spread on the mud mixture with some thin plasticard. Old clear plastic from packages works great for this. Use a wet finger to smooth down any ridges and a dense wet sponge to press
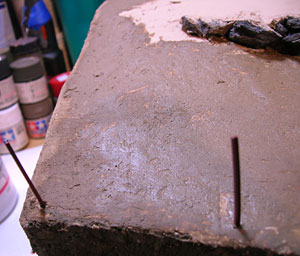
down any grooves and fingerprints. Apply vehicle tracks now if needed. If there are any bare spots or crackles, mix some more mud and fill them in. They should dry filled in and non crackly after this second spot-coat.
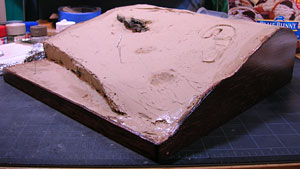
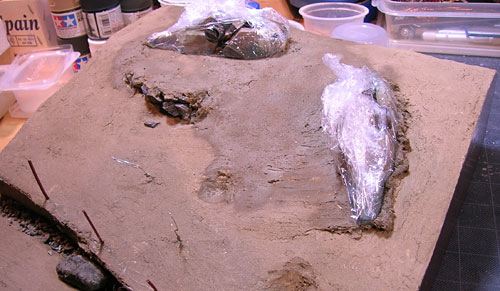
Allow that to dry and you’ve got a bare earth base ready for plants, grasses, and everything else.


![Maude [Cyborg Action-Doll] (Files Only)](https://fichtenfoo.net/blog/wp-content/uploads/2023/01/Maude-Promos-300x300.jpg)


