Your cart is currently empty!
In Progress » The Briegel
02.25.2007 » Concepts/Initial
Progress
I got my beautifully cast and designed Briegel
from Luca Z this past week. It’s just a sight to behold…
huge, detailed, and looks to be a monster of a fun build.
Enough so that a few of us that managed to get ahold of them
are having a small Briegel build-off in the forum.
So far I’ve cleaned all the parts and even started
a little work on it. I plan to do a base with figs, the Late
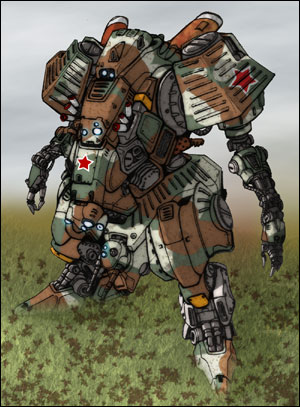
Autumn camo scheme (see below) and even try to light it all
up. I’ll post more when I finish the slave 1 and get more
into it. Here’s the color scheme.
03.16.2007 » Briegel Build-Off
Now that the Slave 1 is done, I can work on
this beautiful piece of work. All the parts were cleaned and
I had started on the “B” parts (pelvis) a few weeks
ago. I finished them up this evening. I plan on lighting this
kit up, but will wait till all the parts are cleaned and pinned
to start that “process”. It’ll involve a LOT of
drilling and planning. I can plan while I’m cleaning and memorizing/getting
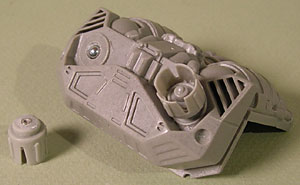
to know the parts. The first “modification” I’ve
done is the “ass” boosters. Insteal of just gluing
them on in a fixed post, I used the ring-magnet/steel ball
method for placement. An image of that is below. I must say
once again… THIS THING IS HUGE! Check out the other pic
to get more of an idea.

03.20.2007 » Lighting Mods
Since the last update I’ve cleaned up most of
the leg and upper torso parts. I’ve also started drilling
and Dremeling to light this thing up. It’s not been an easy
process, but not as difficult as I thought it’d be either.
It just takes a lot of planning and a vacuum cleaner next
to your work area to clean-up the resin grindings from all
the Dremeling.
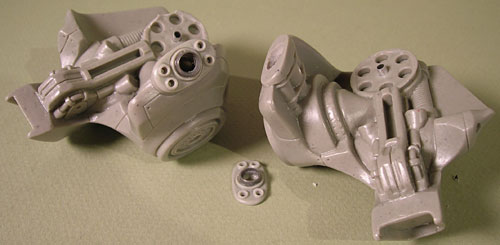
These first 2 pics show the modifications for
the tail lights on the legs and back of the Briegel. To do
these parts I used a Dremel and routed out beneath the light
plates. A small hole just large enough for 2 wires was drilled
on the hidden inside of the armor. Thes ewires will run to
the battery area in the tail. The 2 large lights on the legs
were further modded with some Kotobukiya option parts which
will hold lenses. These 2 lights will be red. The 4 lights
on the back were done a similar way. The top lights will be
red and the lower 2 orange. The 2 small lights on the collar
(not modified yet in this pic) and the back cover were drilled
out and will use fiber optic and red LEDs. I had to gouge
out a lot of the underside of the back armor, but will cut
out a piece of grooved styrene sheet to cover that back up
after the LEDs are in place.


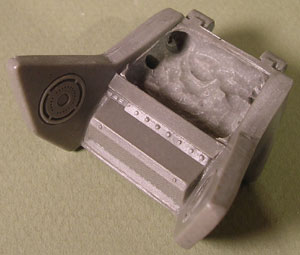
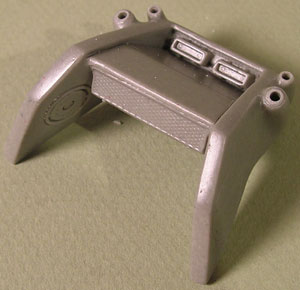
This next set of pics shows how to do the single
light on the crotch cannon. First drill out the existing molded
light and continue to drill down until you drill through to
the bottom. Use a high speed cutter/grinder and a Dremel to
open up under the gun torret to make room for the LED. Now
to run the wires back through this large crotch piece required
a bit of planning. Thankfully the detail for inside of that
panel below the turret is a seperate piece. I used a long
drill bit to start a hole from inside that panel to the back
of that piece near where the battery will be. I drilled down
from where the turret sits into that hole. This way the wire
will run from the turret down into the crotch and back through
to the back of the piece.
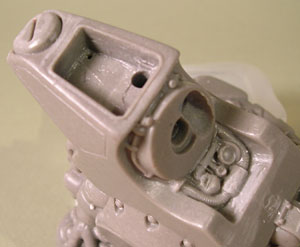
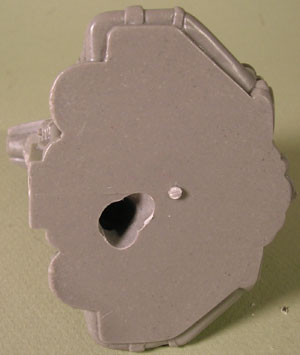
The lights on the chest has its own problems.
The biggest of which being that I had to drill through some
detal on the inside of the hatch. No worries though as I can
replace this detail later.

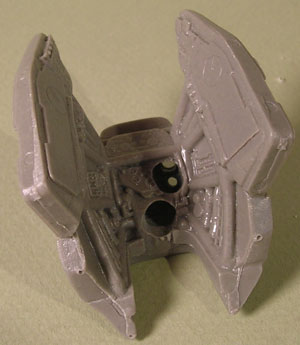
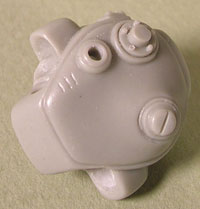
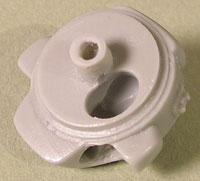
The lights on the weird head piece will use
fiber optic and LEDs. The Fiberoptic will have to run back
through the chest and head mount and under the seat. I had
to gouge out under the seat with my Dremel to make room for
the LED for the fiber optic and LEDs.
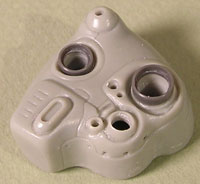


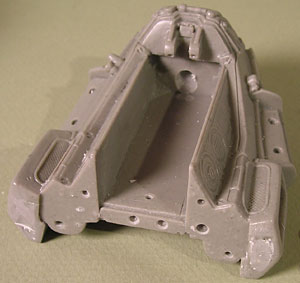


And I have a few more parts I need to drill
out to light, but you get the idea.
03.26.2007 » Extras
A few updates to the Briegel build that will
make it different from the others in the Bring Your
Own Briegel Build-off… First is the multi-launcher
gun which is nicknamed the ‘Orca’. What you see below is very
rough, but after the smoothing, panel-lines, hoses, and detail-up
it’ll be a nice match to the Briegel. It’ll mount on the hardpoint
on the hip. The ‘Orca’, nicknamed due to the look of the nose,
not only fires tank-style projectiles, but from the same barrel
and with no swapping of parts can instantly fire high-intensity
laser bolts. This mixture of ammunition gives the Briegel
the ability to act as a mobile artilary placement, and still
have the offensive capability to ward off enemy mecha. Or
something like that… I’m just making this crap up as I go
along because it’s fun. 😉


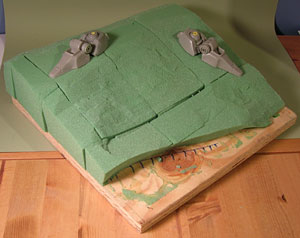
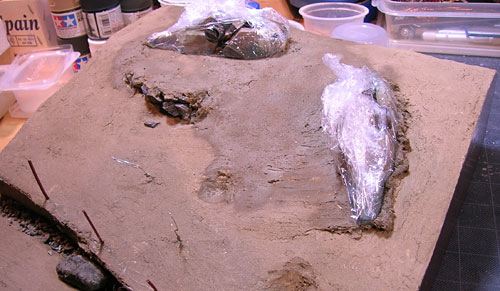
Next up is the base. Since the Briegel is VERY
large, a very large base is needed. I’m using a roughly 1
foot square of leftover plywood as the base. Over that I glued
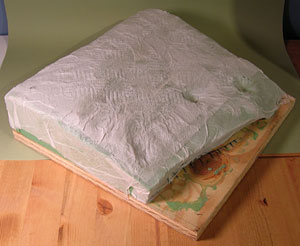
cheap floral foam to carve for the uneven terrain. When that
was carved I applied paper mached paper towels to act as a
barrier between the foam and the next step which will be a
thin layer of Bondo. The bondo will make a nice durable shell
in which to help support the weight of the Briegel. When the
Bondo dries, I’ll carve out a little foam which will be under
the feet of the Briegel and slide in some 2×4 scraps in which
to drill down into in order to pin the Briegel into something
solid.
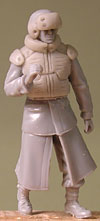
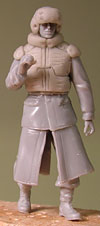
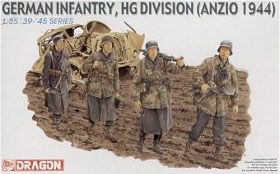
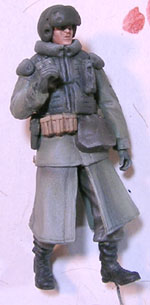
And finally I’ve been working on modifying some
German figs by Dragon into cold climate geared infantry. Below
is the fig I’ve gotten the furthest with out of the 4 in the
set. I picked these figs out because they were walking and
had some cool coats. The body armor and helmet mods were sculpted
from Aves Apoxy Sculpt. Pouches, packs, ammo clips, etc.,
will be added to the armor and around the waist later.

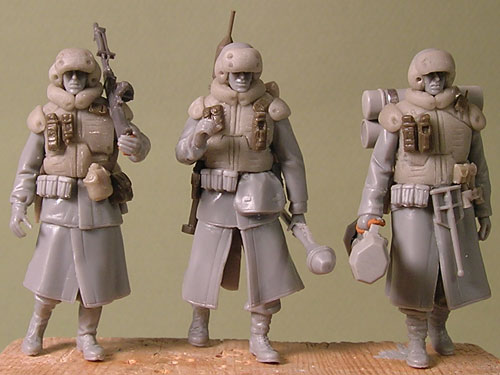
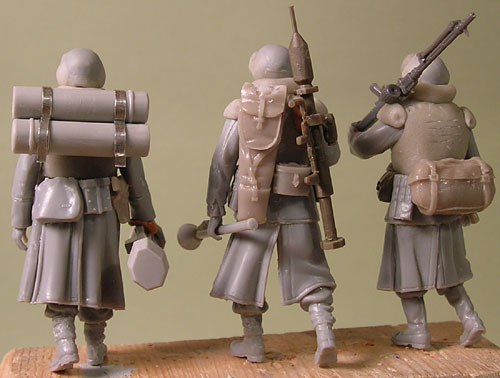
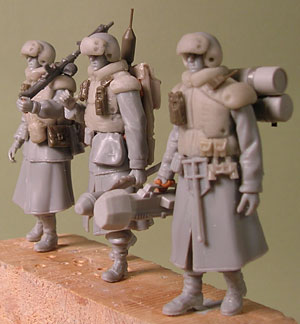
03.29.2007 » Three Stooges
The figures are pretty much ready for primer.
Just need to make a few more lead foil straps and they’ll
be ready for primer. I used miscellaneous leftover gear from
some various figure sets and resin updates. Here’s the pics:

04.05.2007 » Net and Bronze
I’ve been working on little parts of the Briegel,
base and figs. I know I’m getting a lot done, but it feels
like I’m not getting anything done. LOL The past few days
I primed all the parts of this project and started on some
of the extra details like the camo netting. Someone at A_A
asked about netting so I replied with the following which
may help some of you.
“Cheesecloth works well. I picked some
up at a Michaels Crafts for around $6. It’s a 2 sq yd package.
I just colored some yesterday I’ll be using as stowage.
First I dipped it in water to make rolling it up easier.
Then I rolled it up and used wire to secure it where rope
(thread) will be later. I placed aluminum foil over my model
where this will be placed (since it’s draped), placed the
netting into position, then colored it with cheap Apple
Barrel acrylic paints thinned with water. Since the netting
was already wet it soaked up the paint nicely. Since the
acrylic paint is thick it works as a glue to keep the shape
when it dries. Later I’ll do a little drybrushing to bring
out some highlights and dust it with some pigment powders.I’m sure that the above would also work for
covering a whole vehicle or using it as a “tent”
of sorts. Wetting the cloth helps it drape and be shaped
better.”
Now last night after I wrote that and saw some
of the example pics someone else had posted I made some new
nets to add to the existing one. These were a lighter green
than the first and were wrapped loosely around my original
net pack. This gives it a lot of depth and removes the need
to drybrush. It also makes the net roll look sloppier than
my original which is also good since I imagine rolling nets
neatly would be a pain.
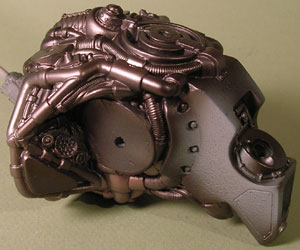
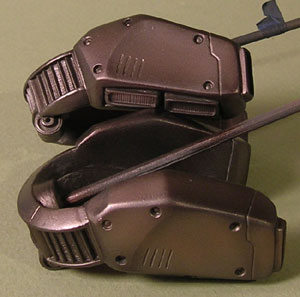
I also applied a rough-cast texture to the armor
parts and painted the first of the internals. I really love
how Luca painted his most of his metals a metallic coppery
brown color. I decided to play with some alclads and do a
similar warm metal look. I satrted by painting ALL the metal-toned
parts in Alclad2 Jet Exhaust which is a dark brownish metal.
Then on the parts I wanted brown I sprayed on a post-shade
of Alclad2 Copper + Steel + Aluminum. This got me a really
nice bronzish color which will look great when contrasted
with the parts I’ll paint in cool tones of Steel and Magnesium.
I think the look is shinier than I want though. A satin clearcoat
when weathering will fix that though.

04.09.2007 » Camo
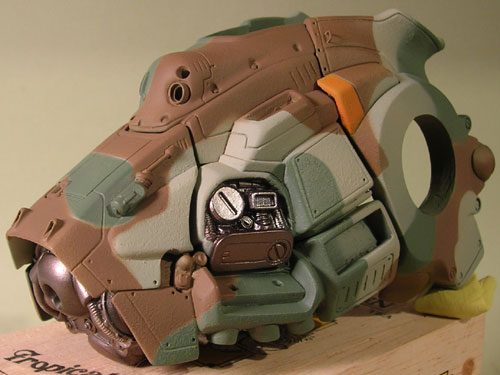
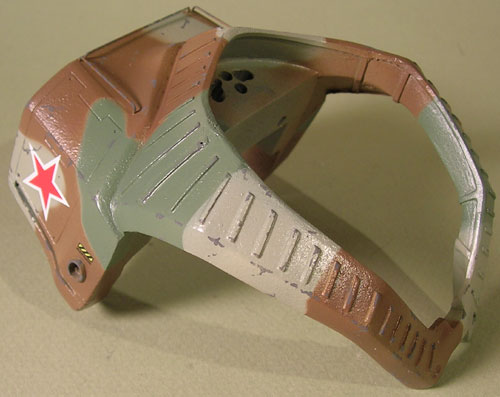
After much masking the camo on the Briegel and
most of the painting (except for the gun and some little figure
extras) is done.I started out using a military-green color
mixed from various leftover drab colors I had lying around.
Some blue and white were added to get the color I wanted.
Waste not want not. Then I masked off where I wanted to keep
the green using sticky tack “snakes” and blue tape.
The next color I painted was Tamiya Deck Tan which is a light
tanish green color. Then more masking and some Tamiya JGSDF
Brown. Below is a pic of the cockpit area roughly slapped
together for the pic. The parts actually align much better
than they look in this pic, but the sticky tack is misaligning
them. I tried my best to line up the camo between the parts
and did a decent job, but there is a slight error below the
orange in the pic. A happy accident is that in some spots
shifting tack mask left a slight “deck tan” line
between the green and brown. I actually like how that turned
out even though it wasn’t intentional. You can also see the
rough cast texture I added.
04.10.2007 » Fixing Pose
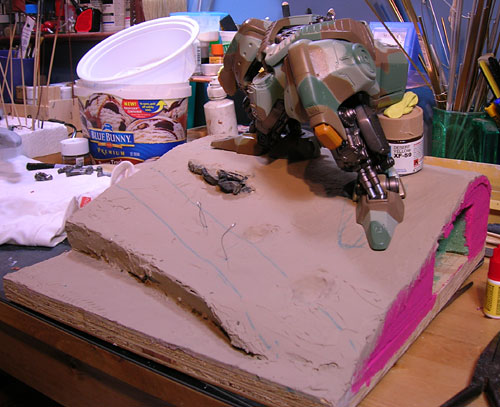
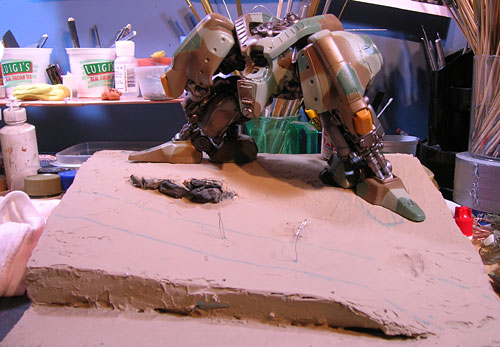
Today’s progress was all about getting the legs
fixed into position on the base so that I can move forward
on the base. This was NOT an easy task since everything is
so big and heavy and wants to sag under its own weight. Plus
the base slopes downward which creates its own problems. In
the end though it worked out and I snapped a few pics. The
next step for the base is applying thin balsa wood around
the outside edge (seen in pink) and adding a quarter-round
trim to the bottom. This will make the base look like it was
made out of solid wood when done. Nice trick and one that
I just recently learned about. I wish I’d known sooner, but
live and learn! After that’s applied and stained I can begin
the groundwork including smooshed ground around the Brigels
feet, a footprint or 2 behind it, dirt, mud, dead grass, leaves,
lots of sticks and twigs, more dead grass, and even more autumn/winter
forest litter.
I also made a trip to the LHS looking for Russian
aircraft decals with stars and red/white outlined numbers.
I have some big red stars with white outlines from a 1/48
Stormovik I got cheap last year, but needed some smaller ones
too. I found a few decal sets, but none had what I wanted.
In the end I ended up buying a Revell 1:72 Lavochkin La-5FN
since it had exactly what I wanted decal-wise and for less
money than the other decal sets. Plus it has enough decals
(enough for 2 plane designs) that I can build this cool little
plane later without needing any extra decals. Here’s box pics
of the 2 kits:

04.12.2007 » Decals
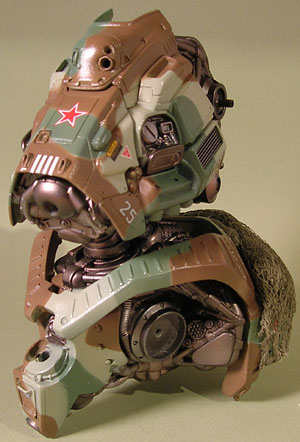
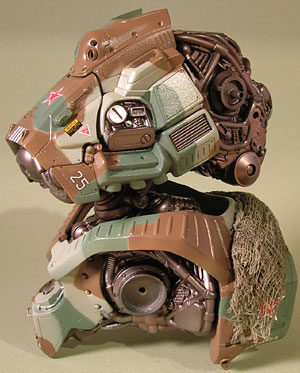
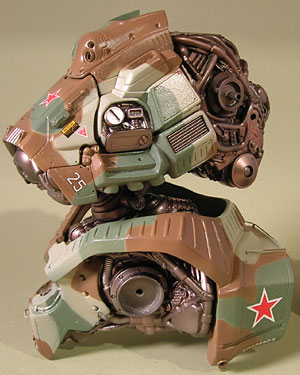
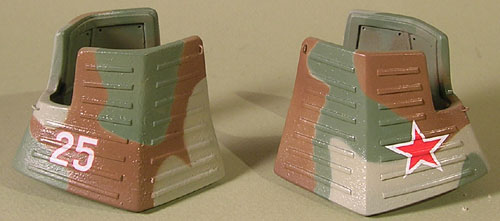
Yesterday I started applying the decals. I still
want to add some more maintenance marks, but it’s almost ready.
Thank goodness for Microsol. It really softened the decals
nicely so that I could conform them to the rough texture of
the armor and around the ridges on the shoulder parts. After
the decaling will be painting small details with a brush and
adding paint chips.
04.13.2007 » Paint Chips and Details
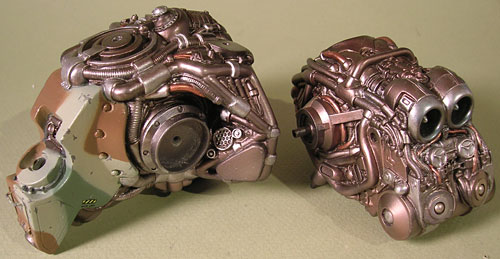
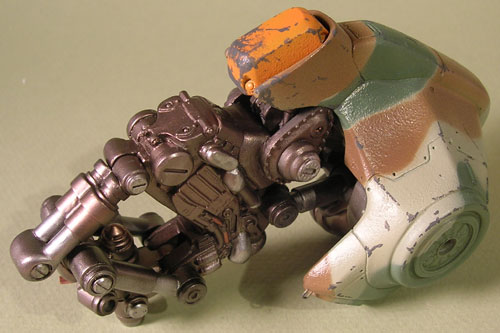
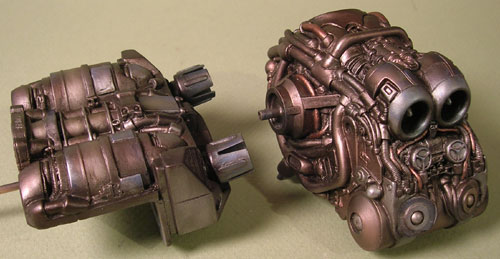
The paint chips are completed as is the additional
detail painting. You can see on the internals I used silver
and copper rub-n-buff to alter the colors of some of the metal
parts to give those sections a larger variety or color and
also to pick out details. Paint chips were added using some
sponge and a thin paintbrush. There’s also a shot of the Orca
without the barrel or numerous tubes.

04.15.2007 » Washes and Metal
Tarnish
A few days ago I gave all the
parts a satin coat of FFA. Today I gave the camo parts their
first filter and the metal parts a wash of black + burnt umber
oil paint thinned with turpenoid. The wash popped out the
details a good bit and simulates engine grime. A thinner wash
of the same color I’ll wash the camo with will be applied
to the metals later. When the wash dried I applied cobalt
blue oils as a rough glaze on certain parts to give the metal
a heat-tarnished look. Here’s a pic:
04.19.2007 » Groundwork…
It’s a dirty job.
I’ve been letting some of the oil washes get
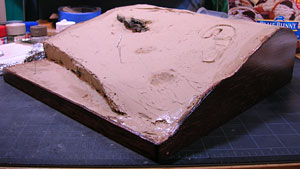
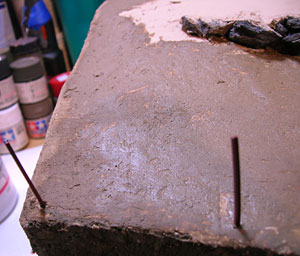
a good cure on the Briegel while I work on the figures and
groundwork. I applied balsa wood to the outside of the base
with 5-minute epoxy then stained and clearcoated it with a
semi-gloss polycrylic.After that was dry I applied my mud
mixture, a little at a time, to the terrain to give it a real
earth look. I did a tutorial on the process whick can be seen
here: Using Real Dirt for Mud
and Groundwork. After the mud had dried I began applying
the various grass and twigs/logs to the base. The grass is
late autumn colored from Silflor. The dead grass is hemp twine
that’s been cut at 1/4 inch lengths and had the fibers pulled
apart. I’ve also been adding little bits of lichen and ‘dead
turf’ to give some variety to the plant life. The leaf litter
is crushed up leaves I saved from last fall. So far I’m more
than pleased with the look. I also finished painting the figs,
but they need a little weathering on the coats… some mud
and dust. Here’s some pics:




04.20.2007 » Can’t See the
Forest for the Trees
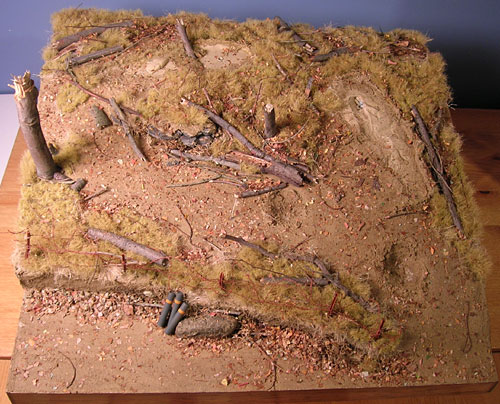
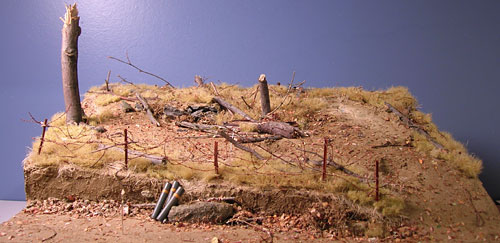
The base is pretty much done now. It took a
good bit of work, but was a lot of fun to do. After securing
all the grass down with white glue, I let it dry. Then I took
an old toothbrush and teased out the grass. The next step
was giving all the grass a flat coat of FFA since it was a
little shiny. While the FFA on the grass was still sticky
I sprinkled on my leaf litter so it’s stick to the grass.
I shook off the excess and then brushed on matt medium mixed
with water over the dirt. (2nd pic) I sprinkled the leaf litter
on that and let it dry. After shaking off that excess I added
some smaller twigs and that was that. Here’s pics:


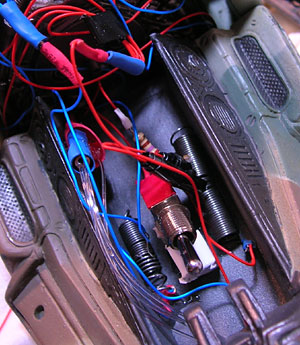
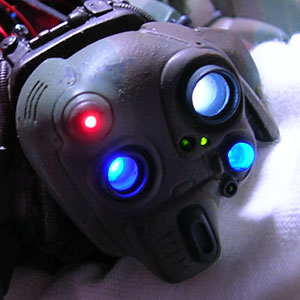
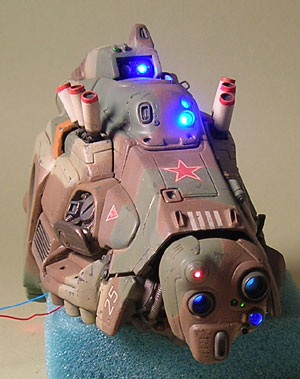
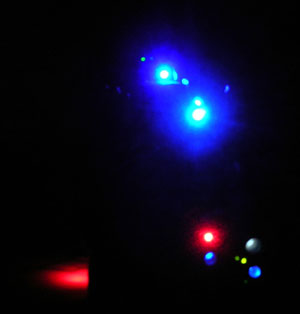
04.26.2007 » Lighting
The lighting is progressing nicely, but it’s
definitely a time consuming process. So far I’ve managed to
light everything on the Orca gun, upper torso, and back. I
still have to light up the lights on the backs of the upper
legs and the light on the turret. After that I can do another
flat coat, airbrush pre-dusting, then hook everything together
and dust with pigment powders. You can see that there’s a
mess of wires inside of the cockpit area. I’m glad now that
I decided to omit the pilot as I’d have no where else to stow
all these wires and switch. To make connecting all the wires
to the battery easier, I’m using a trick I recalled from an
xmas present in 1984… an electronics lab. It basically used
springs to hold the wires to various components and it’s working
well here too. I’m also making heavy use of fiber optic for
some of the smaller lights (all greens and some reds). I still
need to add (and clear paint) clear Wave lenes to the larger
lenses. Here’s some pics:


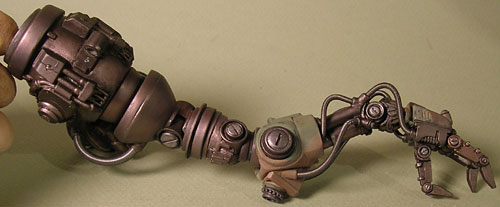
04.30.2007 » Almost Done…
The Briegel is taking quite a bit of work on
these final steps. Getting all the sub-assemblies put together
without damaging them, wiring, rusting, weathering, etc…
So many small things are adding up to weeks of effort. Good
effort though and so worth the trouble as it’s shaping up
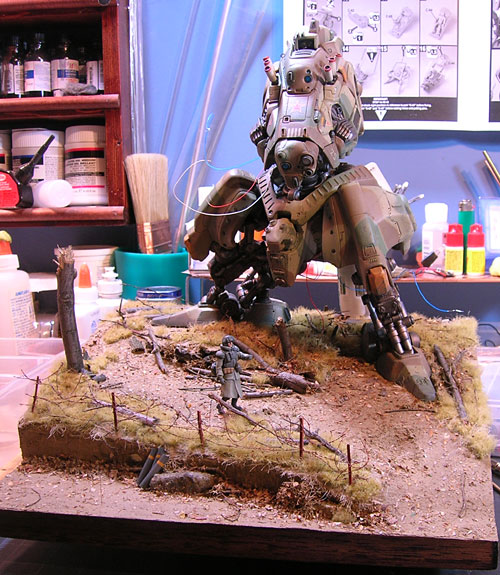
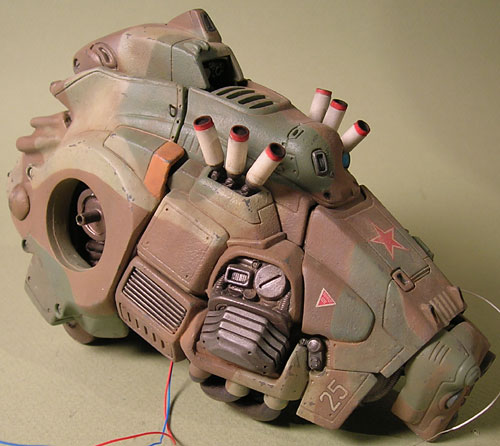
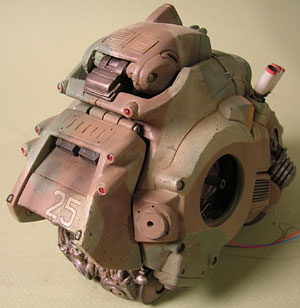
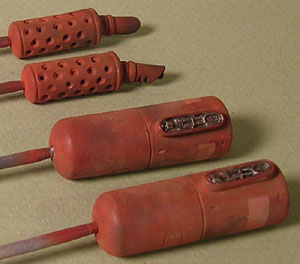
quite nicely. Below are pics of where I’m at… the first
is of the Briegel sitting on the base while assembling wiring
and waiting for epoxy to dry. HUGE!!! The next two are of
starting the pigment weathering on the upper torso section.
After that is the rust on the fuel tanks and exhausts. And
finally is probably my favorite of the Briegel, the arms.
They’re just so evil and spindly looking! LOVE THEM!

Where to buy the Briegel
Please no more
emails to ask where I purchased the Briegel.
They will not be answered as I’ve been inundated
with them and I haven’t the time to answer them all. Contact
Luca Z at his website at kallamity.com
or here at the FichtenFooForums as ZLuca.
Thanks!


![Maude [Cyborg Action-Doll] (Files Only)](https://fichtenfoo.net/blog/wp-content/uploads/2023/01/Maude-Promos-300x300.jpg)


