Your cart is currently empty!
In Progress » KV-X2 to VICTORY!
02.26.08 » Source, Concepts &
Initial Scratchbuilding
I’ve wanted to do a walker version of the KV-2
for some time now. When I bought my last KV-2,
I did so with the intention of making it into a walker, but
decided instead to built it as is and get some armor experience.
This time I have a group-build at the Mig Productions
forum to inspire me to give it another go. Thanks to Nick
Cortese, who sent me a spare turret, I can get started on
this. First up is my initial sketches and some sillouetted
concept art for the build.
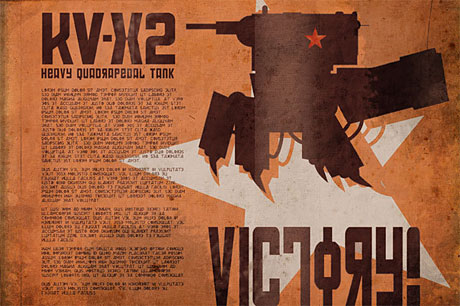

As you can see, I did a bunch of little rough
sketches, but through them all something was missing. Finally
I figured out what it needed which was a larger tilted rear
powerplant and a smaller turret under the midsection that
supports the legs. Doing the sillouetts helped finalize the
overall feel and look.
Once I got the turret and finished my last project
I immediately got started on this. So far I have roughed up
the shapes for the powerplant and midsection. These will be
cleaned-up and detailed using scratchbuilt and various armor
kit leftover bits.
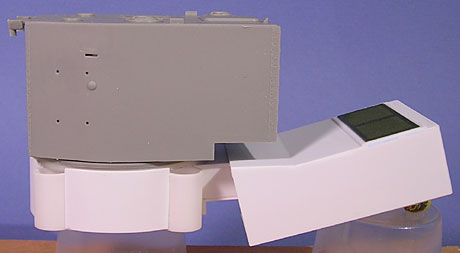
The powerplant so far is a large box made from
styrene sheet and square tubing for inner support. It’ll be
detailed more as the project progresses. To keep the powerplant
from being a big boring box, the underside will have some
exposed engine detail. Practical? No. Visually interesting?
YES!
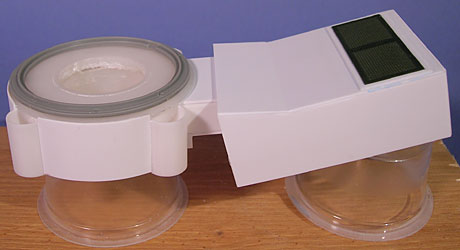
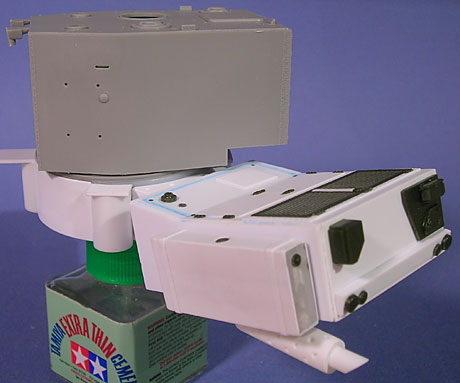
The midsection is made from styrene tubing for
the 4 leg attachment sections and the bulk of the midsection
is a plastic wire-spool which had it’s middle shortened. This
happened to be just the right size and shape for my needs.
I layered the outside of it with bent sheet styrene. Here’s
some pics:


02.27.08 » Powerplant Detailing
Since the last update I’ve worked on detailing
up the rear powerplant portion. I used sheet and strip styrene
and various armor detail extras from an Academy M-10 kit such
as hinges, latches, and bolts. Not to mention a nice big screen
piece from that same kit which I use for various detail bits.
I also made an external long-range fuel tank and the exhaust
stack similar to that on my Dune
Hopper. ( both to be duplicated by casting for the other
side)
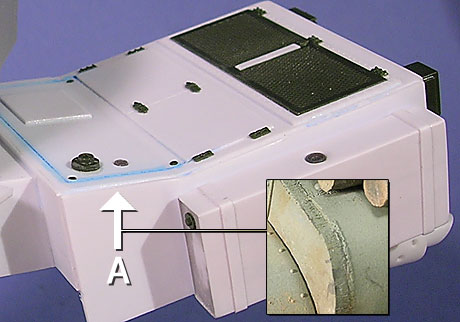
The midsection had its hollow center filled
with resin and I started capping off the hollow leg attachment
tubes with sheet styrene. Later those jutting pieces will
be cut and sanded down to the same curve as the cylinder.
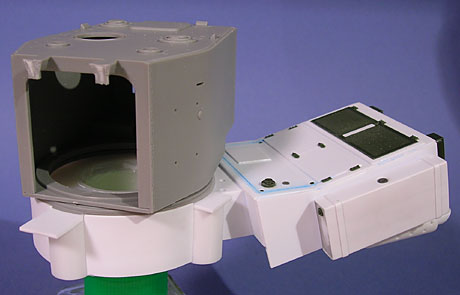
Here in spot “A” I’m debating on adding
torch-cut lines like was done for my other KV-2. I like the
look but am deciding on whether to do it or to let the end-modeler
do it themselves. That space could also have weld-beads too/instead.
02.29.08 » She’s Got Leg…
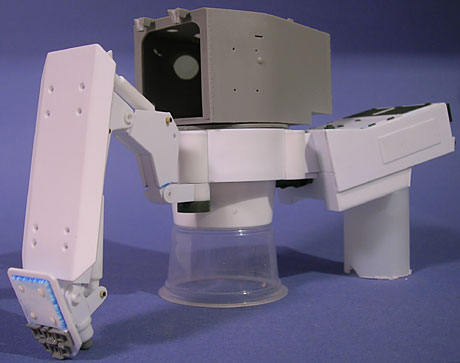
Now for the fun part, the legs! Well, ‘leg’
actually since I only need to make one then have the other
3 replicated when this is casted. I thought for a bit on how
a leg like this would function and what would be simple and
“look” right for the 1940’s time period. Leave it
to road construction to provide the answer… BACKHOES!
The armature for the hoe would lend itself well for leg design
so that’s what this leg is based upon. This leg has four points
of articulation. The swivel joint at the connection to the
midsection, two points for leg extention, and one for the
foot.

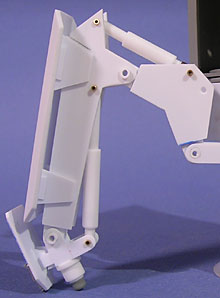
Pistons will be added next and I plan to make
them “movable” so that the legs can be positioned
freely later. The tubes at the articulation points are temporary
and better designed joint caps are coming. I also am working
on two armor sections for the leg. One for the front of the
foot which contains “tread” to help in muddy areas
and the larger one to be attached to the front of the leg.
Below you can see the eventual piston placement to control
leg movement. And I’ll of course be adding more detail to
these legs to match the rest of the design.


03.01.08 » She’s Got Leg…
Today I did the leg armors and a few of the
pistons. The reason for the split leg armor is to give a little
extra protection to the ankle joint, but to also make another
“foot” for the leg. This second foot used tread
from the KV-2 to dig into the ground for extra support on
soft ground. The pokey foot would make for less contact with
the ground leving far less of a trail… and looks cooler
and more bug-like. The pistons are made from styrene tubing.
03.05.08 » That’s All… for now…
(Caster Needed)
Here’s the last shots of the build. Now I just
need to find a caster to do the casting for this project.
I have a couple leads so hopefully I’ll find one soon. I have
12 interested modelers (including me) and am only going to
have 20 or so made in the initial run so let me know if you’re
interested!
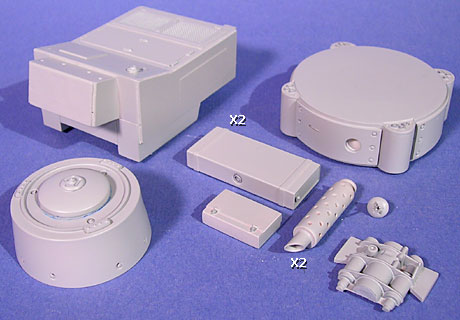
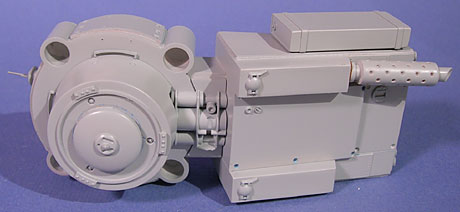
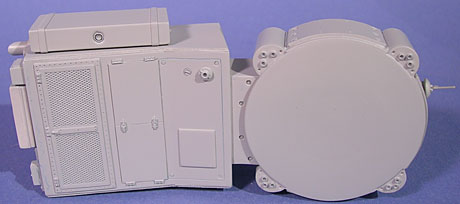
First up are the main body parts. One of everything
will be caseted for the kit except for the fuel tank and smoke
stack of which there will be 2 of each. The blue you see is
magic marker that seaps through the primer.
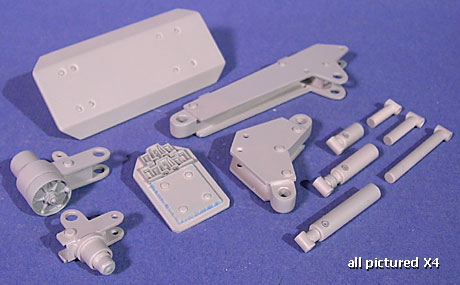
And below are the leg parts. Each kit will need
4 of each part seen here.
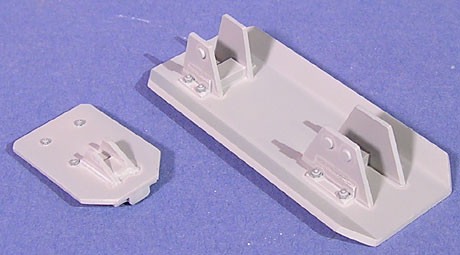
Attachment sides of leg-armor plates.
Underside of hull.
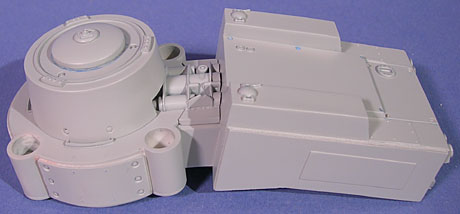
Underside of hull with fuel box and stack attached.
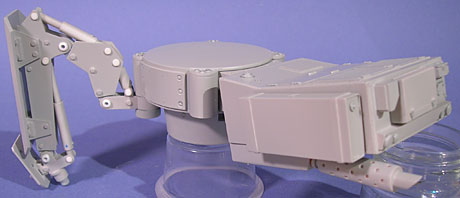
Upper hull. You can see the 3 plugs on each
leg connection point for the piston hydraulic lines.
Side vuew with leg attached. Note white pin/plug/pegs
to hold pistons and joints in place. These were made from
styrene rod which I’ll include in the kit with these
instructions I created on how to make them.
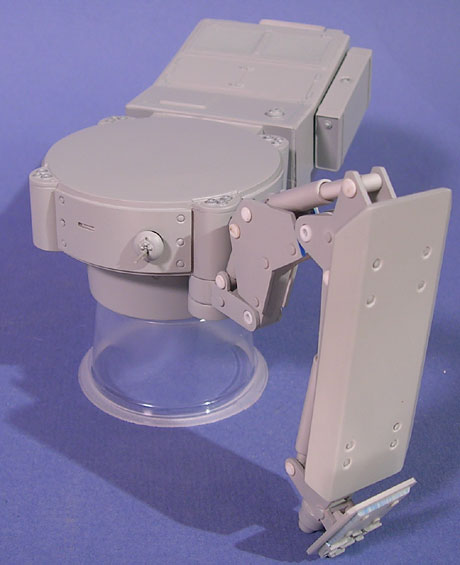
Front view of assembled KV-X2. Note smooth flat
upper midsection to place any turret assembly on. Or use it
as a mount for weapons such as flak cannons.
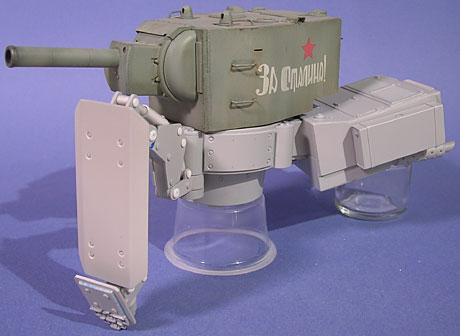
Assembled mech with my old KV-2 turret temporarily
on top for show.
06.12.08 » First Parts Back From
Caster!!!!
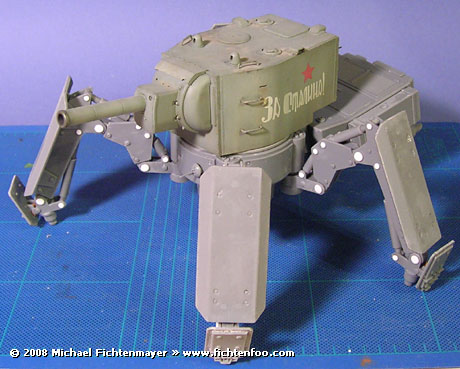
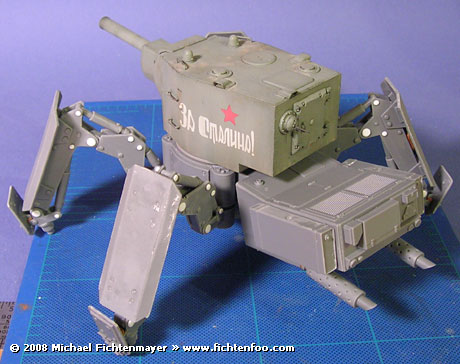
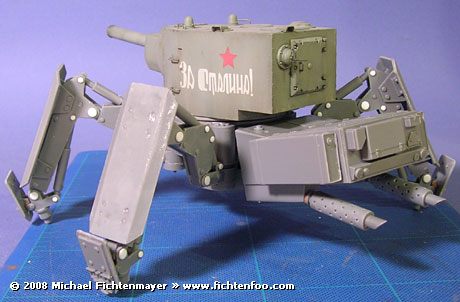
Here’s some shots of the first KV-X2 conversion
set I got back from the caster. The parts are tinted gray
which is great on the eyes when doing clean-up. Joint-pins
were made with styrene rod heated into rivets. It builds pretty
quickly (I spend 3 hours today on what you see below) with
only a few minor clean-ups needed as is usual with resin kits.
So far I have about 40 requests for this kit.
I have a list of everyone that requested and in the order
in which they requested. I will contact those on the list
when the kits arrive from my caster. The first
run will be 25 kits then another run of 25 will be done. If
there’s still interest after that then I’ll consider a 3rd
run.
Final price will be $60 USD. (send
no money until I contact you) Included in the kit will
be:
- 58 kit parts in gray resin
- Instructions
- 1/8″ Styrene Rod (large joint-rivets)
- 1/16″ Styrene Rod (small joint-rivets)
- Thin Steel Wire (D-rings, ladder
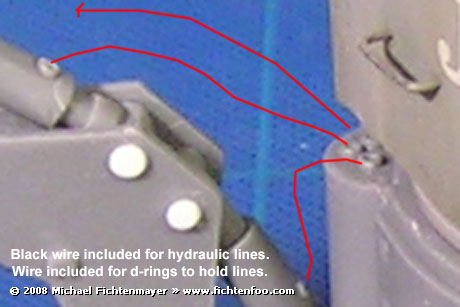
rungs, antennae) - Coated Black Wire (hydraulic lines)
Turret parts not included.


httpv://www.youtube.com/watch?v=w-qMt947ahg
06.30.08 » Painting Begins
While waiting for the casts to come back I’ve
started painting up my first copy. I’ll be going for a winter
white wash over a green basecoat for this. First up though
I’ll be doing more of the hairspray technique (as seen on
my zeon jeep tutorial)
to create the paint chips as well as the latter white wash
chipping.
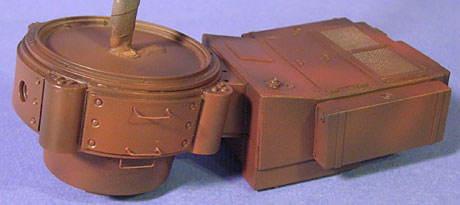
To begin I’ve primed all of my parts with Duplicolor
self-etching primer. Why that? Mostly I wanted to test it
on resing and it’s pretty decent. Afterwards I gave it a coat
of really dark gray-brown followed by a random coating of
a rusty color. This will give me an uneven color base for
chips and leave more rust-color variety in the end. After
the paint I gave it a coating of Gloss FFA.
Next up will be hairspray and the green paint
coats.

07.01.08 » Paint Chipping
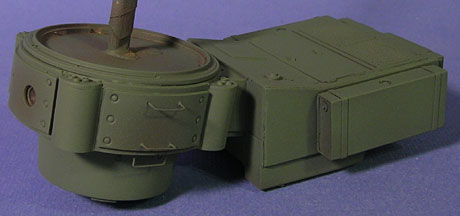
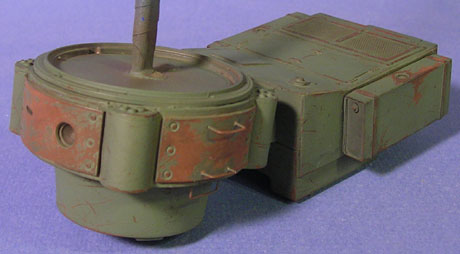
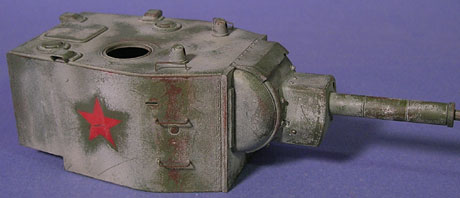
Today I sprayed 1/2 the rusty parts with hair
spray then with JGSDF Olive Drab as a base-coat and a lightening
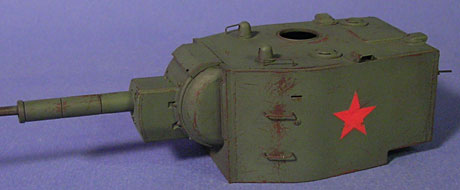
coat of JGSDF Dark Green over that. I cut a paper mask for
a star and sprayed that onto the sides of the turret starting
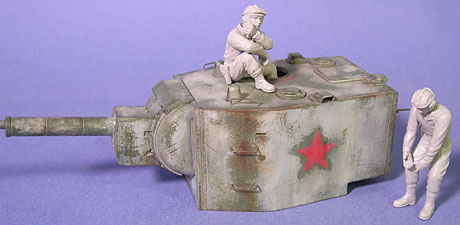
with a light gray then red over that. If I did straight red
it wouldn’t have showed up as well or as bright.
A little later I began wetting the parts and
chipping away the green paint with pieces of styrene strip,
brushes, and skewers. Tomorrow I’ll do the other 1/2 of the
parts. I took more paint off of the armor plate parts on the
center as I want them to look like they were painted poorly
as an afterthought and as such rusted out quicker. The later
whitewash will tie it all together better.


07.02.08 » First Discoloration
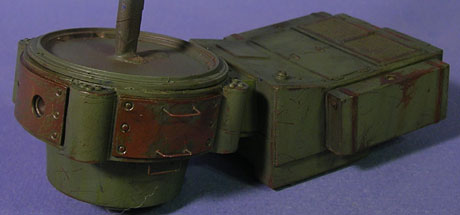
Today I did the oil-discoloration on the first
1/2 of green chipped parts as well as chipping on the 2nd
1/2. It remains to be seen whether I wasted my time with this
step, but it’s better to add it just in case than wish I added
it later. Before the discoloration I applied a satin coat
of FFA. Here’s some pics.



Pardon my “fuzz”. ^
07.03.08 » White Wash Part 1 and
2
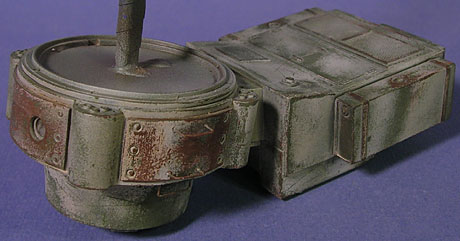
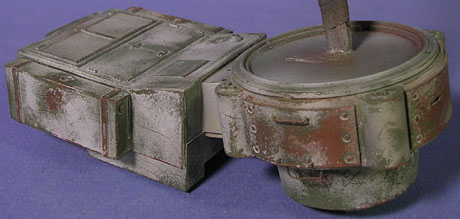
Next up I applied some liquid mask over the
stars on the turret then gave the turret and chassis 2 thick
coats of hairspray which is twice as much as I usually do,
but I wanted easier chipping for this step. Afterwards I sprayed
on thin transparent streaks of very thin Tamiya flat white.
Following that I sprayed a little very thin Tamiya flat earth
color for general grime.


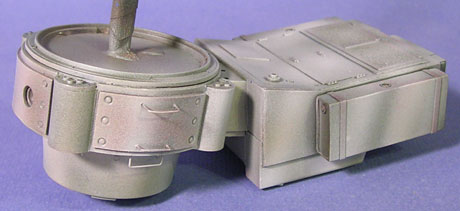
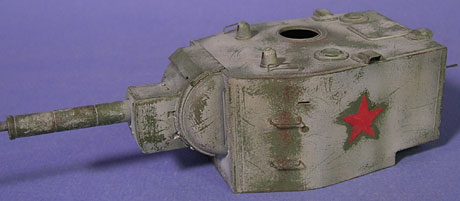
After letting that sit for an hour or so I began
using several soft and medium bristled brushes and water to
remove the white wash in heavily worn areas. After a sealing
satin clear-coat I’ll apply some white oils and washes to
create a splashed on and varied whitewashed surface. These
oils will also whiten the look in spots since right now it’s
not very “white”.
07.04.08 » White Wash Part 3 and
Final Discoloration
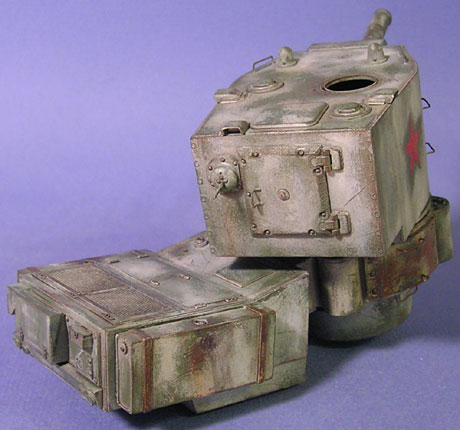
Lastly for the whitewash I blended in white
oil paint to lighten up the white in spots. A little thinner
on an old ratty brush was then used to streak it to simulate
paint brush strokes and rain-streaks. After that a satin coat
was applied the discoloration and a thin pin-wash was applied
to the KV parts.

07.07.08 » Legs, Figures and Base
Since the KV is almost done, just needs a flat-coat,
pigments, mud, and hydraulic lines, I started on my base and
figures. The figures are Trumpeters ‘WWII Soviet Tank Crew
Ammo Supplied Team’ for use with WWII Russian tanks like the
KV’s. It comes with 4 figures a rooster and a chicken. I’m
just using 2 of the figs and no poultry.
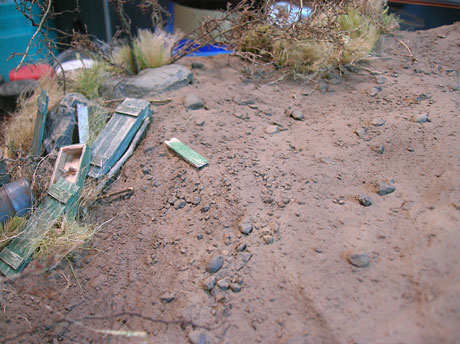
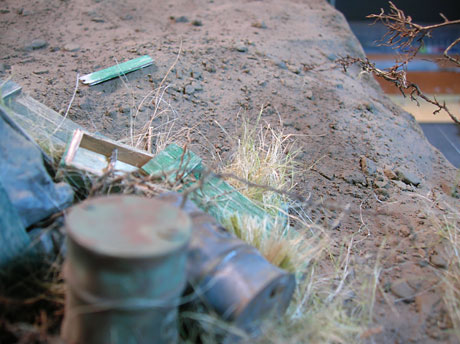
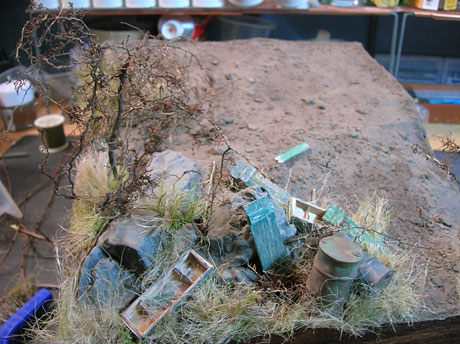
The base is a scrap of wood with green floral
foam glued onto it for the masic slope. Plaster rocks from
rock molds, celluclay, and rocks and grit were applied. A
good trick when working with celluclay on groundwork is to
“stipple” the surface with a round stiff bristled
brush to press the grit/rocks into the surface, flatten peaks,
and give the surface a rougher texture. I’ll be doing this
exact same base for any future mars bases. This one will have
ammo crates, barrels, mud, grass and maybe a light dusting
of snow.
Oh, and this is the first I’m showing the legs
done too! They went together very easily and without any modifications
fit the sloped surface quite nicely.


07.13.08 » Tutorials, Legs, Mud,
and More!
This might be my last update for this project
before final photos. I hope you’ve enjoyed the build-up and
I can’t wait to soo what you guys do with the conversion kit
once it’s released!
First up is the base-work. While doing this
I created two tutorials in my blog. One on building
the groundwork and the other on creating
the grass. Pleae check them out for more info on these
steps. I still haven’t added the snow to the base as I want
to finish my figures first. The crates were made from very
thin birch plywood from the craft store.
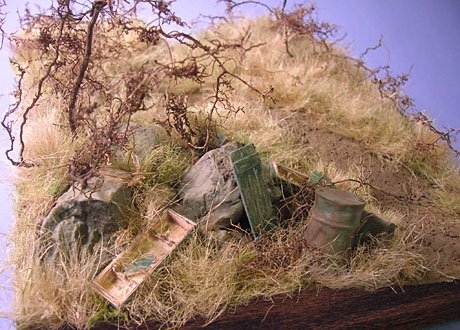
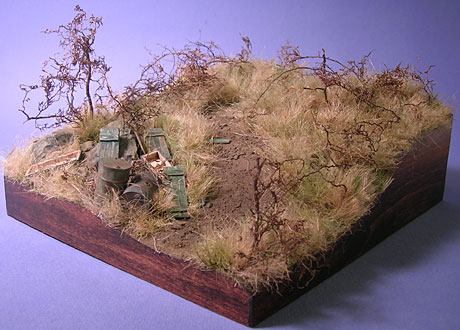
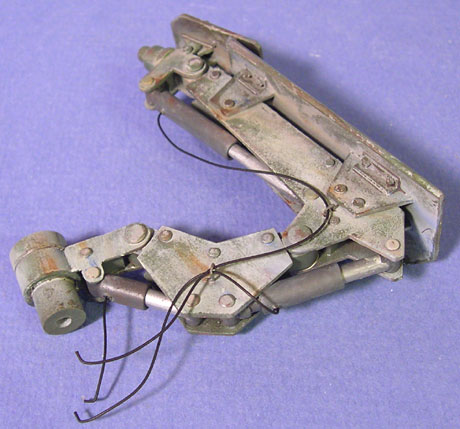
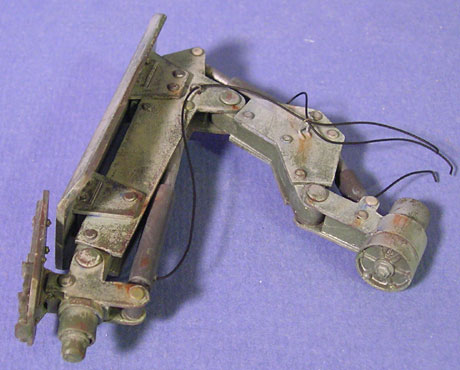
Next up is the construction of the legs and
the addition of the hydraulic cables. Note the thin wire D-Rings
used to run the cables. The leg parts were painted individually
until it was time for the whitewash where they were then assembled
with their pins.
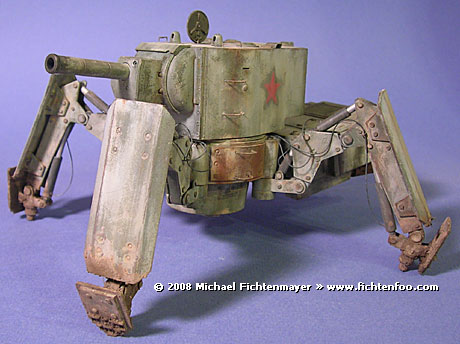
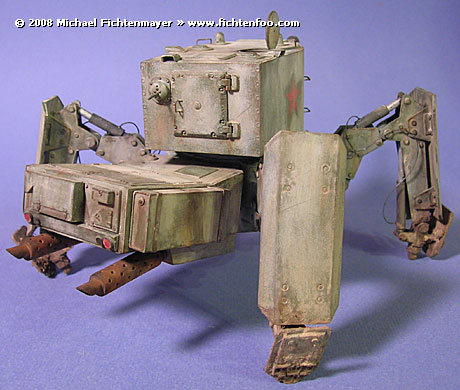
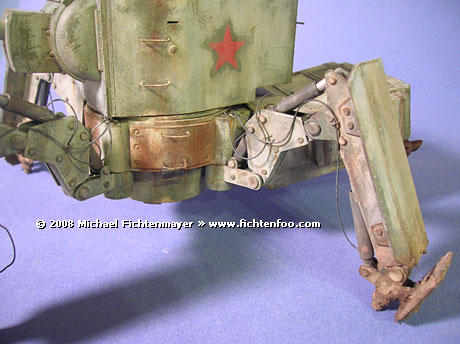
And finally, completed images of the KV without
the base! I aquired the Mig DVD on pigments which really helped
me to understand the use of them more. I actually waited till
it arrived to do the mud and pigment effects and I’m glad
that I did. It’s a great flick and I highly recommend it!
It helped me really up my game for the rusty panels, general
dust and the mud effects. The mud basics (also based on a
Mig tutorial from the FAQ book) are discussed on my Type-74
article. The only difference being the addition of Jute
fibers (same stuff from my grass
tutorial) mixed in for effect.



![Maude [Cyborg Action-Doll] (Files Only)](https://fichtenfoo.net/blog/wp-content/uploads/2023/01/Maude-Promos-300x300.jpg)


