Your cart is currently empty!
In Progress » Falke Antigravity Armored Raider
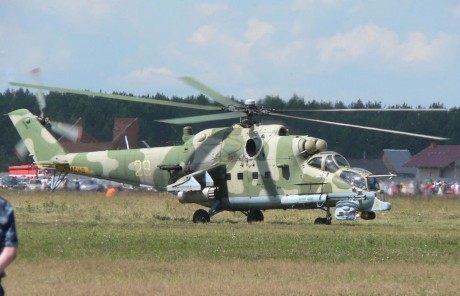
Looks like this will be another speed build for me. A few weeks ago I recieved my new 1/20 plastic Falke kit from Hasegawa’s entry into the Ma.K universe. Thanks to Lin.K for hooking me up with this and his wife for the deliscious snacks that came with it! It’s been sitting on my shelf on top of my 1/35 Hind helo box staring at me, begging to be built. Then it hit me that this would look great in a Hind camo scheme. Construction and clean-up only took about 4 hours not including drying time for putty. The seams were very easy to deal with and part fit is wonderful and unusual for a MaK kit! I decided that since my plan is for an in-flight falke that I’d skip all the parts for the figures and save them for another MaK build.
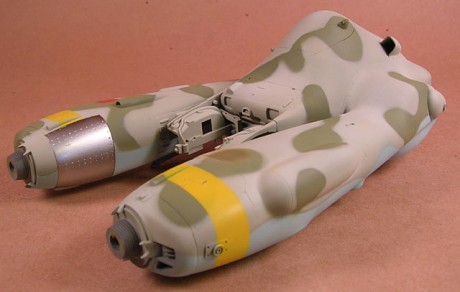
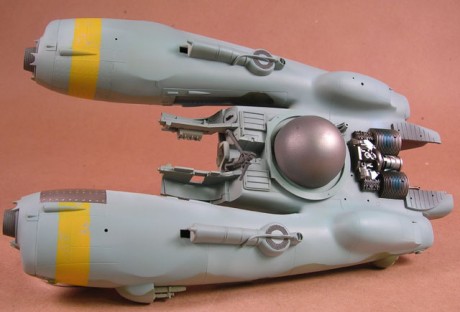
I was only going to build it OOB, but decided that the engine could use a little more pipe-detail to make it more interesting. So I added some brass and floral wire as well as a socket pin inside of the thruster. I replaced the gun barrels with aluminum rod since I hate the flash on OOB tubes and guns. Hard to sand it smooth and perfectly round again. I also added a few panels on the top-front with brass sheet where the craft was damaged and repaired. The only other mod was some detail on the side-seams that made clean-up annoying. I just replaced that with thin styrene.
Like I already mentioned, I’m giving this craft a Soviet Hind helicopter scheme. I have a few reference books on the Hind so getting a good pattern, colors as well as paint/detail pics of engines was easy. I went with the tan/green clover camo and the minty bottom. Always liked that scheme. I used some paper masks and highlighted some panels as well as making some panels completely different. One is bare metal, one coated in red primer, and one that looks like it was repainted in a slightly off color. This is to give the craft a used, repaired, used some more look. Even with that I want the chipping to be minimal. It is an aircraft and not a ground-pounder afterall.
The engine was painted in many colors of Alclad II metalic lacquers. Jet Exhaust, Steel, Stainless Steel, and Pale Burnt Metal. Then some Tamiya clear blue was added. Later more metal variation will be applied with rub-n-buff. As of now the main paint is done and I can start on the filters/chipping/weathering.


![Maude [Cyborg Action-Doll] (Files Only)](https://fichtenfoo.net/blog/wp-content/uploads/2023/01/Maude-Promos-300x300.jpg)


