![]() |
Posts Tagged ‘A-Wing’ »
Completed » 1/72 A-Wing Starfighter »
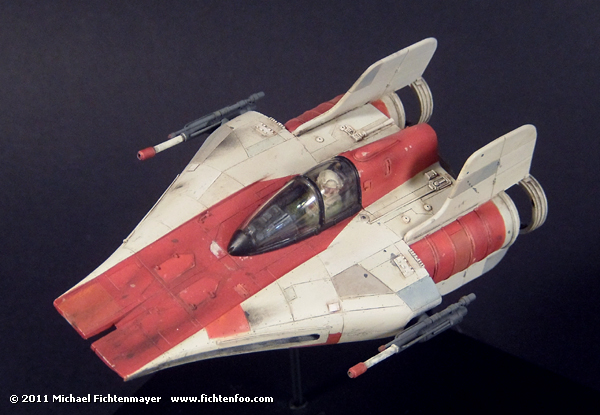
Well, I actually finished this model way back in August 2010, but needed to make a small temporary base for it before photographs. In an effort to finish some stuff up, I painted and constructed the small temporary base today and took the pics. This A-Wing will be part of a much larger diorama along with 6-7 other ships in 1/72 scale. Without further adieu…
In Progress » 1/72 A-Wing » Weathering Part 1 »
Since the last update I’ve gotten through almost all of the weathering steps. Here’s a breakdown of what I did.
First I applied a few tan filters then a gray-brown one. This warmed the color tones and gave it a nice dirty worn start to the finish.
Once the filters had dried I used various oil paint colors in order to highlight panels, alter tones and add the greasy grimy weathered look around panels and the engines. This enhances the worn look.
For some reason the lights look blue-ish in the images where in person they look yellowed. Not sure why this is, but I’ll try to adjust the camera settings for the final images. No matter though as in different movie sceens the engines appeared either yellow or purple.
Once it dried overnight I sprayed on a flat coat of FFA. Tomorrow I’ll finish it up with some pigment powders. I still need to finish the canopy once the new one arrives, but this gives you an idea what the final will look like.
In Progress » 1/72 A-Wing »
I got this little gem a few days ago from rb26 at SSM. The size of the A-Wing (from Return of the Jedi) as you can see is small at this scale, but the amount of crisp details packed into this thing are fantastic. It looks like an injection plastic Fine Molds kit rather than a resin GK which is awesome. I have to wonder if it was made on a computer and 3D printed, that’s how nice the details are. (UPDATE: Nope, all done by hand. Amazing!)
Anyway, as awesome as it is there’s a few VERY minor things worth noting. The first is that the mold likes on the sides of the hull (at least on my copy) are not as flush as one would like resulting in some rescribing of a couple panel lines in the area. Using a scribing saw and a pin to recreate the rivet holes makes quick work of it however with only a small amount of putty required. The other issue is a few air bubbles in the clear resin used for the canopy. (UPDATE: rb26 saw this and is sending me a replacement canopy. Yay! Thanks man!) Like I said though, those issues are minor considering how fantastic a kit this is otherwise. I would definitely buy another SW kit from him if he were to do one. Here’s some great studio model pics for reference.
Since this build will be for a later diorama I needed to light it up. This part was not too difficult as the sculptor had this aspect in mine with the addition of clear parts to go inside the thrusters as well as a clear dash. I drilled out the holes to place 2 clear white LEDs in the two large thrusters then drilled a hole through the hull to connect the wires and finally a hole in the bottom to mount the craft using a hollow brass rod in which the wires will run through. A little clear golden oxide paint on the LEDs makes them appear more incandescent and yellow as seen in the film.
Painting is a simple affair as long as you’ve plenty of masking tape for all the little discolored panels. My colors are a little cool and bright for the moment, but some filters and weathering will bring it more in line with the reference colors. The pilot included is modeled from the A-Wing pilot costume rather than the studio model fig so it’s got much better detail and accuracy IMO.
Next up is more chipping then the weathering begins.
|


Tired of expensive and slow web design services? Looking for quality design with a fast turnaround? Whether you need an all new design or updates to your existing site, I'll give you the same speed, professionalism, and attention to detail.


