


Your cart is currently empty!
In Progress » Slave 1 – Boba Fett’s Customized Version
02.20.2007 » Concepts/Initial
Progress
This is a bit odd… see, I’ve been a huge Star
Wars fan since I was a kid and this is the FIRST Star Wars
kit I’ve ever built. Kinda weird to me, but I’ve turned to
the dark side and purchased a Fine Molds Boba Fett’s Slave
1 (FMS1) from a friend for a really great price.
I received the kit a week or 2 ago and really wasn’t planning
on starting it just yet. But after opening the box and seeing
how big and cool this thing is I of course started planning,
cutting, sanding and more.
My first step was to scour the interweb and
bugged friends for all kinds of reference from the movies
and pics of the studio models. I unfortunately didn’t have
much luck. I found a few great studio model pics and FMS1
build-ups at StarShip Modeler, but not enough for my tastes.
Some of the links I was sent showed promise… but they were
long dead. If anyone out there has some great reference of
the Slave 1 I’d really appreciate it!
I knew I wanted to light this thing up from
the start, but there was one big obstacle.. the long thruster
assembly on the underside was not molded in clear like the
round thrusters. Fortunately while searching for S1 references
I came across a Japanese
build that showed a simple way to make a mold of that
long thruster part and cast the thrusters in clear. I’ve never
casted anything before, but my friend Fulcy gave me a few
lessons a while back and hooked me up with a link to a Super
Silicone Sampler from Smooth-on for only $25. This came
with Mold Rubber, Resin, and the release/sealing sprays. This
is a great package for me since you get a lot for a little
$$$, the resin and rubber are both equal A-B mixes by volume
(not weight), and there’s tons of instructional material packed
with it.
I didn’t have clear resin however… for that
I made a trip to Michael’s Crafts and used the almighty %40
and %50 off coupons! I picked up some Castin’ Craft Clear
Resin and the Catalyst (sold separately). Let me warn you…
this stuff STINKS! Very nasty stuff… smells like Bondo,
but slightly stronger. Make sure you use adequate ventilation.
Thank goodness for my spraybooth! Also make sure what when
mixing/curing the rubber and resins you have 70 degree or
above temps… colder temps slow the cure time. I made my
mold and casted my first set of lights today and I must say
it’s not bad for a first cast! I want to do a few more as
the base on this first one is a little thick (I just need
the raised parts) from pouring too much resin.
Aside from the lighting, I have one more function
I’m adding to the S1 and that’s a servo to move the stabilizers
and guns. I used a small servo motor and a crank system similar
to the one I am using on my Ornithopter.
With the flick of a switch, the stabilizers and guns will
rotate back and forth 90 degrees.
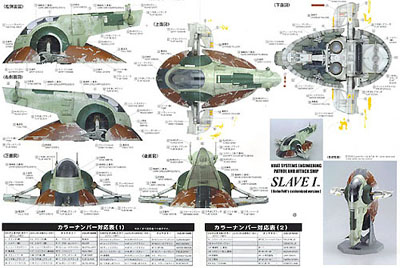
Paint-wise I’ll be going stock of course and
trying to match the studio and FM color sheet model (see above).
I’ll be making some slight changes as I feel the FM pics are
too green… I might lighten/desaturate that a little. I imagine
that the studio model was painted a little darker since it
would appear lighter on film. Anyway, enough babbling… here’s
some pics of the build. The first is an MG Gundam to show
the size of this thing.


02.25.2007 » Concepts/Initial
Progress
So far I’ve managed to do most of the wiring
except for the actual LEDs since they haven’t arrived yet.
I used the 4060 chip with a variable resistor tweaked up to
flash/pulse/strobe the LEDs to simulate engine burn. This
looks much better than just a solid static light. The strobe
is *almost* imperceptible which is what I wanted and can be
changed by taking a screwdriver and turning the dial on the
resistor. The resistor will be accessible right next to the
on off switches under a panel on the underside. The battery
slides up into the hull via a hole under the radar dish dealie
whose correct term escapes me at the moment. The white styrene
parts keep the battery and wires away from the servo arm that
turns the stabilizers.
After I was satisfied that my mold was working
I cut out the inside of the long thruster. I cleaned up the
edges and added a sheet of styrene to the bottom with slots
cut to allow the light to shine through from below and light
the clear parts. Here’s some pics:


03.01.2007 » Painting The Hull
Next up is beginning to paint. At this stage
I decided to change the background paper color of my photos
since the green of the paper blended too much with the green
of the Slave 1. First I primed all the parts. For the upper
and lower hull, I used a mixture of Tamiya deck tan + cockpit
green. It looks light in the first 2 pics but as you’ll see
it darkened after a clear-coat. I gave it a clearcoat of gloss
future floor arylic to make a smoother base in which to remove
the masking fluid for the chips.


Next I took a few small pieces of ripped cheap
dollar-store sponge and applied the Windsor Newton masking
fluid. This is to mask off the darker undercolor for the large
amount of paint chips this vehicle has. The stuff dries clear
so it was pointless to take pics. When dry I airbrushed on
the same color I used as the hull base mixed with white to
lighten it. I wore latex gloves when rubbing off the masking
fluid since the rubber of the gloves catches the latex mask
and makes removing it much easier. You can see in the pics
below the results.


I painted the light gray (almost white) parts
with a mixture of Neutral Gray and Flat White Tamiya. It was
a little darker than I wanted so I sprayed a lighter coat
over it, but used this opportunito to spray some faint streaks
for weathering purposes. The kit comes with decals for the
yellor chips, but I decided to just hand-paint them. They
look the same and was far easier/quicker than using decals.
The good part about the decals is that they were good for
reference as to how to paint the yellow!


03.02.2007 » Hully Gee!
Last night I managed to paint the red and gray
of the lower hull. First I used the masking fluid (see above)
so mask off all the chips. Then I painted the “stripes”
on the frons and back with German Gray Tamiya. I also did
some slight pre-shading knowing that Tamiya red is not the
most opaque of colors. For the hull red I mixed Tamiya Red,
Brown and some Blue. I used tape to mask off the gray portions
then sprayed on the hull red. Since the red is a more delicate
paint for whatever reason, before removing the mask I gave
it another thin coat of Future to protect it. Then using an
eraser this time, since the future made the masking a little
harder to catch an edge of to remove, I removed the masking.
Still pretty easy to lift the mask though and only took all
of 5 minutes to remove. Below are some pics. Next up is the
dark parts of the stripes and the darker greens of the upper
hull.


03.03.2007 » More Greens and Weird
Asymmetry
Next up in the painting stage is the darker
green parts. These are on the two sides above the stabilizer
and on the top of the hull. What’s odd in the studio model
is that one side and top is plain green with the light gray-green
paint chips. The other is dark green with no chips, but with
lighter spashes instead. It’s an odd asymmetry, but kinda
cool as well. To paint the spashed green part I first painted
that portion with the lighter green. Using a toothbrush I
spattered that lighter dark green with the liquid mask. Then
I sprayed all the dark green parts with the dark green mix
and removed the masks. The paint chips were painted and sponged
onto the top and solid-colored side. I also gave the parts
a clear-coat of FFA to seal it and prepare the surface for
some of the kit-supplied decals. I also have the painting
for the bottom of the ship done. I still need to paint on
the pinkish parts of the red hull as well as some minor touch-ups.
I can’t wait to get the painting done to get started on the
weathering.


03.04.2007 » Boba and Boosters
This weekend I also painted the boosters and
Boba Fett for the pilot seat. Boba is pretty small being 1/72
scale, but was fun to paint. Based on the studio model shots,
there were some greenish chips on the black portions of the
cockpit and color on the controls. I’ll add a little more
subtle color variations to the detail behind Fett later to
make that less bland. The boosters in the Studio shots are
a coppery color with greyish yellow chips. I painted those
parts the copper color first then added the yellows with a
sponge afterwards. I painted the insides of the boosters with
aluminum to reflect the light from the LEDs… again, same
as the studio model. LOL! Here’s the pics:


03.06.2007 » Grimey
Now is the fun part… the weathering! First
I gave all the parts a satin coat of FFA. Then when cured
I applied a few filters and a dark sandy colored oil wash
to everything. Once that was completed I could move onto the
more detailed weathering. This is done with various gray and
gray-brown washes and oils. Instead of doing the discoloration
step, I’ve combined it with washes streaking, and more…
all oils. I’m very pleased with the results so far. Below
is a pic. I’ll be adding some pigment dust and a flat-coat
later. The large hole under the radar dish is for the 9 volt
battery that will power the lights and motor. It attaches
magnetically.
On a related note, I’ll be offering
this finished model for sale when completed. Not
sure if I’ll just ask for offers or put it onto ebay as I’ve
never sold any of my works before. If you’re interested, please
contact me.

03.09.2007 » More Grime
I got some more oil-weathering done this evening.
This session was the stabizer parts. I used the same techniques
as described above. You can see in the first image a fully
weathered stabilizer next to one that has only had a light
filter and wash. On the image of the arms, I still need to
weather the brownish parts. Here’s the pics:


03.10.2007 » Upper Hull Weathering
Today I worked on the upper hull weathering
I was a bit nervous about starting this part as it’s a HUGE
mostly level area to weather. However after a few small sections
I got the hang of it and finished it up. I also weathered
the guns. Later I’ll add some gunmetal and black smoke pigments
to them. I’ll also add some black smoke pigment to some of
the damage areas such as the area around the green panels
on the one side and the blaster marks on the other. I also
soldered the connecting wires for the LEDs for the long booster.
Here’s the pics:


03.10.2007 » Lower Hull Weathering
I got the lower portion of the hull weathered
as well. Now I just need to detail/slightly weather the interior
and weather the thrusters. Then I can give everything a flat-coat.
This will even out all the various sheens from the oils, thinners,
and whatnot. Here’s the pics:


03.11.2007 » Lighting Test
Here’s my first shot of the lighting. One of
the 2 shots was taken in near darkness while the other was
with a few of my normal photo-lights off. Tomorrow I’ll finish
setting up the long thruster then test and take images of
that one. After the lighting and servo stuff is done and I
close that up I’ll finish up the weathering on the outside
with the pigment powders.


03.13.2007 » Almost Done!
I’m almost done with the Slave 1! The
only steps I have left to do are to weather it a bit in just
a few spots with some pigment powders, attach the guns, and
gleu the base together. The base has been painted in a satin
black. Looks very nice that way. I finished up the wiring
for the lights. I also put some white LED lights in the cockpit.
They reflect off of some foil stickers on the inside of the
hull and shine through some grill-holes above Boba’s head.
The clear parts I cast for the long thruster were glued into
place as well. The only problem I had when putting it together
was with the servo. I had hoped to make both the stabilizers
and guns pivot. Unforunately the servo just didn’t have the
necessary torque to move the stabilizers. It does move the
guns though so that’s cool. I wasn’t sure if I liked the moving
stabilizers anyway so that part not working didn’t bother
me. It looks great all lit up though. I also painted the small
metal Han Solo frozen in carbonite that came with the kit.
He was painted in German gray, had black washes applied, the
was rubbed with Mig gunmetal pigment. Here’s some pics.
Expect final images then the auction
(unless I get a great offer) by this weekend.


This Finished Kit is For Sale!
I am selling this finished Fine Molds Slave 1 – Boba Fett’s Customized Version.
Sold!
Handcrafted by Michael Fichtenmayer, this beautiful Fine
Molds kit has been masterfully painted and modified with
light up thrusters and cockpit. Paint colors and placement
were based off of those used on the original Studio Model
used for filming Star Wars, The Empire Strikes Back. The finished
piece has been weathered to have more of a used and realistic
appearance. Display stand, seated figure of Boba Fett and
painted metal Han Solo frozen in carbonite included.
The Slave 1’s thrusters and cockpit are lit
using LEDs. This means no bulb heat to warp the model and
a VERY long bulb life. LEDs used in a model last almost forever!
The lights are powered by a replacable 9 volt battery hidden
beneath the radar dish. A small switch is hidden beneath a
magnetically attached panel on the underside.
While I have had numerous requests for commissioned
models, this will be the first finished kit I have ever put
up for sale. Thanks for looking!
$430 USD or best offer.
Includes US shipping, handling and insurance.

![Maude [Cyborg Action-Doll] (Files Only)](https://fichtenfoo.net/blog/wp-content/uploads/2023/01/Maude-Promos-300x300.jpg)


