


Your cart is currently empty!
In Progress » The Batmobile
06.29.2005 » Concepts
and Building
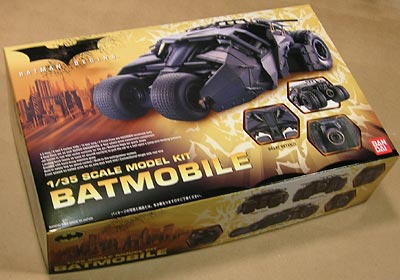
So my next project is the brand spankin’ new 1/35
scale Bandai EX Batmobile from Batman Begins. I got it in the mail
on Monday and just had to start on it right away. As a consequence,
my other projects are on hold for a little bit. I’ll be painting
it mostly stock and probably weathering it up as well since it’s
a pseudo-military vehicle. I’ll also be making a custom base and
since the kit didn’t come with a figure, I might convert a 1/35
scale soldier into Bat-Man. Fun!
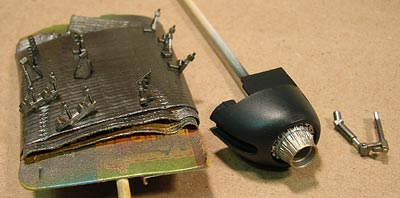
Anyway, I got the kit on Monday and started cutting
and sanding sprue nubs. Tuesday I went to an amusement part with
the family so did nothing. Today (Wednesday) I finished cutting
and sanding, skewered the parts, primed, and am now ready to start
painting after 2.5 hours of work. Does this mean that I’m really
excited about this kit? Well, I am, but it actually
means that this isn’t a very large or partsy kit, has well hidden
and/or easily sanded sprue nubs, minimal flash, and only one problem
spot on the whole kit. NO SEAMS! Well, there was potentially one,
but it actually got hidden by the rear wheels so no worries.
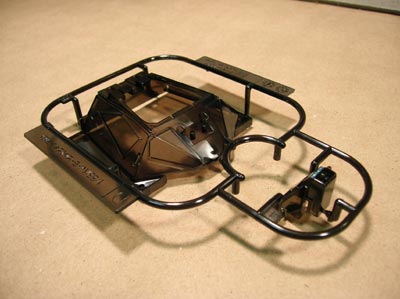
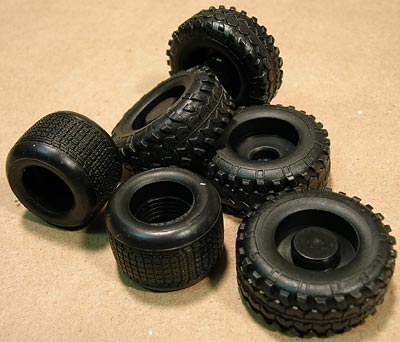
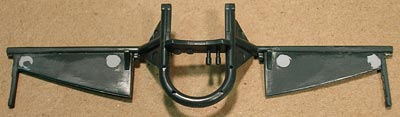
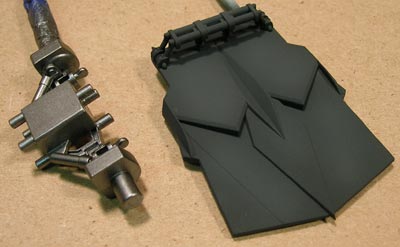
When you open the box, the first thing you notice
is a lack of anything, aside from tires, that would resemble a finished
Batmobile. This is due to the plated nature of the vehicle where
angular armor plates cover and jutt from the entire vehicle. There
are 3 sprues of dark blue-gray parts, 6 tires, and one sprue containing
2 clear dark smoke colored window parts.
I began cutting the parts out while following the
mostly Japanese, but well illustrated and detailed instructions.
Most of the pieces, including the tiniest ones had 3 sprue attachments
each. However they were thin attachment points and sanded down easily.
Other sprue nubs were well hidden. One particularly happy nub placement
was on the clear parts which required no clean-up work at all. While
the armor parts were virtually flash free, the small detail parts
had a thin raised line in the center of each where the molds met.
This is typical with most injection plastic kits and was actually
thinner and easier to deal with than most armor and aircraft kits.
A few of the small piston parts in particular were so thin that
I accidentily bent one cutting it from the sprue. That’s more of
a compliment than a complaint as I like to see small realistically
scaled parts that are not made larger for the sake of children or
big clumsy fingers like mine.
As I mentioned before there is only one piece on the
entire kit that needed extra clean-up work and that was the large
rear spoiler piece. The underside of that had four injector pin
marks. For those I merely added a drop of Mr. Surfacer 500 primer
(from the jar)and sanded when dry. The thin primer filled the marks
and sanded smooth.
Anyway, I primed the parts with Tamiya White primer
and am waiting for it to cure. Meanwhile, here’s some pics:


06.30.2005 » Painting & Base and
Figure Construction
Last night I painted all of the parts for the Batmobile.
I went with a silver + gunmetal for the greebles (instead of the
gold on the box kit) and a Flat Tamiya black + white + field blue
for the main car color. It’s a really dark charcoal with a very
faint hint of blue. Think cool gray. I went and high-lighted (kind
of max-techniqued) some of the armor panels with that same color
plus a few drops of white. Subtle but it looks great. Next I need
to go and hand paint all of the little details such as pistons,
headlights, etc…
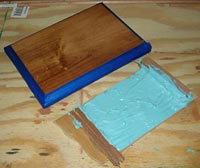
Today I started on the base. I want a Bat-Cave road
look to it so I started with a liece of 1/4 inch plywood and cut
out my section of roadway. I need the road flat since the wheels
will not move on pistons or what-not to make all lay flat on the
base. I took scrap strips of that same plywood and made risers to
have the roadway sit up from the base.
On the underside of the roadway I smathered on Bondo
Automotive putty to make the cave-looking ridges. I used the Bondo
since it hardens in about 10 minutes and it saved me a lot of time.
I didn’t use it elsewhere since it’s like working with cake-icing.
Since the underside of the road will be barely visible, it was perfect.
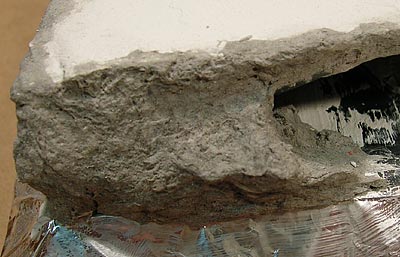
On the top of the road I spread joint compound on
to give it a smooth rock look while keeping the roadway flat. For
the rest of the cave I used rocks and celluclay. I stippled the
wet celluclay with a cheap plastic brush to give it a nice rock
texture. This is the first time I’ve tried this after seeing it
in Amazing Figure Modeler #33 and it worked great! I’ll be using
this a lot in the future. The foil in the pic is so that I can lift
the road from the base later to paint the underside and do the water
under the bridge.


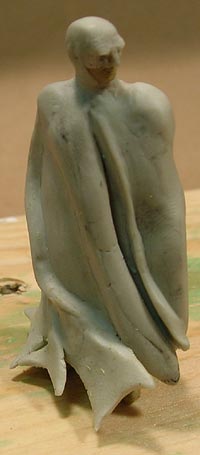
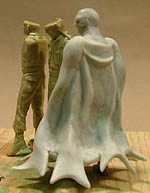
Finally, I’ve been converting a 1/35 scale soldier
to be Batman. I’m using Magic Sculpt (MS)for this part. I separated
the head from the body and added the mask a little at a time. MS
dries enough in about 2 hours to have a firm base for adding more
details. To make the cloak I added a very rough buldges with the
MS. When those dried I started adding the head and neck, shoulders,
ridges and folds. Currently I’m adding the curvy bat-cut of the
edge of the cloak. Like I said, I’m adding a little at a time as
to not destroy detail I’ve already done. Here’s where I’m at so
far in the pic. I have a lot more cape to add and a lot of clean-up
to do but I’m happy with my progress.
07.02.2005 » Car Paint and More Figure
Modification…
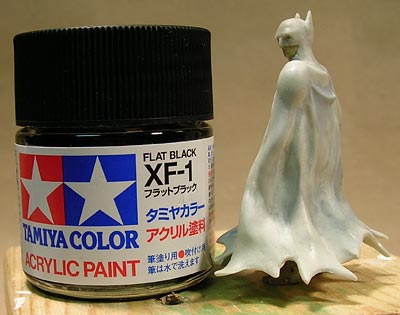
I got the rest of the cape done on Batman and did
the cleanup. As you can see in the pics I did the cape a little
at a time. As each section dried, I added more creases and edge
to the cape. I then took steel woll and smoothed him out andgot
rid of most of my fingerprints. The rest of the clean-up I did with
Mr. Surfacer 500 from the jar. I dabbed it into the gaps and recesses
and instead of sanding it away, I learned that 91% alcohol can be
used to smooth it away with a q-tip or paper towel. Worked like
a dream!
Once I did the clean-up the last thing I added before
the first test primer was the horns. I don’t wanna accidentily break
them off while sanding so I figured I’d do them last. Didn’t matter
anyway though as right after I primed him I broke both of them off.
Now I’m waiting for the primer to completely cure so I can putty
up the cracks left from gluing them back on. Regardless I’m very
happy with how he looks. I’ll post pics of him fully primed after
I do the clean-up of the horns.


I also finished the bulk of the painting. I washed
in the panel lines with thin black oils then drybrushed with white
oils. WHITE? well, since I’m drybrushing it doesn’t look white on
the kit. It blends to a lighter version of my base colors. The metal
portions are done too. I drybrushed the gunmetal + silver parts
with gold + silver rub-n-buff. the result is a nice tarnished metal
look. I gave the car its a flat coat Maybe I’ll do a little more
drybrushing if needed after building it and adding a little dust
on the tires and undercarriage.
07.03.2005 » Final Update
I finished the kit the past few days and thought I’d
elaborate on the figure and base painting and weathering of the
Batmobile.
Figure: After the figure was cleaned up, I first primed
him with Duplicolor dark gray sandable primer available at Walmart.
Next I airbrushed on the same charcoal color as the Batmobile. I
took a bit of that color and added some black and Future Floor Acrylic
to make it less opaque. I then sprayed the shadows and folds of
the cape. Next I did the same thing with the base color and Future,
but added white and sprayed where the light would hit on the top
of the head and shoulders and the ridges of the cape. For the face
I brushed on a mixture of white and burnt sienna oil paint and shaded
with burnt sienna.
Batmobile: After my painting was done I gave all the
parts except the tires and windows a coat of Future Floor Acrylic
to seal the paint. I then gave the parts a wash with black oil paint
and a drybrush right after with white. The white oils went on thin
enough to not be too stark of a contrast and blended with the base
color. Afterwards a satin coat of Future was applied. The tires
were dusted with Mig Pigment powders (light dust + europe earth)
and then wiped so that only the crevases contained grit since most
of that dirt would wear off as the car drove in the cave, through
puddles and on asphalt.
The Base: I primed it with Duplicolor dark gray sandable
primer first. When that dried I drbrushed on lighter shades of gray,
brown, and white Americana Acrylics. Finally I drybrushed on some
glossy Future Floor Acrylic to give the rocks a moist/smooth water-worn
sheen.
Check out the final pics in the finished kits section!
Project Time Sheet:
Out of curiosity, I want to know just how much time
I’ll spend on this project. This part will remain at the bottom
of my in-prog page. The times will be rounded to the nearest quarter-hour.
Estimated Concepts: 1.5 Hours
Total Cutting/Sanding: 2.5 Hours
Total Skewering: .5 Hours
Total Priming: .25 Hours
Total Painting: 1.75 Hours
Total Masking: 0 Hours
Total Clear Coating: .5 Hours
Total Weathering: 2.75 Hours
Total Decaling: 0 Hours
Total Construction: 1 Hours
Total Figure Modification: 5 Hours
Total Figure Painting: 1 Hours
Total Base Construction: 2 Hours
Total Base Painting: .75 Hours
Grand Total 19.5 Hours

![Maude [Cyborg Action-Doll] (Files Only)](https://fichtenfoo.net/blog/wp-content/uploads/2023/01/Maude-Promos-300x300.jpg)


