


Your cart is currently empty!
In Progress » The Crimson Iota EX-S Gundam
05.10.04 » Concept
Work
 For
For
my next project, I’ll be tackling the Master Grade EX-S Gundam.
It’s a rather large and “partsy” kit. I don’t think I’ll
be doing anything modification-wise to this piece. I may add some
LEDs, but other than that, it’ll be OOB. (out of box) Best case,
I light up every “green” spot on the kit. Worst case,
I do the head and booster lights. I counted 27 green parts which
would need lit if I went the “best case” route. Plus the
4 boosters. If I go that route I may look into skipping a battery
and going with an AC adapter. LOL!
Color placement-wise, I got inspiration for the white
on the shoulders and stripes on the booster pack guns from an EX-S
I saw in Model Graphics a while back. The rest of the color choices
are because I think they look cool. The color that I don’t feel
is coming off very well over the web is the blue/purple color. I’ll
be mixing that to be a very pale blue-violet with airbrush fades
of a lighter version of the same color. Kind of like I did for my
ReGZ. The reason for the blue-violet is to compliment the orange
and yellow accents on the rest of the kit.
Decal-wise, I was looking through a book on WW2 nose
art that a co-worker of mine had and decided to base my “Miss
Iota” decal idea off of some that I’d seen. It’s amazing the
varying quality of the nose arts. Some were crap while others were
simply amazing. The rest of the decalse are various text markings
and such. I drew my girl “simple” due to the limitations
of the ALPs printer. There is a screening to the purple and orange,
but it’s slight thanks to Peter and Models4U! Thanks man!
There’s no made-up back-story for this kit. I’m basically
doing it because this is the way I want it done.

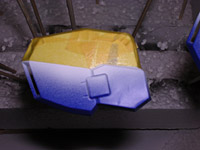
06.23.04 » Painting… FINALLY!
I finally finished sanding and got to painting this
thing. It has so many parts that it took me longer than usual to
get started. Plus I took a week off to do the GunTank. Anyway, I
have 3 colors sprayed so far. Here’s some pics:


07.03.04 » Ink
The painting is almost done. All I have left is to
paint the lenses and that won’t be until I’m done with the decals.
That’s because I don’t want a flat coat of future over my lenses.
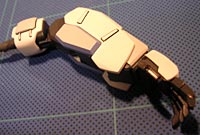
Currently, I’m inking all the parts. It’s taking forever,
just like EVERYTHING with this kit. I have decided that to save
time, I’m going to build what I can as I ink before decaling. The
reason for this departure from my norm is that it took 3 1.5 hour
airbrushing sessions to apply 1 coat of future to all the parts.
By building sub-assemblies, I’ll have less skewers to paint later.
Here’s some pics.


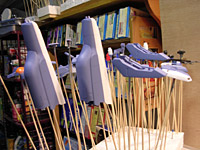
07.04.04 » Ink is complete!
I’m done with the inking. Next I’ll give the inked
parts another coat of Future to seal the ink from the waterslide
decals and also to give more gloss for applying the decals. Here’s
a few more pics:


07.06.04 » Decals
I started adding the decals today. Here’s a pic of
some of my progress. The other sides of the pods and shoulders are
decaled as well as other misc. parts.


![Maude [Cyborg Action-Doll] (Files Only)](https://fichtenfoo.net/blog/wp-content/uploads/2023/01/Maude-Promos-300x300.jpg)


