


Your cart is currently empty!
Completed » Tachikoma

About The Tachikomas »
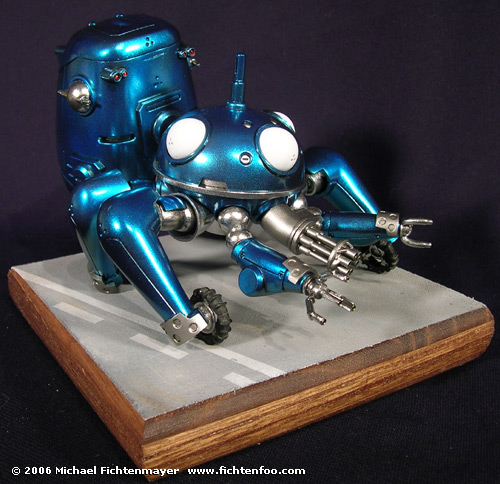
Tachikomas (From Ghost in the Shell: Stand Alone Complex) are just plain cool. From their child-like personalities to their leaping
about like Spiderman taking on some attack helicopters, there’s not much to hate about them except that they’re not Fuchikomas. But that’s another story. Anyway, I picked this kit up because it looked like a fast and fun build. I wasn’t dissapointed there. Let’s pick things apart…
About the Kit »
This particular kit is from Wave and depects a Tachikoma from Ghost in the Shell S.A.C. 2nd GIG. It sports some minor differences
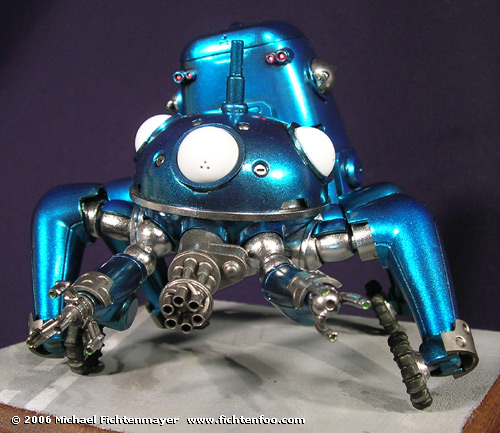
from the 1st season Tachikomas such as added armor and an optional gatling gun. It also came with wheeled (closed) and standing (open) feet.
Having only dealt with option parts from Wave in the past I wasn’t sure what to expect. The plastic (molded in blue and white sprues) felt rubbery compared to most other plastic kits I’ve built. It glued together fine as well as sanded, but felt odd. The blue sprue has a bit of a texture to it. Nothing major and filled up with primer, but worth noting.
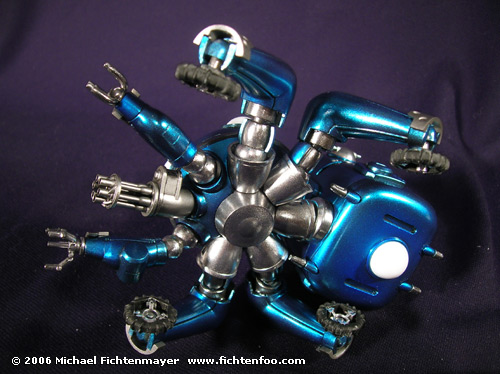
The kit went together rather quickly with less than a dozen seams to deal with. Many parts had their sprue-nubs on the undersides of
parts so that when removed did not mar the visible surface of the kit. GREAT FEATURE!
About the Build »
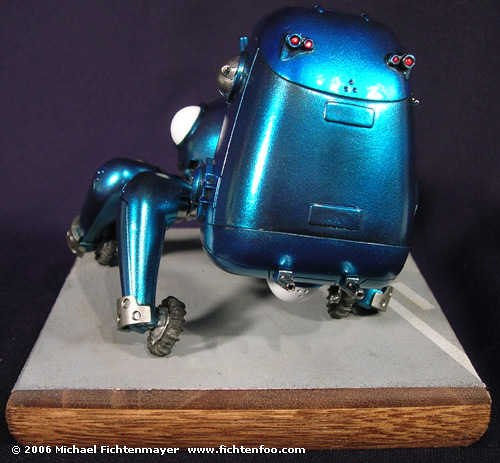
I wanted to light up the red lights on the rear of the Tachikoma. I didn’t have small LEDs for the holes so I came up with another solution which was to use fiber optic which had it’s ends melted into a lens shape. This was accomplished
by holding the fiber optic close to a candle flame causing it to form a “mushroom” shaped buldge on the end. These made perfect lens covers and were built into the fiberoptic. I drilled out the existing lights molded into the plastic and slid the FO lights through. All eight lights are lit by a single red LED powered by a 9v battery. All of it fits into the rear of the Tachikoma.
About the Paint »
Paint for this kit was an experiment for me. I did a candy-coat which is nothing new to me having done it for my Griffon, but this
time I used Alclad 2 Chrome for the undercoat. As usual the Alclad went on beautifully and without flecks. Unfortunately the base coat of black lacquer did not. It went on with a slight texture which ended up making the chrome look speckly. Not a huge deal sunce it person it looks great. In the photos the effect shows up a lot worse. I also used Alclad 2 Poloshed Aluminum and Steel for the other metal parts. Wheels were painted with flat black Tamiya Acrylic and dusted with Mig Pigments. A wash of plack oils was applied only
to the panel lines and recesses.
About the Base »
For the road-base I applied 2 coats of stucco textured Liquitex medium with a piece of plastic to trowl it down flat. I then primed and painted it to look like street.


![Maude [Cyborg Action-Doll] (Files Only)](https://fichtenfoo.net/blog/wp-content/uploads/2023/01/Maude-Promos-300x300.jpg)


